Replacing a memory module, Replacing, Memory – Lenovo ThinkCentre A61 User Manual
Page 35: Module, Removing, Installing
Replacing
a
memory
module
Attention
Do
not
open
your
computer
or
attempt
any
repair
before
reading
the
“Important
safety
information”
in
the
Safety
and
Warranty
Guide
that
was
included
with
your
computer
for
the
computer.
To
obtain
copies
of
the
Safety
and
Warranty
Guide,
go
to
http://www.lenovo.com/support.
This
section
provides
instructions
on
how
to
replace
a
memory
module.
Note:
Your
computer
has
support
for
two
memory
modules.
1.
Remove
the
computer
cover.
See
2.
Remove
the
bezel
and
drive
bay
assembly.
See
3.
Remove
any
parts
that
might
prevent
access
to
the
memory
connectors.
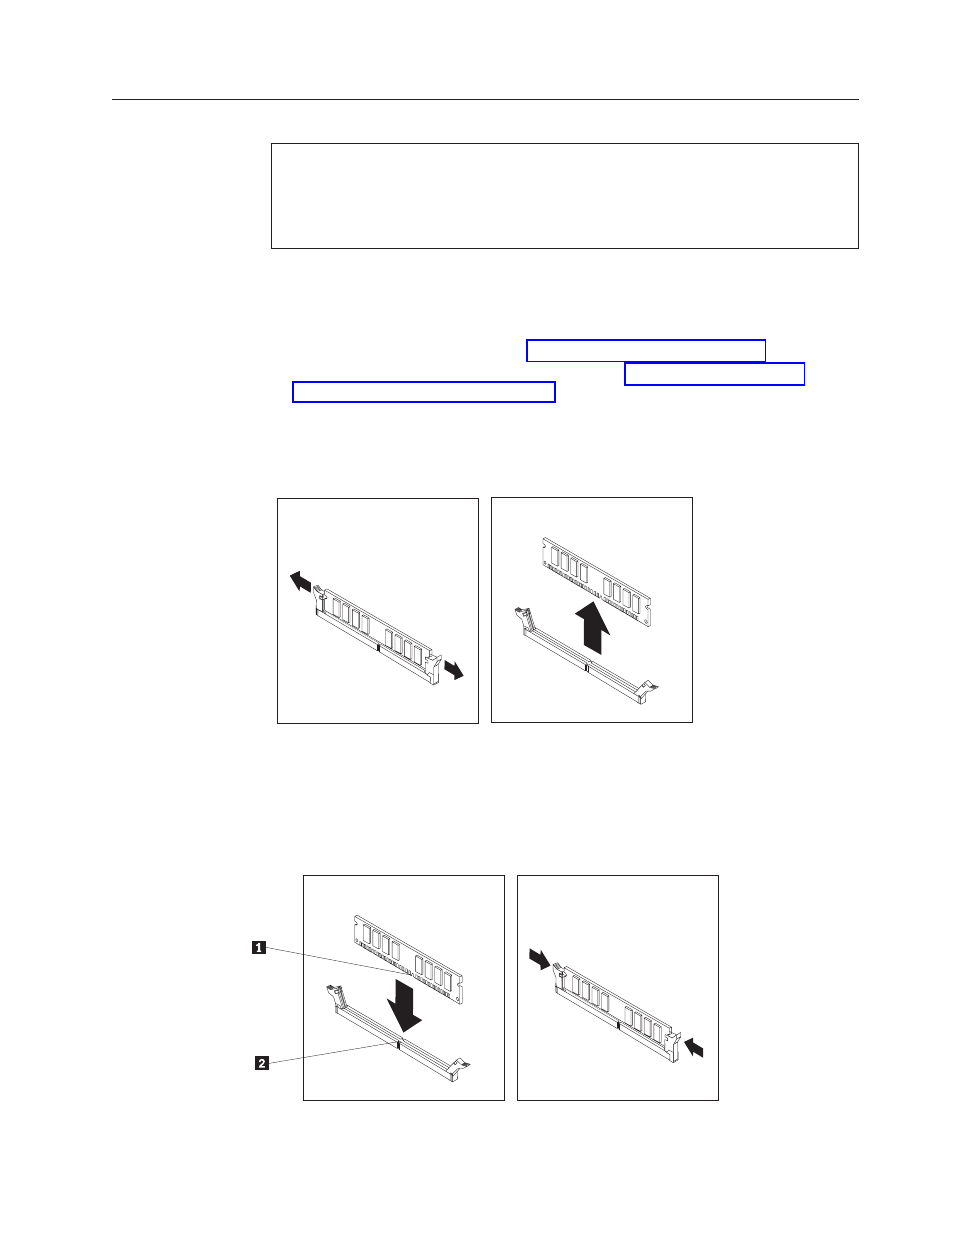
4.
Remove
the
memory
module
being
replaced
by
opening
the
retaining
clips
as
shown.
5.
Position
the
replacement
memory
module
over
the
memory
connector.
Make
sure
that
the
notch
1 on
the
memory
module
aligns
correctly
with
the
connector
key 2
on
the
system
board.
Push
the
memory
module
straight
down
into
the
memory
connector
until
the
retaining
clips
close.
Figure
33.
Removing
the
memory
module
Figure
34.
Installing
the
memory
module
Chapter
3.
Installing
options
and
replacing
hardware
27