Installing a drive in bay 1, Drive, Bays – Lenovo ThinkCentre A61 User Manual
Page 24: Installing
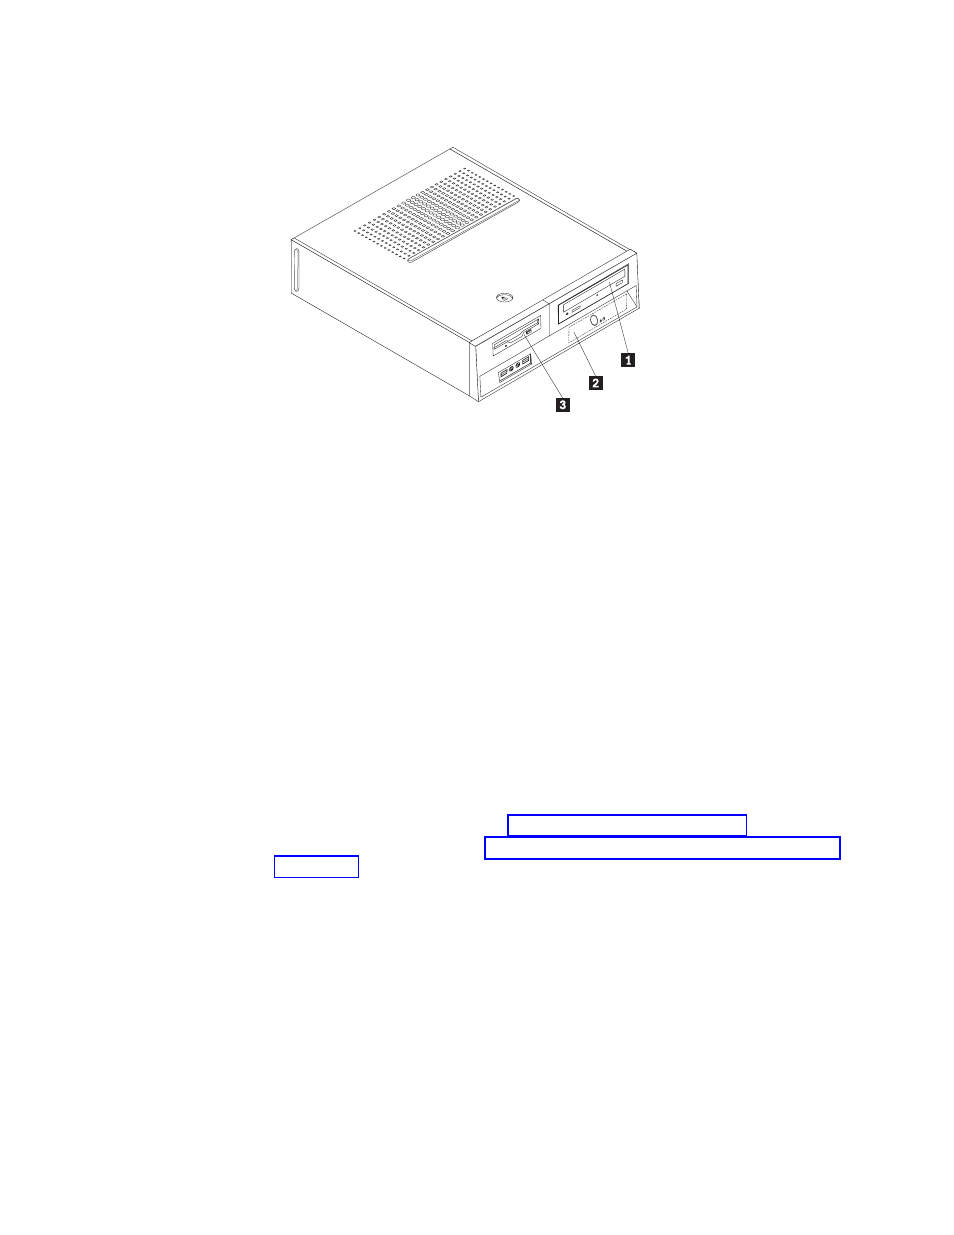
The
following
illustration
shows
the
locations
of
the
drive
bays.
The
following
list
describes
the
types
and
size
of
drives
you
can
install
in
each
bay:
1
Bay
1
-
Maximum
height:
43.0
mm
(1.7
in.)
Optical
drives,
such
as
CD
drive
or
DVD
drive
(preinstalled
in
some
models)
3.5-inch
hard
disk
drive
(requires
a
Universal
Adapter
Bracket,
5.25
to
3.5-inch)
*
5.25-inch
hard
disk
drive
2
Bay
2
-
Maximum
height:
26.1
mm
(1.0
in.)
3.5-inch
hard
disk
drive
(preinstalled)
3
Bay
3
-
Maximum
height:
12.7
mm
(0.5
in.)
3.5-inch
diskette
drive
(preinstalled
in
some
models)
*
You
can
obtain
a
Universal
Adapter
Bracket,
5.25
to
3.5-inch,
from
a
local
computer
retailer
or
by
contacting
the
Customer
Support
Center.
Installing
a
drive
in
bay
1
To
install
an
optical
drive
or
an
additional
hard
disk
drive
in
bay
1,
do
the
following:
1.
Remove
the
computer
cover.
See
2.
Access
the
system
board.
See
3.
If
you
are
installing
a
drive
with
accessible
media,
such
as
an
optical
drive,
remove
the
plastic
panel
in
the
bezel
by
squeezing
the
plastic
tabs
that
secure
the
panel
on
the
inside
of
the
bezel.
4.
Remove
the
metal
shield
from
the
drive
bay.
5.
For
a
5.25-inch
drive,
install
a
retainer
bracket
on
the
side
of
the
drive.
Note:
If
you
are
installing
a
3.5-inch
hard
disk
drive
you
must
use
a
Universal
Adapter
Bracket,
5.25
to
3.5-inch.
You
can
obtain
this
bracket
from
a
local
computer
retailer
or
by
contacting
the
Customer
Support
Center.
Figure
13.
Drive
bays
16
Hardware
Installation
and
Replacement
Guide