Operation - fonctionnement - funcionamiento – Nilfisk-ALTO 614219 User Manual
Page 14
OPERATION - FONCTIONNEMENT - FUNCIONAMIENTO
14
Nobles UltraGlide (03--04)
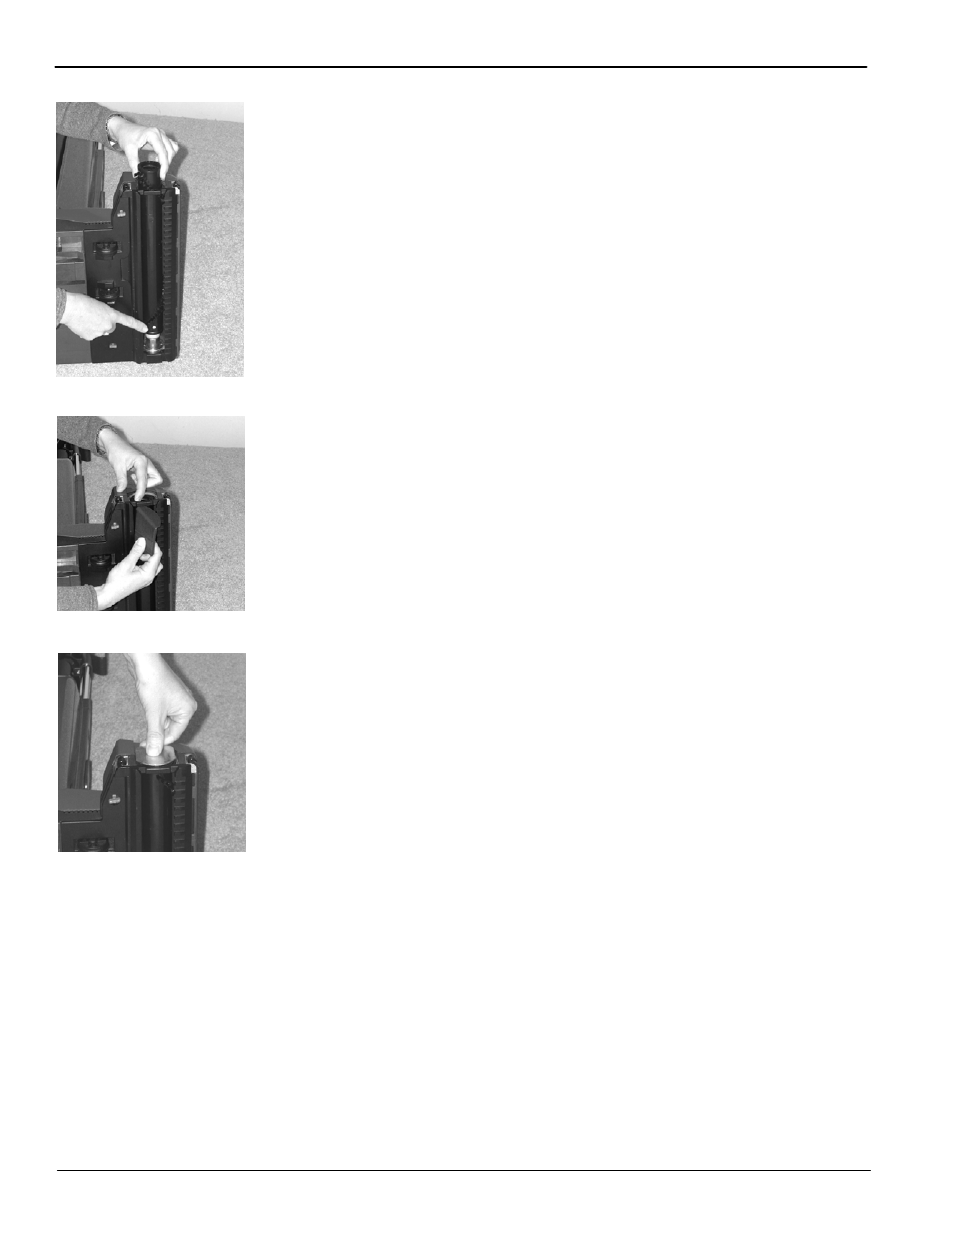
4. Look inside the brush roll
for the end that has a
hexagon shape cut out.
This is also the end that will
have a white dot on the
outside of the brush roll.
Put this end in first. Line up
the white dot with a flat
portion of the drive.
5. Make sure the brush roll
goes all the way down over
the drive. Look to see that
none of the brush bristles
are caught between the
metal support and the
brush (the metal support
will not fit properly if there
are any brush bristles
sticking up and out of the
end, it will also damage the
bristles of your brush roll).
6. Reassemble the metal
brush support and then the
side cover.
4. Introduire d’abord
l’extremité de la brosse
avec l’ouverture
hexagonale dans le boîtier,
le point référence (photo)
consiste à faire coincider
un côté plein du dispositif
de traction avec le point
blanc de rouleau, en
vérifiant qu’elle soit bien
enfoncée jusqu’au bout du
support de transmission.
5. Faire attention à ce que le
rouleau soit bien en place
et que les poils latéraux
soient à l’intérieur du
support en métal. (le
support en métal n’entrera
pas correttamentte si les
poils sont sont pas bien en
place et en outre, il
abimera votre rouleau).
6. Remplacer le support de la
brosse et insérer le
couvercle latéral.
4. Introducir antes en su lugar
la extremidad del cepillo
con la abertura hexagonal,
haciendo encajar una cara
llana del dispositivo de
tracción con el punto
blanco sobre el cepillo (foto
), asegurándose de que se
inserte completamente en
el soporte.
5. Asegúrese de que el rodillo
esté bien instalado en su
lugar y que las cerdas
laterales estén
internamente al soporte
metálico.(el soporte
metálico no entrará
correctamente si la cerdas
no están bien puestas y
además irán a estropear
las cerdas del rodillo).
6. Montar el soporte del
rodillo y luego insertar la
porta lateral.