Caution – Masterbuilt 30-inch Electric Digital Stainless Steel Smokehouse (20070411) USER GUIDE User Manual
Page 14
13
To
replace batteries:
•
Slide belt clip to the left to remove.
•
Press tab down on battery cover and pull out.
•
Install 2 “AAA”
Alkaline batteries. Check positive (+) and negative (-) symbols, on the case and bat-
tery
, to insure proper installation.
•
Replace the battery cover
.
•
Remove batteries before storing remote control.
To
test frequency range:
•
T
urn unit on.
•
Use remote to turn light on and of
f as you move away from unit.
•
Remote control is out of frequency range when light will no longer turn on and of
f.
IMPORT
ANT
•
Do not leave remote control exposed to sunlight for prolonged periods of time.
•
Remote control has frequency range of up to 100ft (30m).
•
Test frequency range before and during use.
TROUBLESHOOTING
If the remote is not working properly or not interfacing correctly with the controller
, it may be due to
weak batteries, batteries being incorrectly installed or the remote is not correctly linked to controller
.
Possible solutions
•
Replace batteries and install according to image in battery housing
•
Link remote and controller by:
a.
T
urn Controller & Remote “ON”,
b.
Press and HOLD “SET
TEMP” on controller for 3 seconds.
c.
On the Remote press “MEA
T
PROBE”, “LIGHT”, “MEA
TPROBE”, “LIGHT” (
all buttons must be
pressed within 5 seconds of each other
) A
short beep will occur after each button press.
HOW T
O
USE CONTROL
P
ANEL
& REMOTE CONTROL
CAUTION
•
Keep batteries away from small children. If battery is swallowed consult a physician immediately
.
•
Be sure to insert batteries correctly
. Improper installation may result in leaks and/or possible explosion.
•
Do not dispose of batteries in
fi re.
•
Do not mix old and new batteries.
•
Do not mix alkaline, standard (carbon-zinc), or rechargeable (ni-cad, ni-mh,etc) batteries.
*Batteries not
included
6
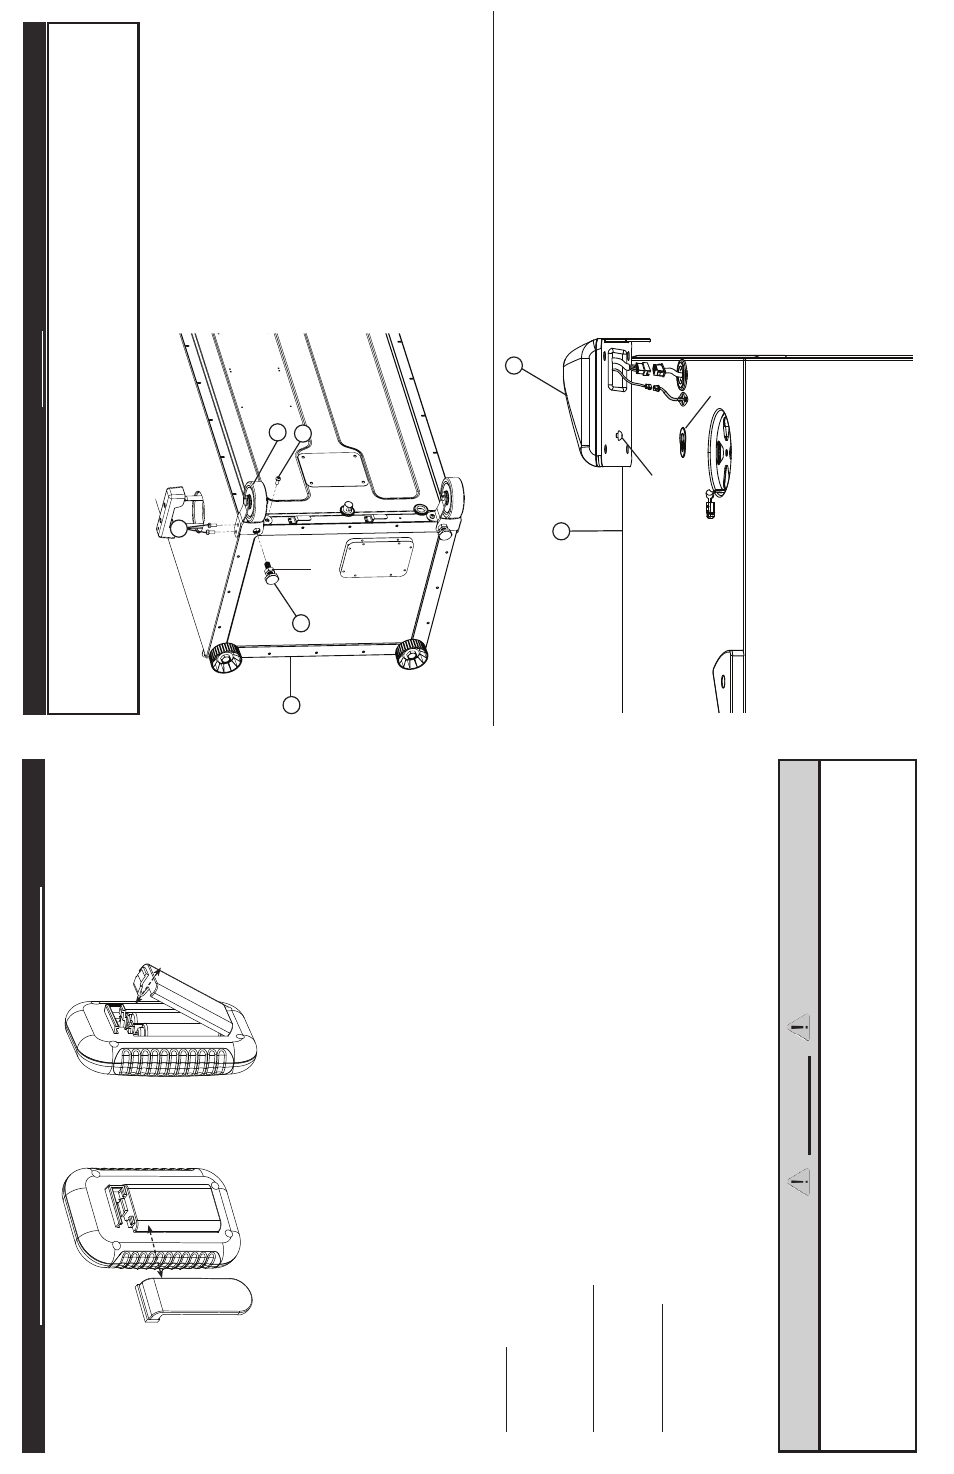
ARMADO
•
ANTES DE
ARMARLA, LEA
DETENIDAMENTE T
ODAS LAS INSTRUCCIONES.
•
ARME LA
UNIDAD EN UNA
SUPERFICIE LIMPIA
Y
PLANA.
• HERRAMIENT
AS NECESARIAS: DEST
ORNILLADOR PHILLIPS
PASO 1 Ubique la rueda (5) en la parte inferior del ahumador (1), como muestra la ilustración.
Inserte el pata roscada ajustable (4) en la parte inferior de la rueda (5)
Fije la rueda (5) a la parte inferior del ahumador (1), utilizando tornillos Phillips (A).
Repita el mismo paso en el lado opuesto.
Nota:
Ajuste la altura del pata
roscada ajustable, girándolo hacia la derecha o izquierda, de modo que el ahumador quede nivelado. Una vez que esté nivelado,
fi je la posición de
las patas traseras con las tuercas de tensión.
PASO 2a Coloque el panel de control (6) en- cima del cuerpo del ahumador (1), como se ilustra.
Alinee las ranuras del conector del panel de control con las pestañas del conector del ahumador
, y realice
la conexión entre ellos, como se ilustra.
PASO 2b Monte el panel de control al insertar la cabeza del tornillo estabilizador en la ranura.
Nota: Es probable que el tornillo estabilizador necesite ajustarse ligeramente para que quede a la perfección.
A
5
A
1
4
T
uercas
de tensión
1
6
T
ornillo
Estabilizador
Ranura