Figure 11 – DuraVent Combustion Air Systems for PelletVent Pro User Manual
Page 10
10
Important: regardless which side
the branch is located it is important that the
branch be rotated into the proper orientation.
the branch must be rotated so that the “V”-
notch is at the bottom (6 o’clock position),
allowing the damper to remain closed when at
rest (Fig 9). the damper is to ensure the air
flows from the Wall thimble or Channel into
the appliance, and not in the other direction.
After choosing which side the branch
will be on, insert the front faceplate into the
back portion of the Channel tee. the sides
and bottom edge of the front faceplate fit
inside the back portion (Fig 9 & 10). It is highly
recommended that waterproof sealant be
used inside the Channel tee where the front
faceplate meets the back portion to prevent
any possible leakage of condensate that may
occur. Install the Channel tee itself by sliding
it over the bottom of the Wall thimble or
Adjustable Wall Channel. Secure the Channel
tee in place with (2) 3/8” black screws on both
sides (Fig 10).
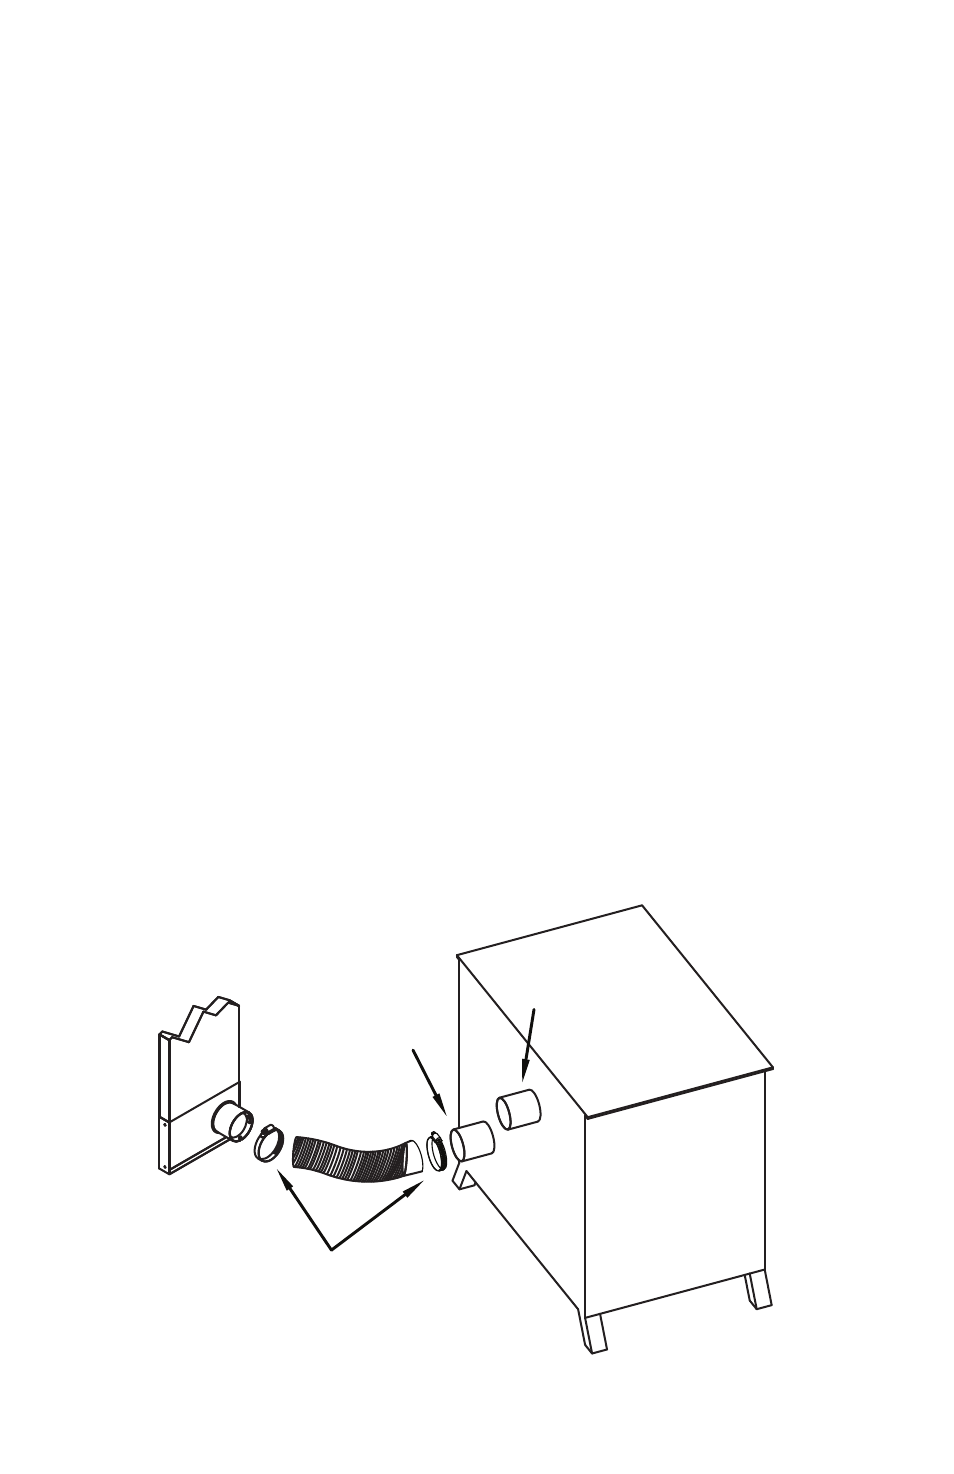
Step 6. Connect flex. Install the flex section
over the Channel tee branch and secure with
the hose clamp provided (Fig 11). Depending
Figure 11
Figure 11
EXHAUST
OUTLET
AIR INLET
SECURE FLEX TO
CHANNEL TEE AND
APPLIANCE AIR
INLET WITH HOSE
CLAMPS
SeCUre fleX tO CHAnnel tee
AnD APPlIAnCe AIr Inlet WItH
HOSe ClAmPS.
AIr Inlet
eXHAUSt
OUtlet
on your appliance, the method of attaching
the flex to the appliance’s air-inlet may differ.
If your appliance allows the flex to slip over
the air-inlet, then slip the flex over the inlet
and secure it using one of the hose clamps
provided. If the appliance has a 2” air-inlet
opening, you can use a 3”-2” decreaser
adapter that is available. Slide the flex onto
the 3” end and secure with a hose clamp.
Insert the 2” end into the appliance’s air-inlet
and secure with at least (2) ½” or 5/8” sheet
metal screws (Fig 12). If your appliance
will not accept either of these connections,
a Universal Adapter that can bolt onto the
back of the appliance is also available. the
Universal Adapter connects to the flex using
a hose clamp on one end, and mounts over
the appliance’s air-inlet using (8) sheet metal
screws (Fig 13). the Universal Adapter
can fit air-inlets up to 4-3/4” square. It is
recommended that when using the Universal
Adapter, that you seal it against your appliance
using waterproof sealant.