4 connecting the vs-21dpir, Connecting the vs-21dpir, 4connecting the vs-21dpir – Kramer Electronics VS-21DP-IR User Manual
Page 9
6
VS-21DPIR - Connecting the VS-21DPIR
4
Connecting the VS-21DPIR
Always switch off the power to each device before connecting it to your
VS-21DPIR. After connecting your VS-21DPIR, connect its power and
then switch on the power to each device.
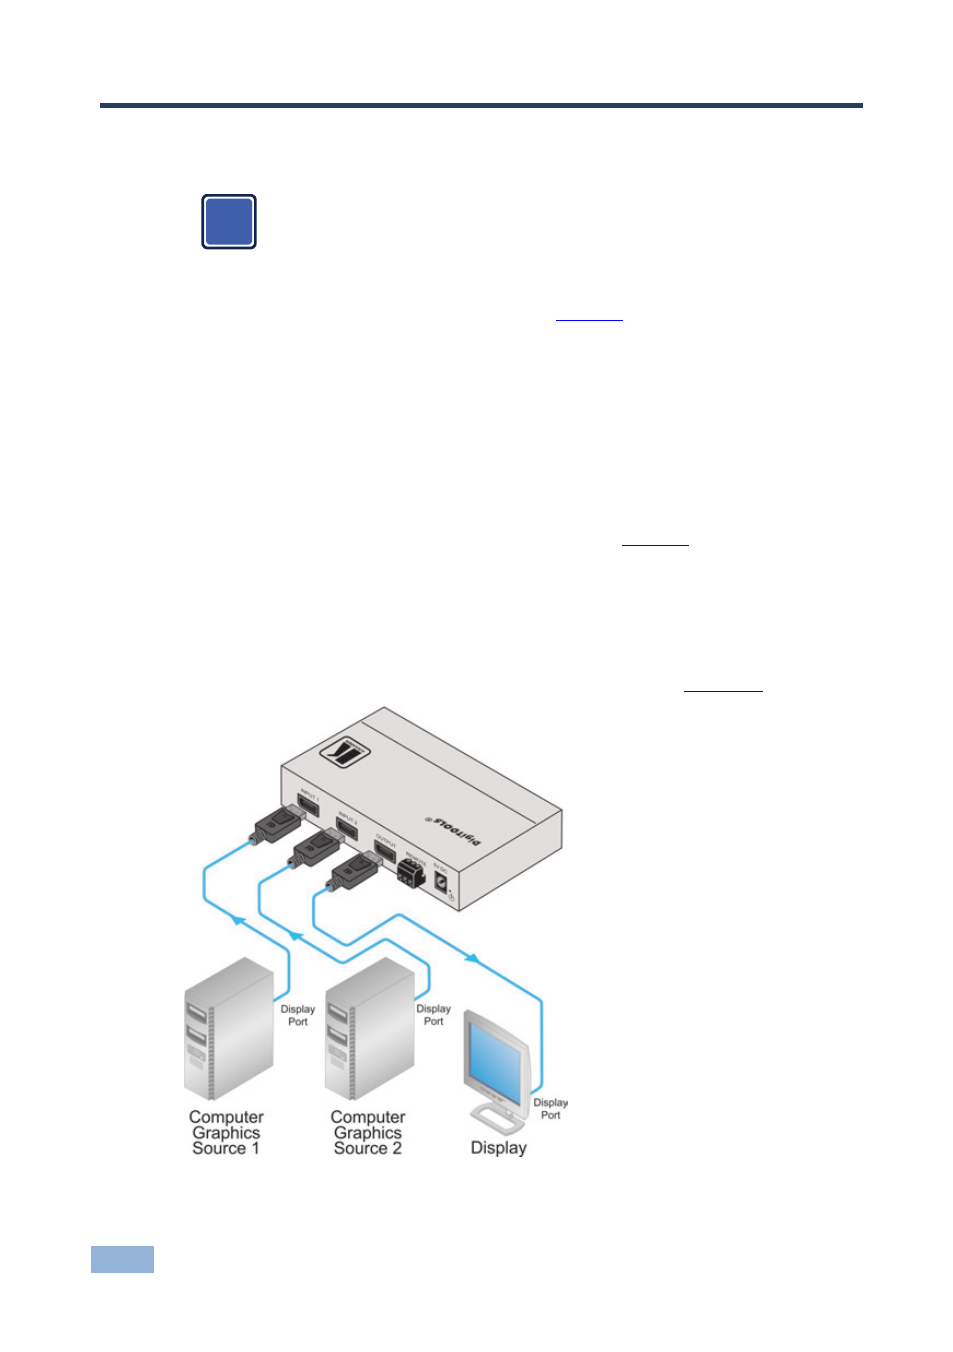
To connect the VS-21DPIR, as the example in
shows, do the following:
1. Connect up to two computer graphics sources to INPUT 1 and INPUT 2.
2. Connect the OUTPUT connector to the DisplayPort acceptor (for example, a
display), using the Kramer DisplayPort cable.
You can connect the DP output to an HDMI acceptor by using an appropriate adapter
and setting the DIP-switches.
3. Connect the 5V DC power adapter to the power socket and connect the
adapter to the mains electricity (not illustrated in
4. Press the SELECT button to choose which DP input to route to the output.
The SELECT button toggles between INPUT 1 and INPUT 2, lighting the
IN 1 LED when INPUT 1 is selected, or the IN 2 LED when IN 2 is selected.
Alternatively you can press key 1 or 2 on the remote transmitter, once setup (see
section 4.1), or use the contact closure remote control pins (see
Figure 2: Connecting the VS-21DPIR 2x1 DisplayPort Switcher
i