5 connecting the vp-300thd, Connecting the vp-300thd, Figure 2 – Kramer Electronics VP-300THD User Manual
Page 8: Table 2, 5connecting the vp-300thd
KRAMER: SIMPLE CREATIVE TECHNOLOGY
Connecting the VP-300THD
6
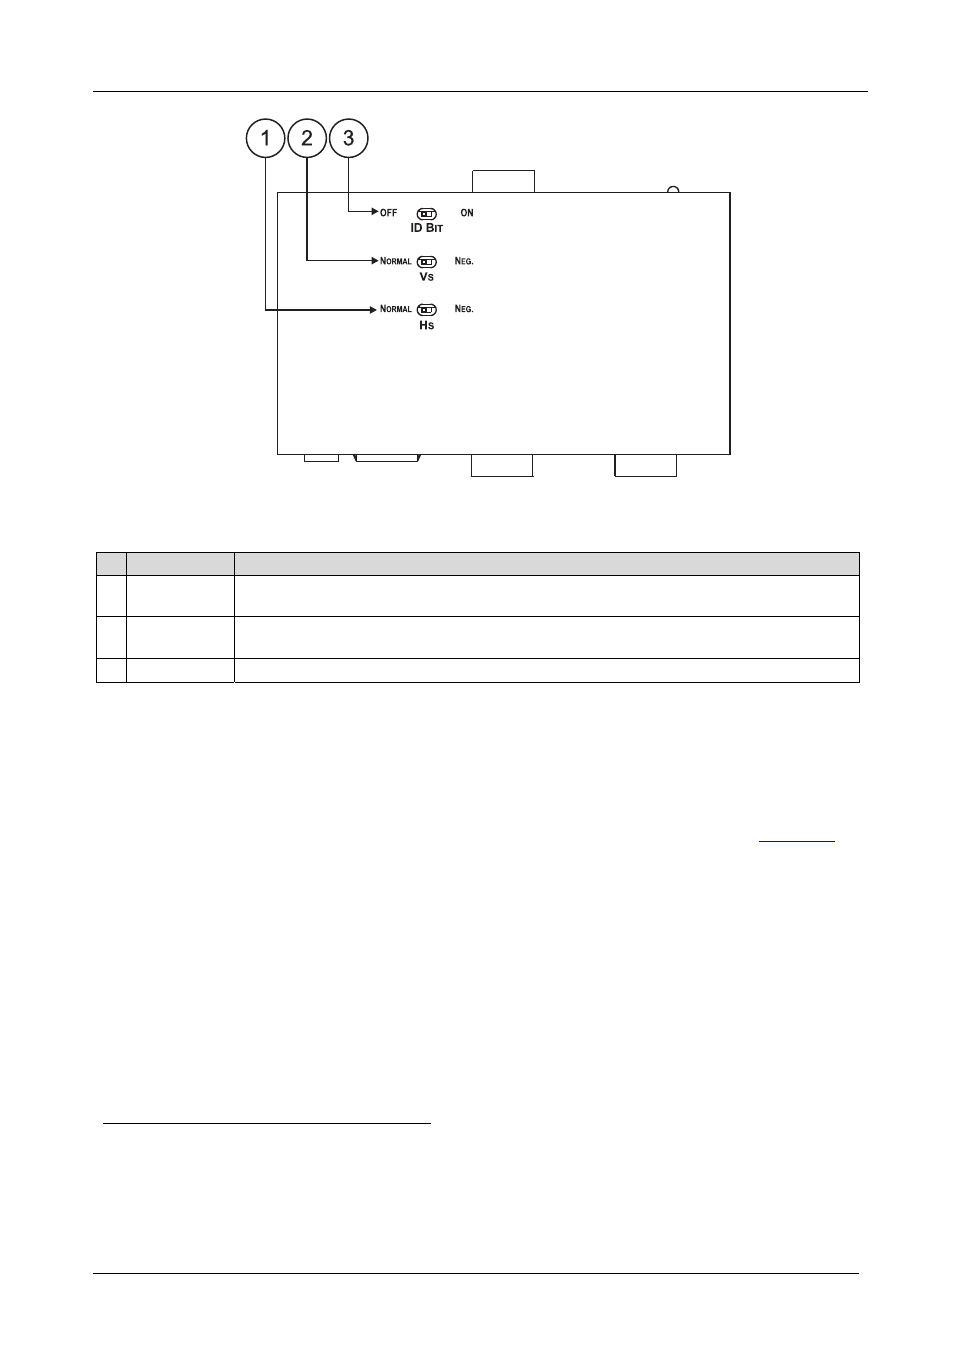
Figure 2: VP-300THD 1:2 XGA/HD DA/CAT 5 Transmitter (Underside)
Table 2: VP-300THD 1:2 XGA/HD DA/CAT 5 Transmitter (Underside) Features
#
Feature
Function
1
HS
Switch
Slide the switch to the right to change the HS polarity to NEG. (NEGATIVE) polarity
;
slide the switch to the left
(to NORMAL) to retain the polarity
2
VS Switch
Slide the switch to the right to change the VS polarity to NEG. (NEGATIVE) polarity
;
slide the switch to the left
(to NORMAL) to retain the polarity
3
ID BIT Switch Slide to the right to set to ON
; to the left to set to OFF
5
Connecting the VP-300THD
You can use the VP-300THD and, for example, the TP-120 to configure an
XGA/HD DA/CAT 5
Transmitter and Receiver system.
To connect the VP-300THD with the TP-120, as the example in
illustrates, do the following:
1. On the VP-300THD 1:2 XGA/HD DA/CAT 5 Transmitter, connect the:
Computer graphics (XGA / HD) source (for example, a computer)
to the INPUT 15-pin HD connector
OUTPUT 1 and OUTPUT 2 15-pin HD connectors to up to
two
acceptors (for example, to a display and to a projector,
respectively)
1 Downgoing syncs
2 By default, both switches are set to the left
3 The default. Enabling the notebook or laptop to output a VGA signal to an external VGA monitor
4 When both outputs are not required, connect only the output that is required and leave the other output unconnected