Kramer Electronics PT-102S User Manual
Page 8
Using the PT102VN 1:2 Video DA
KRAMER ELECTRONICS, LTD.
6
4 Using the PT102VN 1:2 Video DA
You can connect your
PT102VN:
As a 1:2 video DA (see section 4.1)
To a
4x1VB 4x1 High Resolution Video Switcher to increase the number
of inputs (see section 4.2)
To two
105VB 1:5 High Resolution Video DA units to increase the
number of outputs (see section 4.3)
Note: similar principles apply when using the
PT102A or the PT102S.
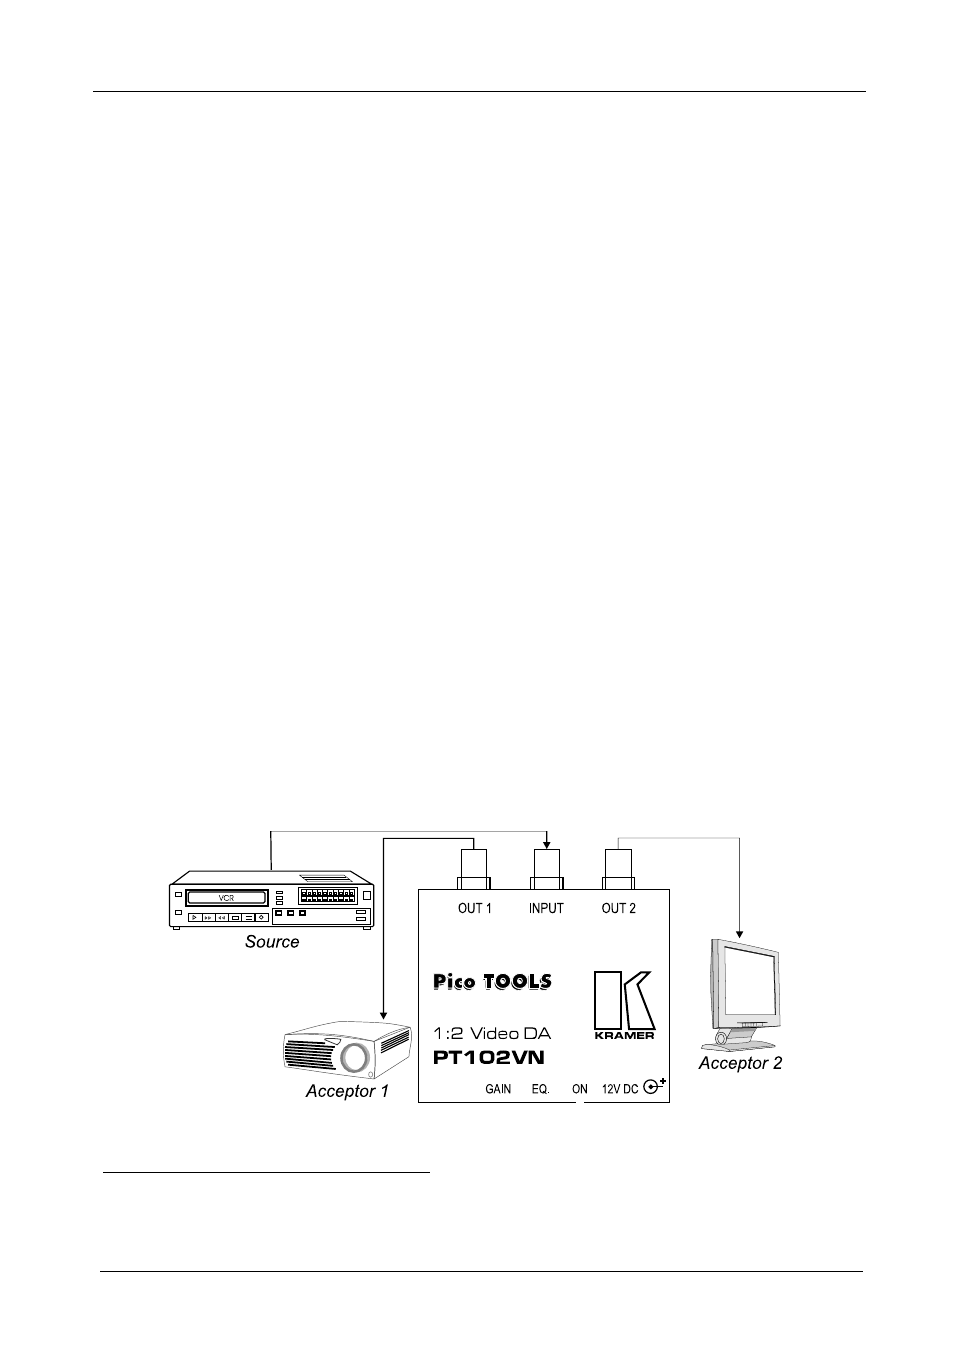
4.1 Connecting the PT102VN 1:2 Video DA
To connect the
PT102VN 1:2 Video DA, as the example in Figure 4
illustrates, connect the following
1
:
1. Connect a composite video source (for example, a VCR) to the INPUT
BNC connector.
2. Connect the 2 OUT BNC connectors to up to 2 composite video
acceptors, as follows:
Connect the OUT 1 connector to video acceptor 1 (for example, a projector)
Connect the OUT 2 connector to video acceptor 2 (for example, a monitor)
3. Connect the 12V DC power adapter to the power socket and connect the
adapter to the mains electricity.
4. Adjust the output signal level and/or cable compensation equalization
level, if required.
Figure 4: Connecting the PT102VN 1:2 Video DA
1 Switch OFF the power on each device before connecting it to your PT102VN. After connecting your PT102VN, switch on
its power and then switch on the power on each device