Unpacking correct use, Operation – Chemglass CG-1994 User Manual
Page 5
5
Optimag 082011
• Unpacking
- Please unpack the device carefully
- In the case of any damage a detailed report must be set imme-
diately (post, rail or forwarder)
• Contents of package
- Heating magnetic stirrer - Mains cable
- Operating instructions
- Screwdriver
- Temperature sensor
- Protection cover
• Use
- For mixing and/or heating liquids
• Range of use
- Laboratories
- Schools
- Pharmacies
- Universities
This device is suitable for use in all areas except, except industri-
al areas.
The safety of the user cannot be guaranteed if the appliance is
operated with accessories that are not supplied or recommended
by the manufacturer or if the appliance is operated improperly con-
trary to the manufacturer’s specifications or if the appliance or the
printed circuit board are modified by third parties.
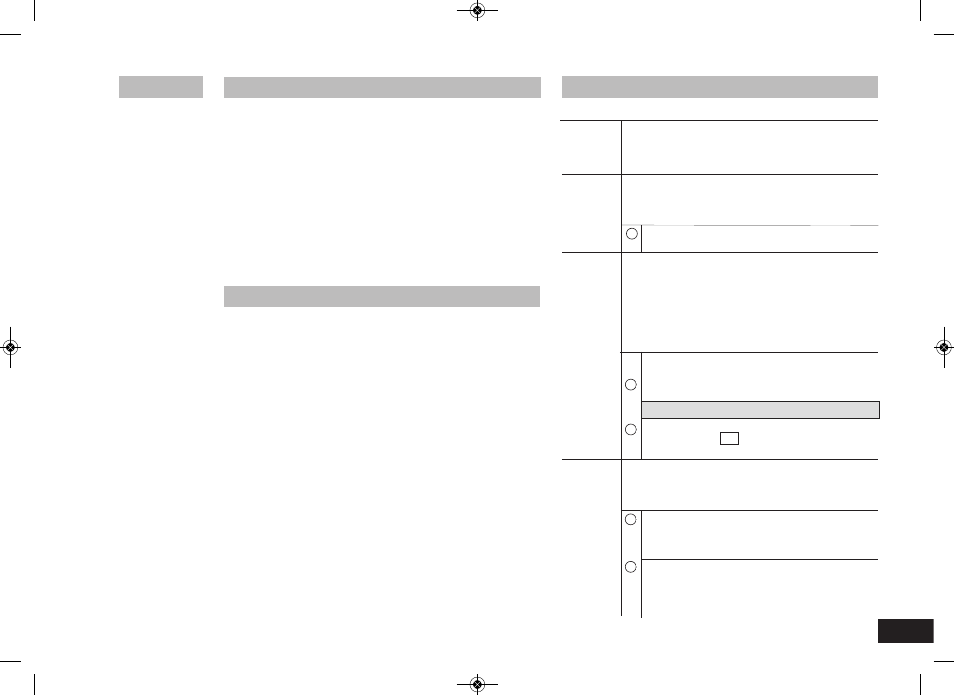
Unpacking
Correct use
Commis-
sioning
Stirring
Heating
Connecting
external
thermo-
meters
(direct tem-
perature
control in
the media)
Move device switch (A) to the OFF position
Insert the mains power cable into the power socket (K)
Move device switch (A) to the ON position
The unit will be set to factory setting mode A (see “Operating modes”)
Operation
Adjust the motor speed using the rotary knob (D)
The value selected will be shown on the display (F)
Set the start point for the agitation function by pressing the
rotary knob (D)
The display value will flash until the desired motor
speed is reached
Set the safe temperature limit
(see “Setting the safe temperature limit”)
Adjust the set-point teperature using the rotary knob (C)
The value selected will be shown on the display (E)
Set the temperature control mode (see “Setting the tempe-
rature control mode”)
Set the start point for the heating function by pressing the
rotary knob (C)
The set-point and actual temperatures will be shown
alternately on the display (E)
When the heating is switched on, the LED “heating
plate” (G)and the LED “Set-point value (I) will be lit
During agitation and stand by operation, the display (E)
will show if the base plate temperature
is above 50 °C
Move device switch (A) to the OFF position. Detach contact
plug (L). Attach a DIN 12878 (Class) 2 compliant safety con-
tact thermometer or a PT 1000 temperature sensor to the
socket (L). Move device switch (A) to the ONposition.
Temperature sensor PT1000 The actual temperature for
the temperature sensor shown on display (E) will corre
spond to the temperature of the media. The LED “exter-
nal temperature sensor” (H) will be lit.
Contact thermometer e.g. ETS-D5 Follow the operating
instructions for the contact thermometer. The LED “deci-
mal point for the temperature display” will be lit. When a
contact thermometer is connected, the display (E) will only
show the set-point temperature that has been set
i
HOt
i
i
i
i
The maximum temperature that can be set for the heating plate is 310 °C
Ensure that the protective film is removed from the base plate before use!
3957121_Optimag_082011:6 31.08.11 09:14 Seite 5