Comfort-Aire PTHP15A130A User Manual
Page 7
Heat Controller
OWNER’S MaNual
Packaged Terminal
6
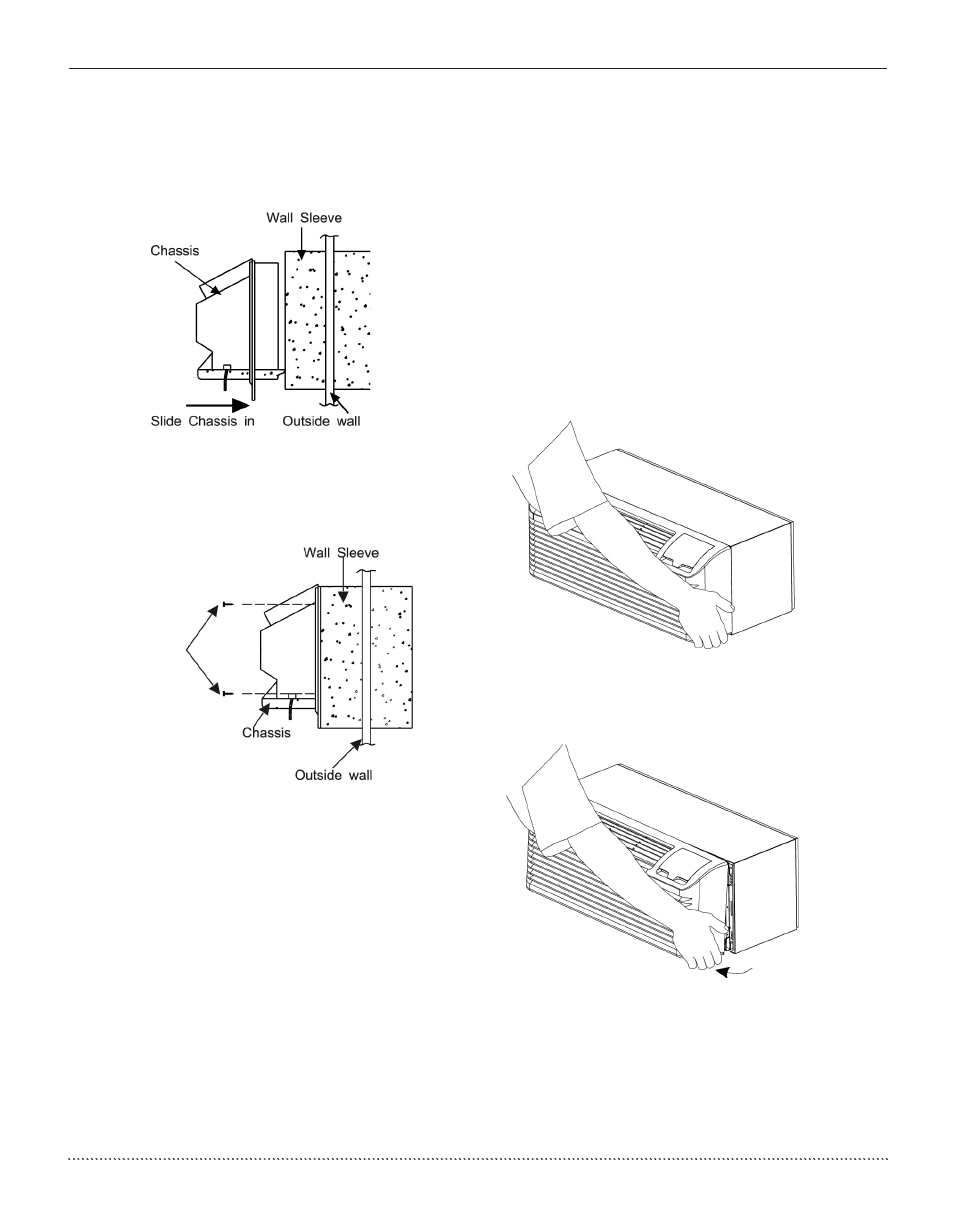
CHASSIS INSTALLATION
1. Remove the cabinet front from the chassis as
described In Front Removal.
2. Insert the chassis into the wall sleeve.
IMPORTANT NOTES:
1. The unit is equipped with a rubber grommet
mounted compressor. These grommets are factory
set and require no adjustment.
2. Check the indoor and outdoor grilles for
obstructions to air flow. The unit must be located
where curtains, furniture, trees, or other objects do
not block the air flow to and from the unit. If air is
obstructed and/or deflected back into the unit,the
air conditioner compressor may cycle on and off
rapidly. This could damage the compressor or
possibly void the warranty.
FRONT REMOVAL
1. Grasp the cabinet front.
3. Slide the chassis into the wall sleeve until the
chassis flanges contact the front edge of the wall
sleeve.
4. Secure the chassis to the wall sleeve using two
screws on each side of the chassis to ensure a
proper seal between the chassis and the wall
sleeve. The screws are supplied in a plastic bag.
Chassis Installation View 2
Chassis Installation View 1
3. Lift the cabinet front off the chassis. Reverse this
procedure to reinstall the cabinet front.
Cabinet Front Removal View 2
2. Pull the bottom of the cabinet front away from
the chassis until the retaining clips disengage.
Cabinet Front Removal View 1
Screws
(2 on each
side of unit)