Rugged Ridge Dual Battery Tray, 97-06 Jeep Wrangler User Manual
Page 2
Page 2
11214.52 Dual Battery Tray
Applications: 1997- 2006 TJ Wrangler
2003- 2006 LJ Unlimited
Dual Battery Tray Installation Instructions 1997 - 2006 Wrangler
pic.7
pic.8
pic.9
pic.10
WARNING: This kit requires batteries to be placed on their sides during installation and use.
ONLY Orbital Gel batteries can be used with this kit. DO NOT USE standard wet
cell batteries or damage to vehicle may result.
pic.11
pic.12
Pg. 2 of 3
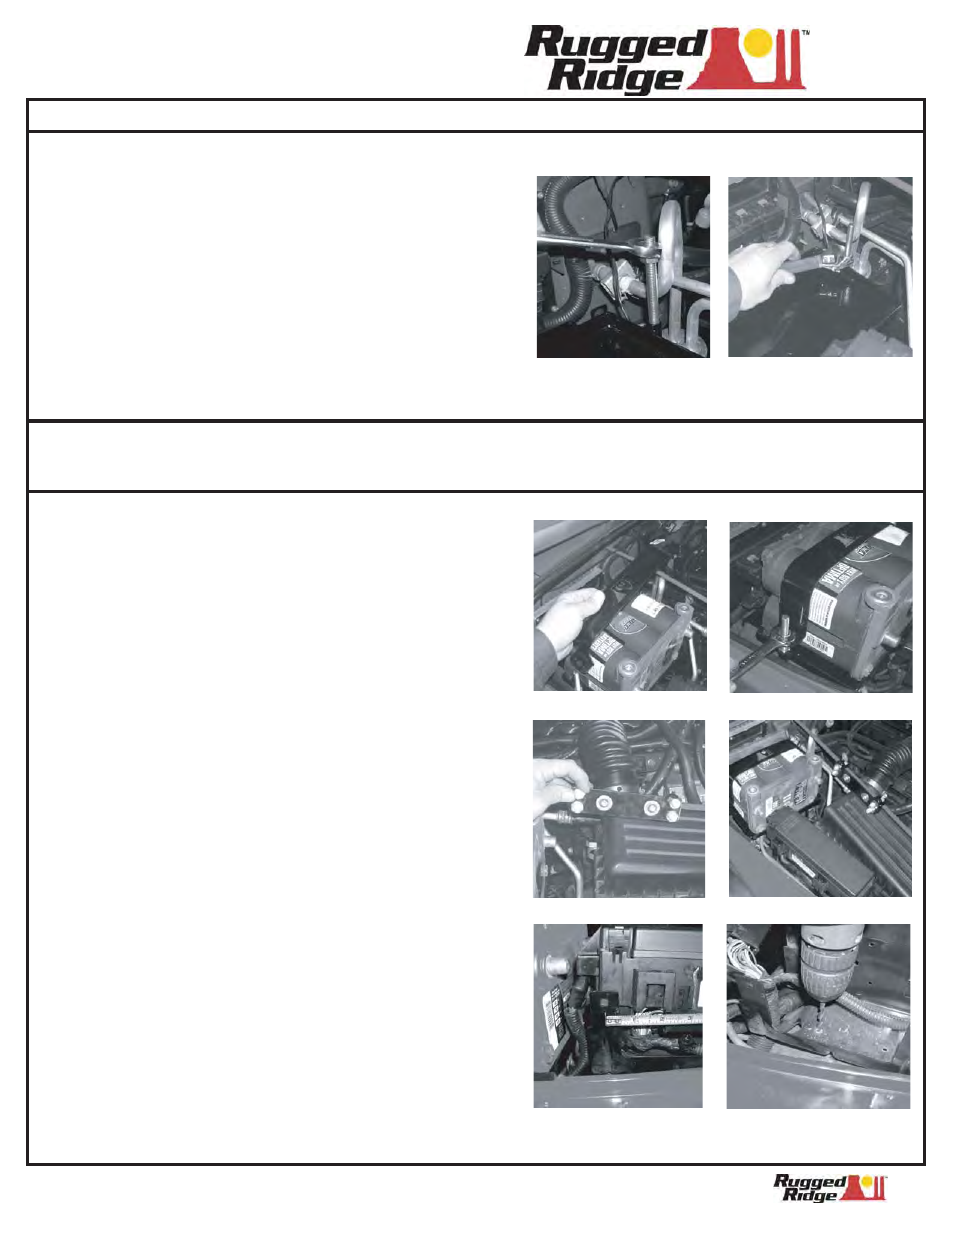
Step 8: Tighten the two nuts together. You can now thread
the rod into the lower battery tray by tightening
the top nut (pic.7). Thread rod until it is flush with
the bottom of the lower battery tray.
Step 9: Remove the top nut from threaded rod. Hand
tighten the remaining nuts to the upper tray.
Tighten with wrench until secure. DO NO OVER
TIGHTEN! (pic.8). NOTE: AC line may need to
be pushed away from threaded rod. Tube can
be bent to avoid contact with rod.
Step 10: Place top battery onto upper tray with terminals
facing towards the front of the vehicle. Place
battery hold down bracket onto threaded rods
and lower onto battery (pic.9).
Step 11: Thread nuts onto rods and secure hold down
bracket to top battery. DO NOT OVER TIGHTEN.
(pic.10). Attach second battery cables as
desired. Always connect POS (+) cable first .
Step 12: This kit has been supplied with a relay mounting
bracket. The bracket is designed to mount to the
grille support rods. Install relay bracket onto
support rod (pic.11). Mount relay to bracket and
position so that relay does not make contact
with hood (when lowered) or any other items
inside engine compartment (pic12).
Step 13: For some later model Wranglers the fuse box
and bracket will need to be relocated. Place fuse
box back down onto fuse box mounting bracket.
(fuse box was removed in step #6). Move fuse
box forward until it clears upper battery
terminals. The fuse box will need to be moved
about 1.75" forward (pic.13).
pic.13
pic.14
Step 14: With fuse box removed drill out rivets securing
fuse box mounting bracket (pic.14).
Step 15: With rivets removed slide bracket forward the
the distance needed to clear battery terminals.
this should be about 1.75". The front of the
mounting bracket will need to be turn inward
towards the air box by .20" or 1/5". Reconnect
fuse box to loose bracket and place in new
location. Check that hood can close without
touching fuse box (pic.15). When correct location
has been determined mark the new location of
mounting bracket to the fender base (pic.16).
Mark the front and back with marker.