Rugged Ridge Dual Battery Tray, 97-06 Jeep Wrangler User Manual
Rugged Ridge For the car
Contents:
(1) Lower Battery Tray
(1) Upper Battery Tray
(2) Threaded Rods
(4) Hex Head Nuts - Threaded Rod
Page 1
11214.52 Dual Battery Tray
Applications: 1997- 2006 TJ Wrangler
2003- 2006 LJ Unlimited
Dual Battery Tray Installation Instructions 1997 - 2006 Wrangler
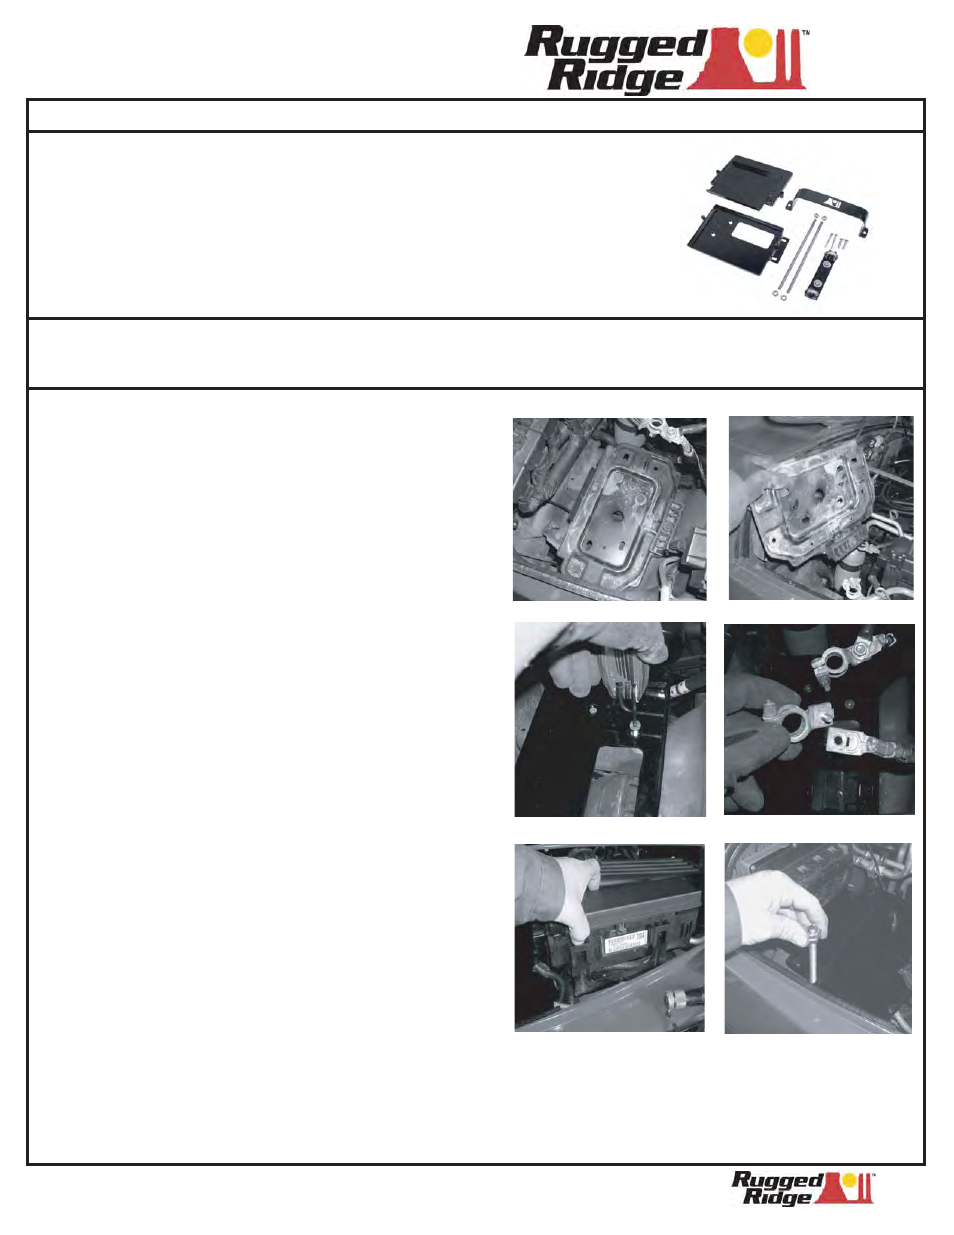
Step 1: Disconnect Battery by removing the NEG (-)
cable first and then the POS (+) connector.
Remove battery from tray (pic.1). Loosen and
remove the four bolts securing the factory
battery tray and remove from vehicle. DO NOT
discard bolts (pic.2).
Step 2: Place Lower Battery Tray onto mounting
bracket. Using the supplied counter sunk
Allen head bolts secure the tray to the bracket
(pic.3). Reuse the factory bolts for the other
mounting holes located towards the fender
wall.
Step 3: If possible unbolt battery connectors and flip
connector to the backside of the battery cables.
This allows the cables to be connected to the
lower battery (pic.4). NOTE: Earlier model
vehicles may not have reversible connectors.
longer cables may be required.
Step 6: Remove relay box from bracket by depressing
retainer clips and lifting fuse box upward (pic.5).
With fuse box removed the upper tray can now
be installed.
pic.1
pic.2
pic.3
pic.4
(1) Battery Hold Down Bracket
(2) Counter Sunk Allen Head Bolts
(2) Hex Head Bolts
(1) Battery Relay Mounting Bracket
w / hardware
WARRNING: This kit requires batteries to be placed on their sides during installation and use.
ONLY Orbital Gel batteries can be used with this kit. DO NOT USE standard wet
cell batteries or damage to vehicle may result.
Step 5: Test fit upper tray on top of lower battery. If the
battery tray has interference with the fuse box
the fuse box mounting bracket will need to
be relocated. If there is no issue with tray
clearance proceed to step # 7. If the fuse
box mounting bracket does need to be relocated
proceed with step #6. Bracket relocation will be
discussed later in step # 13-19.
pic.5
pic.6
Pg. 1 of 3
Step 7: With lower battery installed and upper battery
tray in place insert the threaded rods through the
upper battery tray and into the lower tray. To aid
in the threading of the rod into the lower tray place
two hex head nuts onto rod (pic.6)
Step 4: Install (main) battery onto lower tray and connect
terminals back to battery starting with POS (+)
cable first. Avoid contact with grounded metal.