U-ds40 smart table • assembly instructions – Martin Universal Design U-DS40 SMART TABLE User Manual
Page 4
03/2009- RPI
Pg. 4
FIG 6
U-DS40 SMART TABLE • Assembly Instructions
G
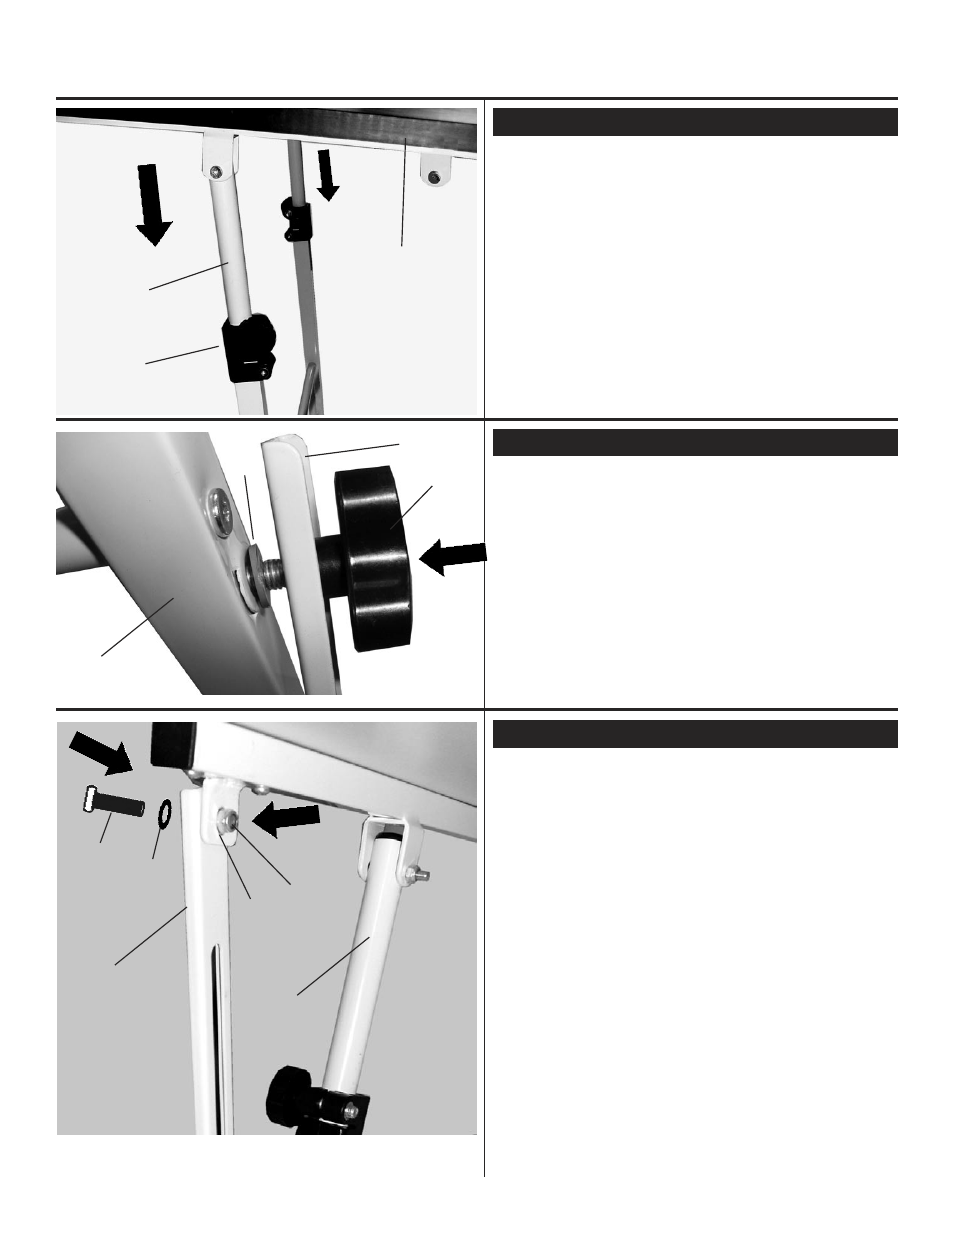
STEP 5] Attach Top to Base
Loosen knobs on collars (part G) to allow the upper
legs to be inserted into the collars easier.
Have each person hold onto the table top and guide
the [2] upper legs (part F) into the collars that are at-
tached to the base assembly. Tighten knobs on collars
to secure.
SEE FIG 6.
F
G
TOP - A
IMPORTANT: USE TWO PEOPLE FOR THIS STEP
STEP 5] Attach Top to Base
You need the [2] Knobs (part J), [2] Tilt Arms (part H),
and [2] Large Washers (part P2) to attach Tilt Arms to
table.
Insert the bolt that is connected to the Knobs (part J)
through the tilt arm (use the end that is opposite the
hole) add the large washer (part P2) to the knob bolt
and then thread into the table legs.
Repeat with opposite side. SEE FIG 7.
NOTE: These are the Knobs that you will loosen to
adjust the tilt of the table.
STEP 7] Attach [2] Tilt Arms to Table
FIG 7
C
H
J
H
P2
To attach the Tilt Arm (part H) to the Top Support (part
B), you will need to insert the 6x12mm allen bolt (part
M) with a small washer (part P1) through the tilt arm,
then through the top support tab. Continue by adding
another washer (part P1) to the end of the bolt and finish
by adding a nut (part O). Tighten with wrench (part Q)
to secure. Repeat with other Tilt Support.
SEE FIG 8.
STEP 8] Attach [2] Tilt Arms to Top
H
F
B
M
P1
P1 O