First time set-up with the clearview hd-19, Getting started – Vaddio ClearVIEW HD-19 User Manual
Page 6
ClearVIEW HD-19
ClearVIEW HD-19 Manual 342-0259 Rev. A
Page 6 of 16
First Time Set-up with the ClearVIEW HD-19:
The ClearVIEW HD-19 was designed to be exceptionally easy to use and operate. There is documentation at the
back of the manual for pin-outs for all of the connectors on the ClearVIEW HD-19 camera.
Getting Started
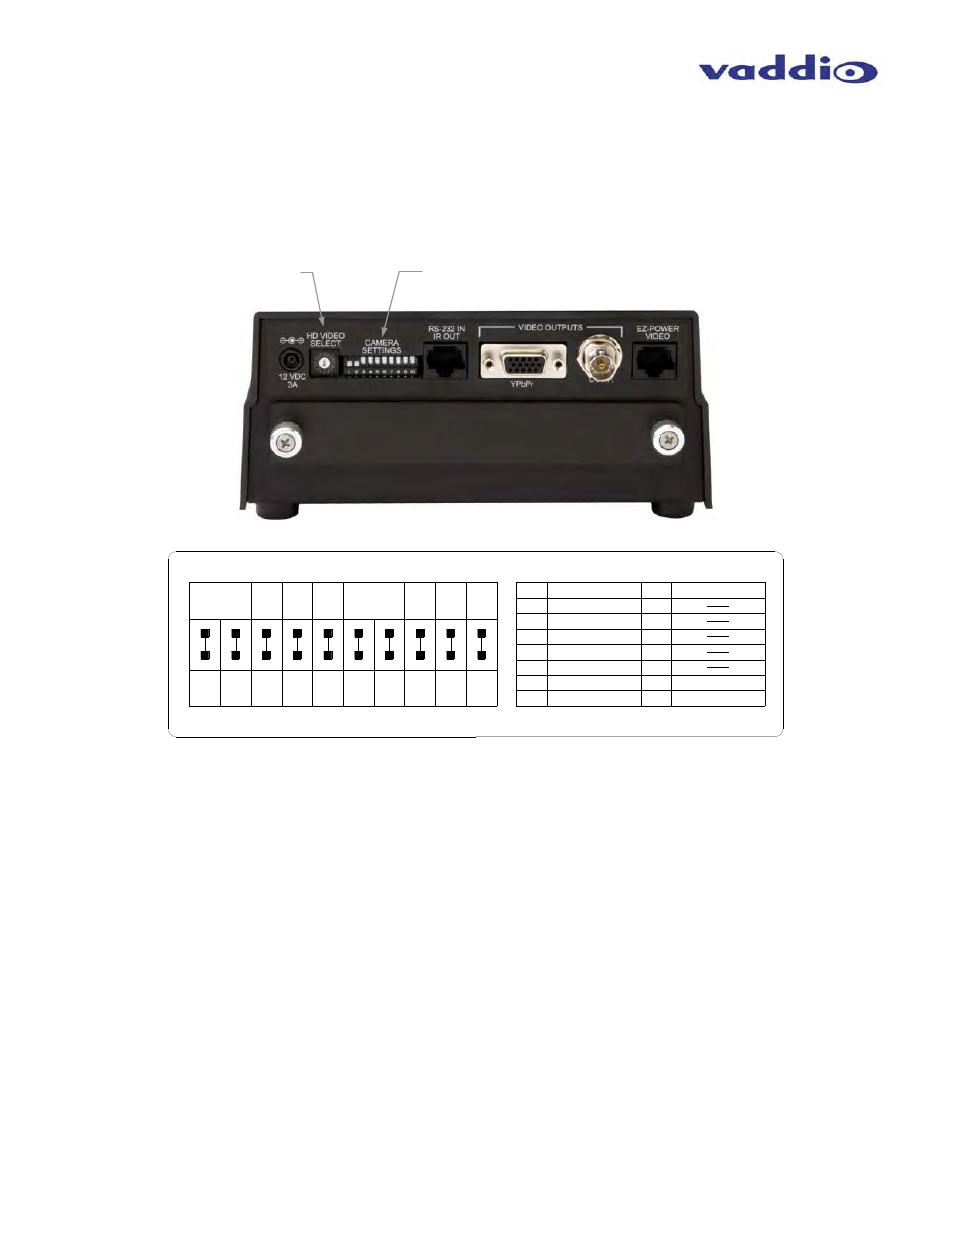
Step 1: Using the HD Video Select Rotary Switch and Camera Settings Dip Switch on the back of the camera,
set up the camera’s output resolution and functional preferences. There is a label on the bottom of the camera
that identifies the choices.
Set the HD output resolution for the camera with the Rotary Switch.
Set the IR frequency of the camera if it is to respond to the IR remote control.
If using RS-232 for control, leave the IR OUT OFF (SW3) and choose 9600bps for most applications.
If using the IR forwarding feature, turn the IR OUT ON (SW3).
If inverting the camera, turn the IMAGE FLIP ON (SW8).
Dip Switch Settings:
IR 1 & 2: The IR remote has the capability of operating up to three different PTZ cameras from one remote.
Use the selector buttons at the top of the IR remote to select the frequency.
IR Out 3: The IR output is sent out on the RS-232 RJ-45 jack on the back of the camera. Turning on the IR
output will allow IR signals to be transmitted over the CAT-5 cable to the head end. When using RS-232
control or Vaddio CCU controllers (also via RS-232), turn the IR OUT to OFF.
Baud Rate 4: The options for baud rate are either 9600 bps or 38,400 bps. Default is 9600 bps.
SD Format 5: Choose between NTSC or PAL formats
SD Configurations 6 & 7: SD video can be set to standard 4:3, squeeze mode or letterbox mode.
Image Flip 8: To invert the HD-19, turn the IMAGE FLIP ON (switch down).
Test Bars 9: Turning on the non-standard test bars will override the camera video output. These non-
standard test bars are 75% IRE.
Switch 10: Leave up - or in the OFF position
HD Video Select Switch
Camera Settings 10-Pos Dip Switch
HD-19
Rear
Panel
Label on Bottom of the HD-19
IR 1
1 & 2 UP
ON
SD
NTSC
SD
PAL
SD 4:3
6 & 7 UP
SD
LB
IMAGE
FLIP
OFF
ON
ON
DIP SWITCH SETTINGS
8
1
2
3
4
5
6
7
9
10
HD VIDEO SELECT
720p/59.94
1080i/59.94
0
1
2
3
4
5
6
7
8
9
A
B
C
D
E
F
1080p/59.94
1080p/60
720p/50
1080i/50
1080p/50
2
1
5
4
3
7
6
8
10
9
ON
IR 2
ON
IR 3
ON
IR
OUT
OFF
9600
bps
38400
bps
SD
SQ
TEST
BARS
OFF
10
OFF
480i/29.97
1080p/25
1080p/30
576i/25