Programmazione di ora e data, Setting the date and time – Panasonic NVVS4EG User Manual
Page 56
56
ITALIANO
ENGLISH
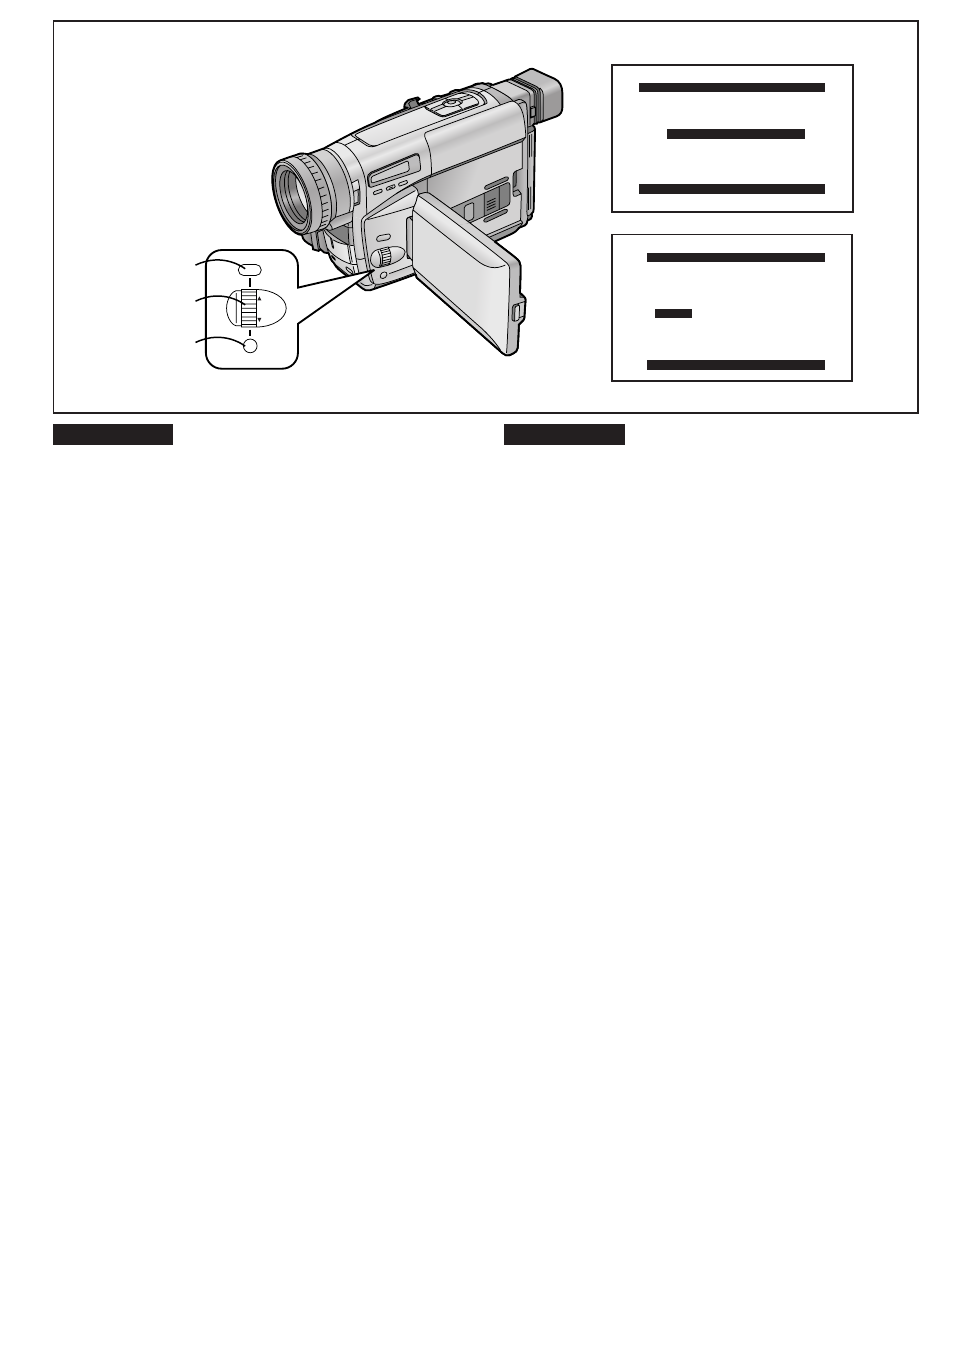
DATE/TIME SETUP
PRESS MENU TO RETURN
YEAR
2000
MONTH 10
DATE 15
HOUR 14
MIN.
30
MENU
FOCUS / SET
MF/
TRACKING
2,4,6,8
1,3,5,7,9
10
CAMERA FUNCTIONS
PRESS MENU TO EXIT
1.CAMERA SETUP
2.DIGITAL EFFECT
3.TITLE SETUP
4.
DATE/TIME SETUP
5.OTHER FUNCTIONS
6.LCD/EVF SETUP
Programmazione di Ora e Data
Selezionando il sottomenu [DATE/TIME SETUP] sul menu
principale [VCR FUNCTIONS] o sul menu principale
[CAMERA FUNCTIONS], apparirà il menu indicato sopra.
Esempio:
per programmare l’orologio su
15 Ottobre 2000, ore 14:30.
1
Ruotate il selettore [34
34
34
34
34
] per impostare
[2000].
L’indicazione dell’anno si modifica nel seguente ordine:
...1990 ...1991... 2000...2089...1990...
2
Premete il tasto [SET] per selezionare
[MONTH].
3
Ruotate il selettore [34
34
34
34
34
] per impostare [10].
4
Premete il tasto [SET] per selezionare [DATE].
5
Ruotate il selettore [34
34
34
34
34
] per impostare [15].
6
Premete il tasto [SET] per selezionare [HOUR].
7
Ruotate il selettore [34
34
34
34
34
] per impostare [14].
8
Premete il tasto [SET] per selezionare [MIN.].
9
Ruotate il selettore [34
34
34
34
34
] per impostare [30].
10
Premete il tasto [MENU] per confermare la
regolazione di ora e data.
Inizierà il conteggio dei secondi a partire da [00].
Premendo nuovamente il tasto, il menu verrà
cancellato.
≥
Quando selezionate il sottomenu [DATE/TIME SETUP], se la
pila a pastiglia non è inserita nella movie o è scarica,
scomparirà il Menu principale e al suo posto lampeggerà
l’indicazione [0]. Inserite una nuova pila a pastiglia (l 54)
e regolate nuovamente ora e data.
≥
Dato che l’orologio interno della movie è soggetto a lievi
imprecisioni, controllate bene l’ora prima di effettuare una
ripresa.
≥
L’orologio interno utilizza un sistema a 24 ore.
Setting the Date and Time
If you select the [DATE/TIME SETUP] Sub-Menu of the [VCR
FUNCTIONS] or the [CAMERA FUNCTIONS] Main-Menu,
the menu shown above appears.
For example: To set the clock to 15th October
2000, 14:30.
1
Turn the [34
34
34
34
34
] Dial to set to [2000].
The years change in the following order:
...1990...1991... 2000...2089 ...1990 ...
2
Press the [SET] Button to select [MONTH].
3
Turn the [34
34
34
34
34
] Dial to set to [10].
4
Press the [SET] Button to select [DATE].
5
Turn the [34
34
34
34
34
] Dial to set to [15].
6
Press the [SET] Button to select [HOUR].
7
Turn the [34
34
34
34
34
] Dial to set to [14].
8
Press the [SET] Button to select [MIN.].
9
Turn the [34
34
34
34
34
] Dial to set to [30].
10
Press the [MENU] Button to finish the date
and time setting.
The operation of the clock starts from [00] seconds.
Pressing the button one more time makes
the menu disappear.
≥
If you select the [DATE/TIME SETUP] Sub-Menu when the
button-type battery is not inserted into the Movie Camera or
is exhausted, the Main-Menu disappears and the [0]
Indication flashes instead. Insert a new button-type battery
(l 54) and then set the date and time again.
≥
As the Movie Camera’s built-in clock is subject to slight
imprecision, be sure to check the indicated time before
recording.
≥
The clock employs the 24-hour system.