Panasonic NVVS4EG User Manual
Page 156
156
ITALIANO
ENGLISH
Acquisizione automatica dei fermi immagine
digitali nella modalità Camera per creare un
album DV
Per acquisire automaticamente dalla videocamera come fermi
immagine i video della modalità Camera, usare il
procedimento descritto sotto. Collegare la videocamera al
personal computer. Disporre poi la videocamera nella
modalità Camera e aprire l’applicazione.
1
Selezionare il metodo di acquisizione sotto
[Auto Acquire Settings] in [Config].
Selezionare l’intervallo di acquisizione sotto “Interval
Time”.
Gli intervalli di tempo sono soggetti a leggere
imprecisioni.
2
Puntare la videocamera sul soggetto
desiderato.
3
Cliccare [AUTO ACQUIRE].
L’acquisizione delle immagini comincia. I fermi immagine
vengono acquisiti agli intervalli di tempo selezionati, e le
immagini acquisite appaiono sequenzialmente sul display
delle immagini
1
.
≥
Per arrestare una acquisizione, cliccare [Cancel].
≥
Per la possibilità di una operazione sbagliata, non far
funzionare direttamente la videocamera quando si è usato il
pulsante di acquisizione alla fine di DV STUDIO2.
≥
Dato che l’immagine viene compressa nel formato JPEG, la
sua qualità sarà leggermente inferiore a quella dell’originale.
≥
Quando si acquisisce il fermoimmagine di una scena che
contiene movimenti, l’immagine finale può contenere
sfocature o barre, come indicato nella figura
2
.
Nell’acquisizione delle immagini, i risultati migliori si
otterranno collocando la movie su un treppiede o su un altro
supporto stabile e inquadrando un oggetto fermo.
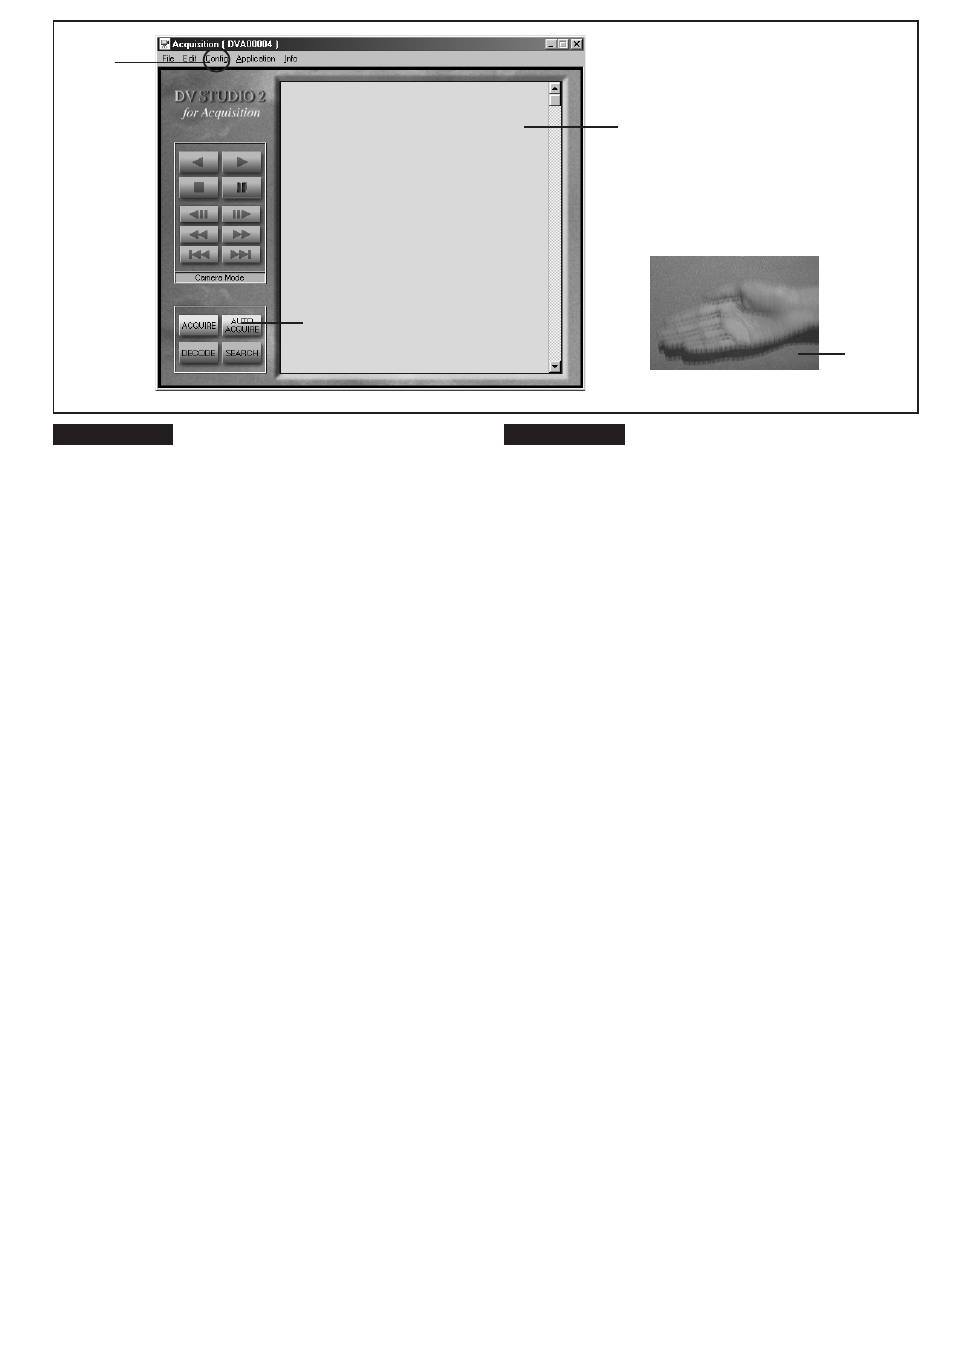
Automatically acquiring digital still pictures in
Camera Mode to create a DV album
Use the procedure described below to automatically acquire
a digital still picture through the camera lens. Connect your
Movie Camera and personal computer. Next, set the Movie
Camera to Camera Mode and open the application.
1
Select the acquisition method under [Auto
Acquire Settings] in [Config].
Select the acquisition interval under “Interval Time”.
The Interval times are subject to slight imprecisions.
2
Point the Movie Camera at the desired object.
3
Click [AUTO ACQUIRE].
Picture acquisition now starts. Still pictures are acquired
at the selected time intervals, and the acquired pictures
appear in sequence on the picture display
1
.
≥
To stop auto acquire, click [Cancel].
≥
Due to the possibility of an incorrect operation, do not
operate the Movie Camera directly when the acquire button
has been operated at the DV STUDIO2 end.
≥
As the acquired picture is compressed in the JPEG format,
its picture quality is slightly inferior to that of the original
picture.
≥
If you acquire a still picture of a scene with moving objects,
the acquired picture may be blurred or contain bars as
shown in the illustration
2
. Therefore, we recommend that
you attach the Movie Camera to a tripod or place it on
another stable support and aim it at a stationary object to
acquire a still picture.
3
1
1
2