Sony DCR-SR300C User Manual
Page 82
82
5
Touch [
COMPUTER] on the
LCD screen of your camcorder.
The [HDD Handycam Utility] window
is displayed on the computer screen.
6
Click [Easy PC Back-up] in the
[HDD Handycam Utility] window
on the computer screen.
7
Select the type of image file and
the destination folder.
A
Importing file type
Select if you want to import movies and
still images individually. In the default
setting, both the movies and still
images are set to be imported.
B
The destination folder
To change the destination folder to save
the imported images, click [Change].
The default destination is set as the [My
Pictures] folder.
8
Click [Import].
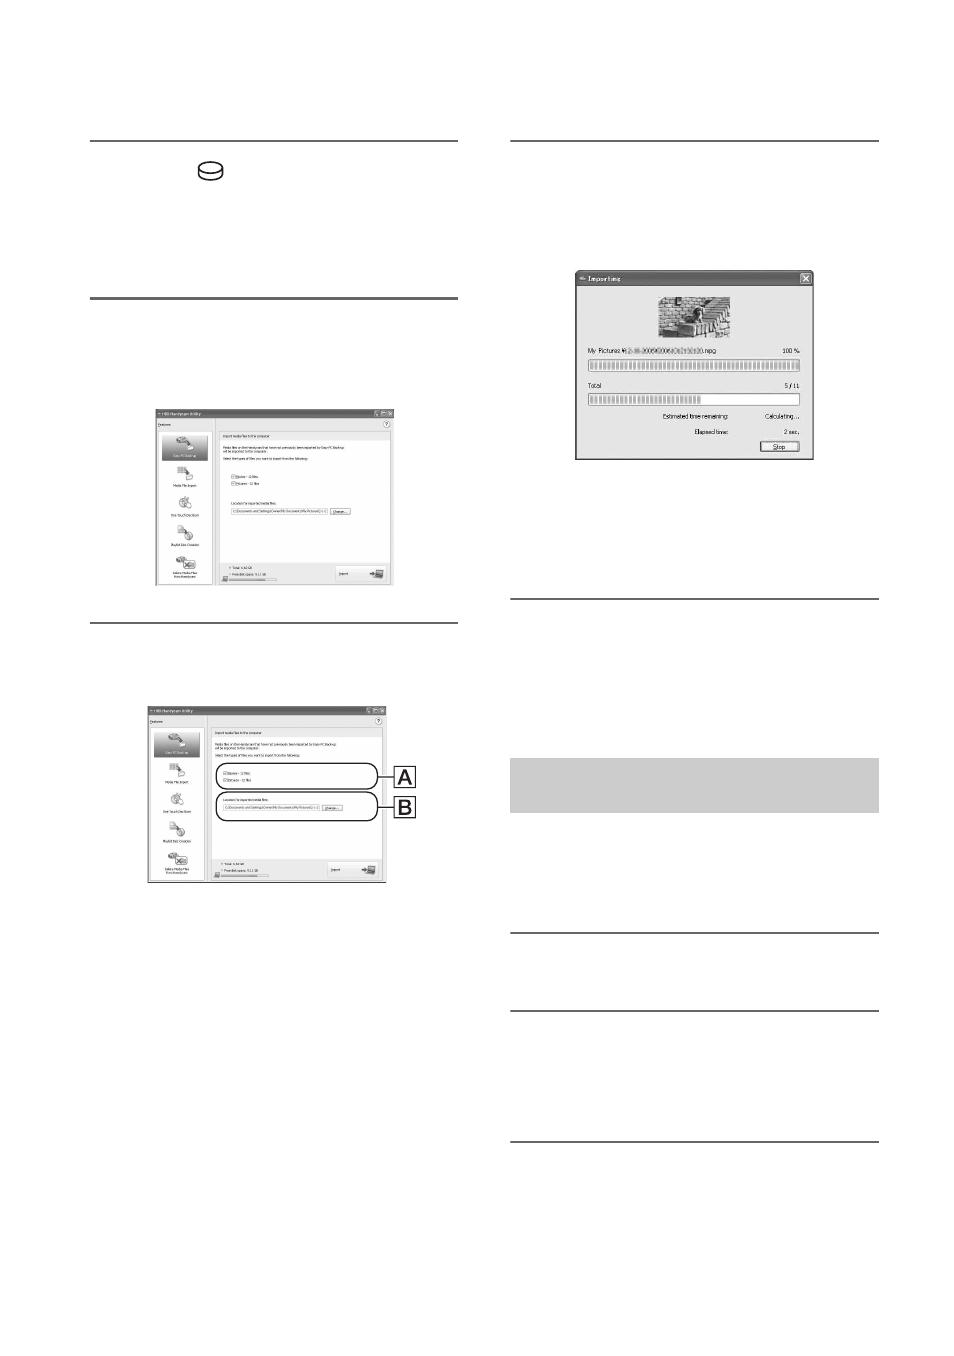
The image that have not been imported
to a computer are automatically
imported to your computer.
When the import of the data is
completed, [Picture Motion Browser]
starts up automatically and the imported
images are displayed in the window.
b
Notes
• While importing images, do not apply vibration
on the camcorder. The importing may be
terminated.
You can import selected images on your
camcorder to a computer with [Media File
Import] on the HDD Handycam Utility.
1
Turn on the computer.
2
Connect the Handycam Station to
the wall outlet using the supplied
AC Adaptor.
3
Set the camcorder onto the
Handycam Station, then turn the
POWER switch to turn on.
Importing selected images to a
computer (Media File Import)