Superimposing a message on an image, Superimposing – Sony DPP-FP70 User Manual
Page 23
23
GB
Making various printing
Superimposing a message on
an image
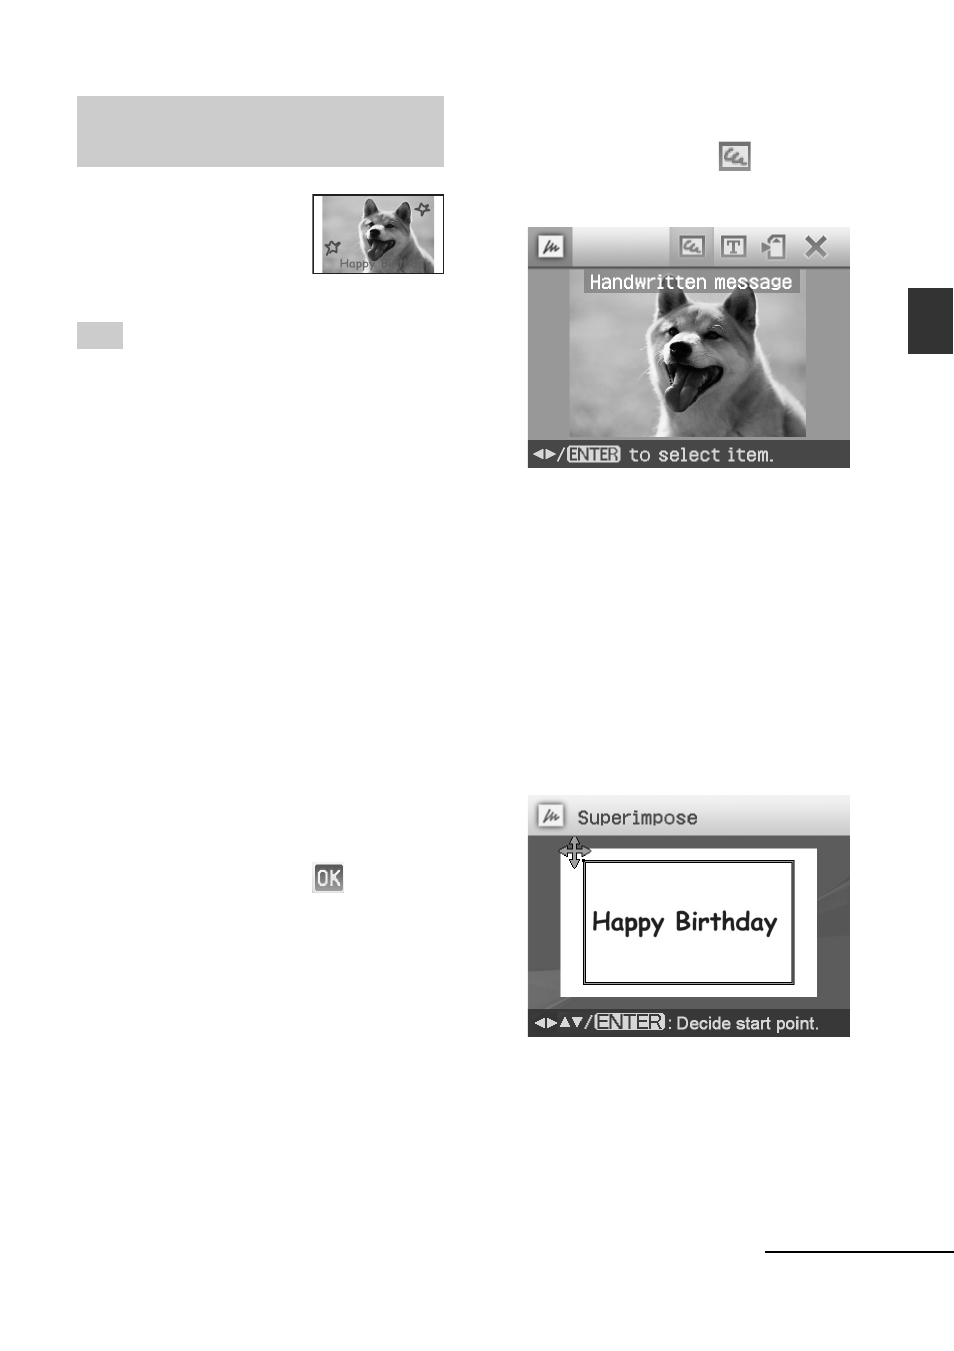
You can place a preset
message, handwritten
characters or illustrations
on an image
(superimposing).
Tip
To superimpose a handwritten characters or
illustration, draw them with a black ink pen on
a white paper, shoot them with a digital camera,
and save them on a memory card. You can also
use “Superimpose characters glossary” on page
79.
1
Display the Creative Print menu
(page 18).
2
Press g/G/f/F to select
“Superimpose”, then press ENTER.
The window used for selecting the
background image is displayed.
3
Select an image for background.
1
Press g/G/f/F to select an image
for background, then press ENTER.
The window used for adjusting the
image angle and position is
displayed. For information on
adjustment, see step 6 on page 19.
3
Press g/G to select
and then
press ENTER.
Preview window is displayed.
4
Superimpose a handwritten or
standard format message over the
background image.
x
To superimpose a handwritten
message
1
Press g/G to select
(Handwritten message), then press
ENTER.
The window for selecting an image
to be superimposed is displayed.
2
Press g/G/f/F to select an image
you want to superimpose and press
ENTER.
Select the image of handwritten
characters or illustrations you have
prepared in advance.
The trimming cursor is displayed.
3
Press g/G/f/F to specify the
beginning point of the area to be
superimposed, then press ENTER.
4
Press g/G/f/F to specify the
ending point of the area, then press
ENTER.
Continued