Overview of the system/lift unit buttons and, Indicators – Sony TAV-L1 User Manual
Page 13
13
GB
Overview of the system/
lift unit buttons and
indicators
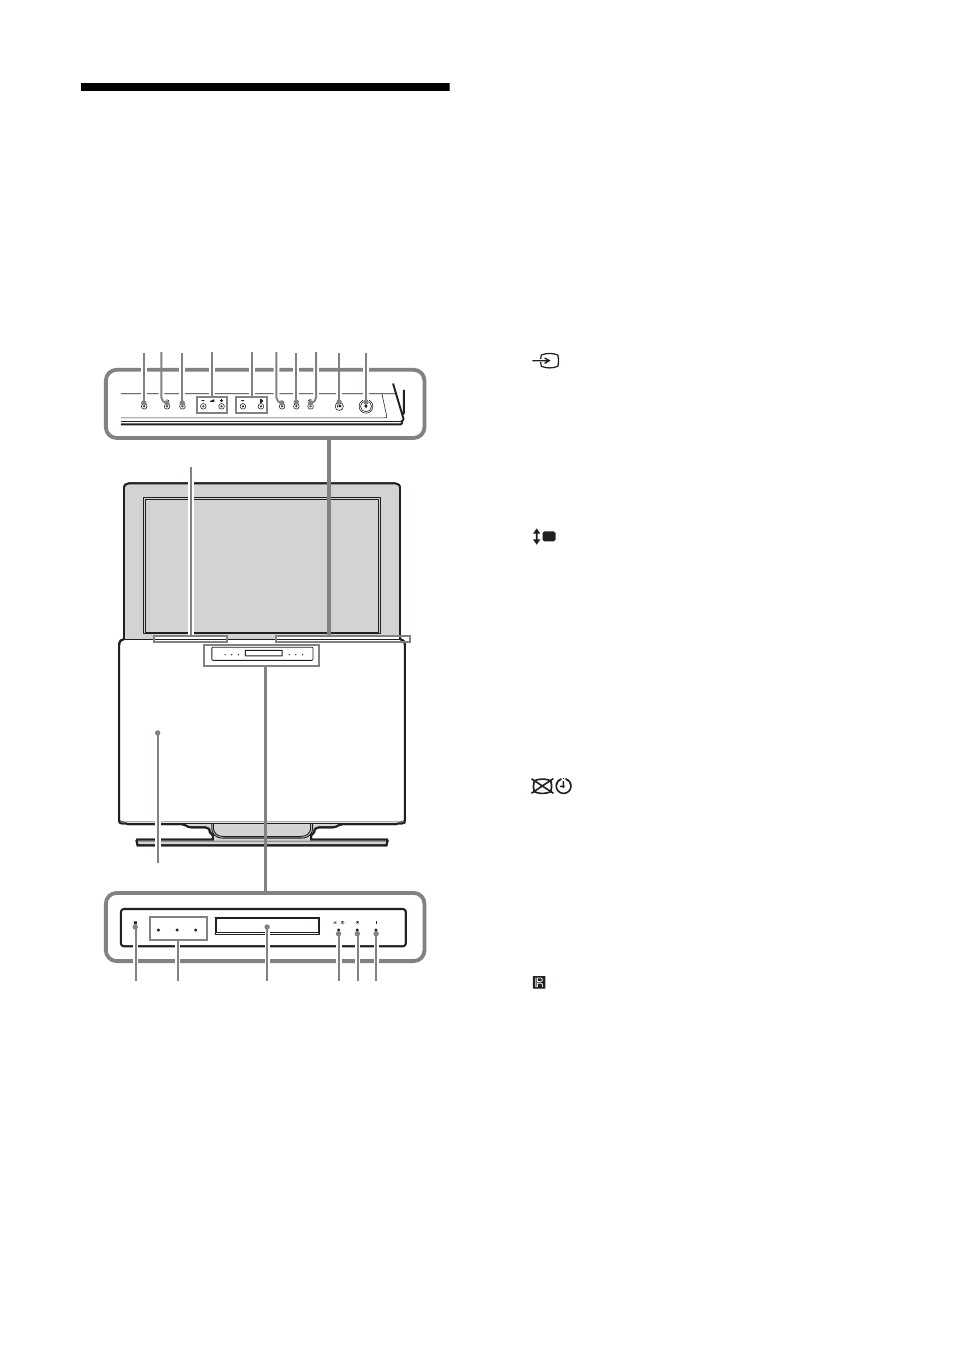
Touch panel buttons (2 – 9): Touch any of these
buttons once, to activate the panel (buttons light up), then
touch the desired button.
1
Disc slot
2 Z
– Eject
Eject a disc.
3 H
– Play
Play a disc.
4 x
– Stop
Stop a disc.
5 2
+/– – Volume
Increases (+)/decreases (–) volume.
6
PROG +/–
• In TV mode: Select next (+)/previous (–)
channel.
• In FM mode: Select next (+)/previous (–) preset
station.
7
FM
Change input select to FM directly.
8
TV
Change input select to TV directly.
9
– Input select
Select the input select of connected equipment.
Each time you press the button, the input select
changes as below.
A-TV
t D-TV*
1
t AV1 t AV2 t DVD t
AV4
t PC t HDMI t A-TV t D-TV*
1
t........
0
UP/DOWN – Lift unit up/down
Move the lift unit up/down.
qa 1
– Standby
Switch system on/off. While the system is on, if
you press "/1 on the remote, the system enters
standby mode.
qs `
– Power indicator
Lights green when system is on.
qd 1
– Standby indicator
Lights red when system is in standby mode.
qf
*
2
– Picture Off (page 42)/Timer indicator
(page 43)
• Lights up in amber when the “Sleep Timer” is
set or when a digital event is programmed.
• Lights up in green when “Picture Off” is set.
• Lights up in red when digital REC starts.
qg
Front panel display (page 71)
qh
Sound Field indicator
qj
– Remote control sensor
qk
Lift unit
*1 Note that this input select may not be available in some
countries.
*2 Note that this indicator may not light up in some countries.
2CH STEREO
AUTO
FRONT
SURROUND
TV
TV
UP/DOWN
UP/DOWN
FM
FM
PROG
PROG
qs
qd
qf
1
qg
qk
qj
qh
0 qa
8
4
2
6
5
3
7
9