Figure 2-14. installing sodimm into socket – Ampro Corporation Ampro ReadySystem 1U User Manual
Page 26
Chapter 2
Installing ReadySystem 1U Options
22
Users Guide
ReadySystem 1U
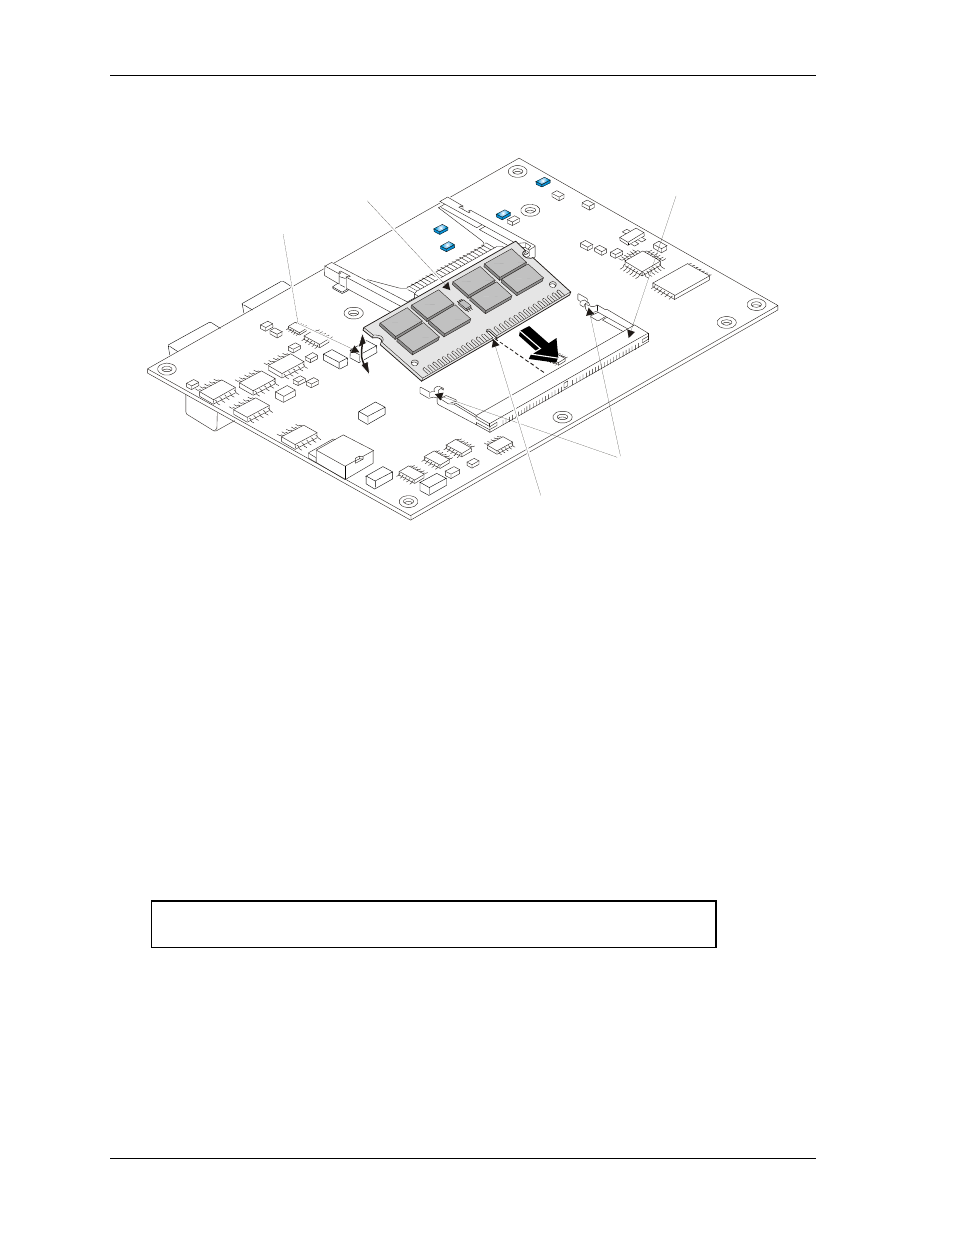
11. Insert the SODIMM into the socket at a 45
° angle to the bottom of the ReadyBoard model with
the components facing up. See Figure 2-14.
The SODIMM card edge and socket are keyed to install into the socket in only one direction.
R
d
y
S
y1U
_21a
45 Angle
°
Retaining Latches
SODIMM
SODIMM Socket (DIMM1)
Alignment Notch
Figure 2-14. Installing SODIMM into Socket
12. Press the edges of the SODIMM down between the latches, until the latches snap into place.
See Figure 2-14.
The latches should open to accept the SODIMM without any resistance. If you encounter any
resistance, you may not have inserted the SODIMM far enough into the socket.
13. If the retaining latches do not close completely on the SODIMM, remove it and repeat
Steps 10 to 12.
14. Reinstall the ReadyBoard model into the ReadySystem 1U enclosure.
Refer to the Installing the ReadyBoard procedure for more information.
15. Reconnect the cables to the ReadyBoard model.
Refer to Connecting the Cables procedure for more information.
16. Restore power to the ReadySystem and observe the boot screen for new memory recognition.
If the system does not boot or there is a problem recognizing the new memory, the new
SODIMM could be defective or the SODIMM was not properly installed or recognized.
CAUTION
Depending on BIOS Setup, some ReadyBoard products will power
on as soon as you connect DC power to the system.