Assembly – PerTronix Dougs Headers D3342 User Manual
Page 2
Part No. 0110-003115
Page 2
8-29-2011 DSL
ASSEMBLY
1. Install the headers from the bottom of the vehicle. Slide the headers and gaskets into place
and install a bolt at either end of the header to hold them in place and check for proper fit.
2. Check the passenger side header for clearance between the header primary tubes and the
frame/engine perch. A minimum of ¼” is recommended. It may be necessary to remove a
small amount of metal from the frame/engine perch for proper clearance.
3. Tighten the header bolts evenly to a torque of approximately 35 Foot Pounds.
4. Install the spark plugs and connect the wires to the proper plug.
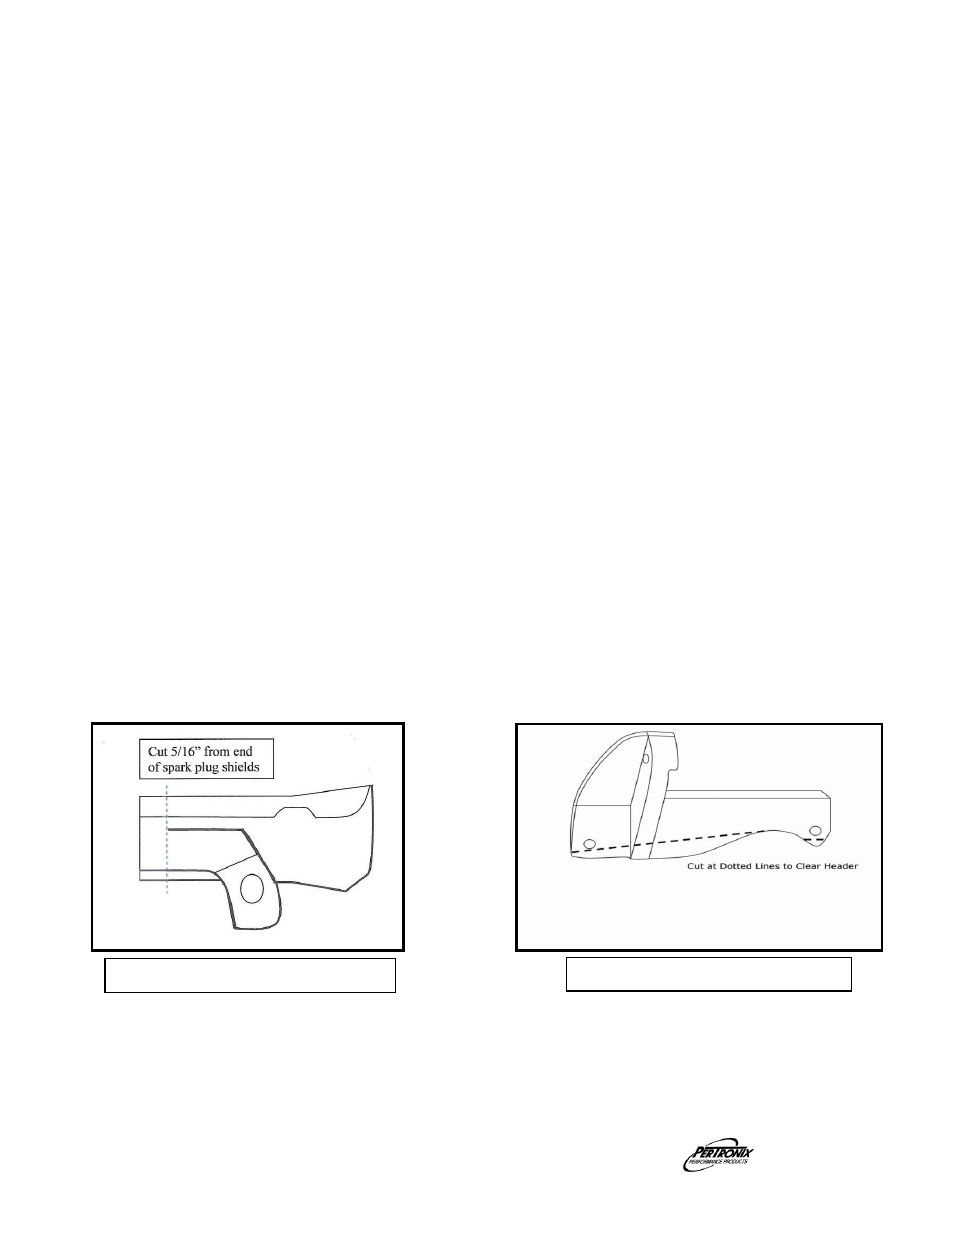
5.
If you reuse the spark plug heat shields, you will need to trim 5/16” per Illustration ‘A’
6. Install any accessories that were removed during the header installation.
7. NOTE: 73-75 models with left side A/C will need to modify
the bracket per Illustration ‘B’
1968 models with power steering will need to fabricate & install a spacer per Illustration
‘C’
1969-72 models with right side A/C will need to modify the bracket per Illustration
‘D’
1968-72 Models with A/C will need to fabricate and install a spacer under the A/C support
bracket per Illustration ‘E’
8. Install the reducers and determine the connection to the exhaust system.
9. Weld the reducers to the exhaust system and install them onto the headers utilizing the
gaskets and bolts supplied.
10. Check to make sure that all the wiring, brake lines, hoses, etc. are clear of the headers or
any exhaust component.
11. Connect the negative battery cable.
Illustration ‘B’ 73-74 A/C bracket
Illustration ‘A’ Spark Plug Shields