PerTronix JBA Exhaust 6625S User Manual
Page 3
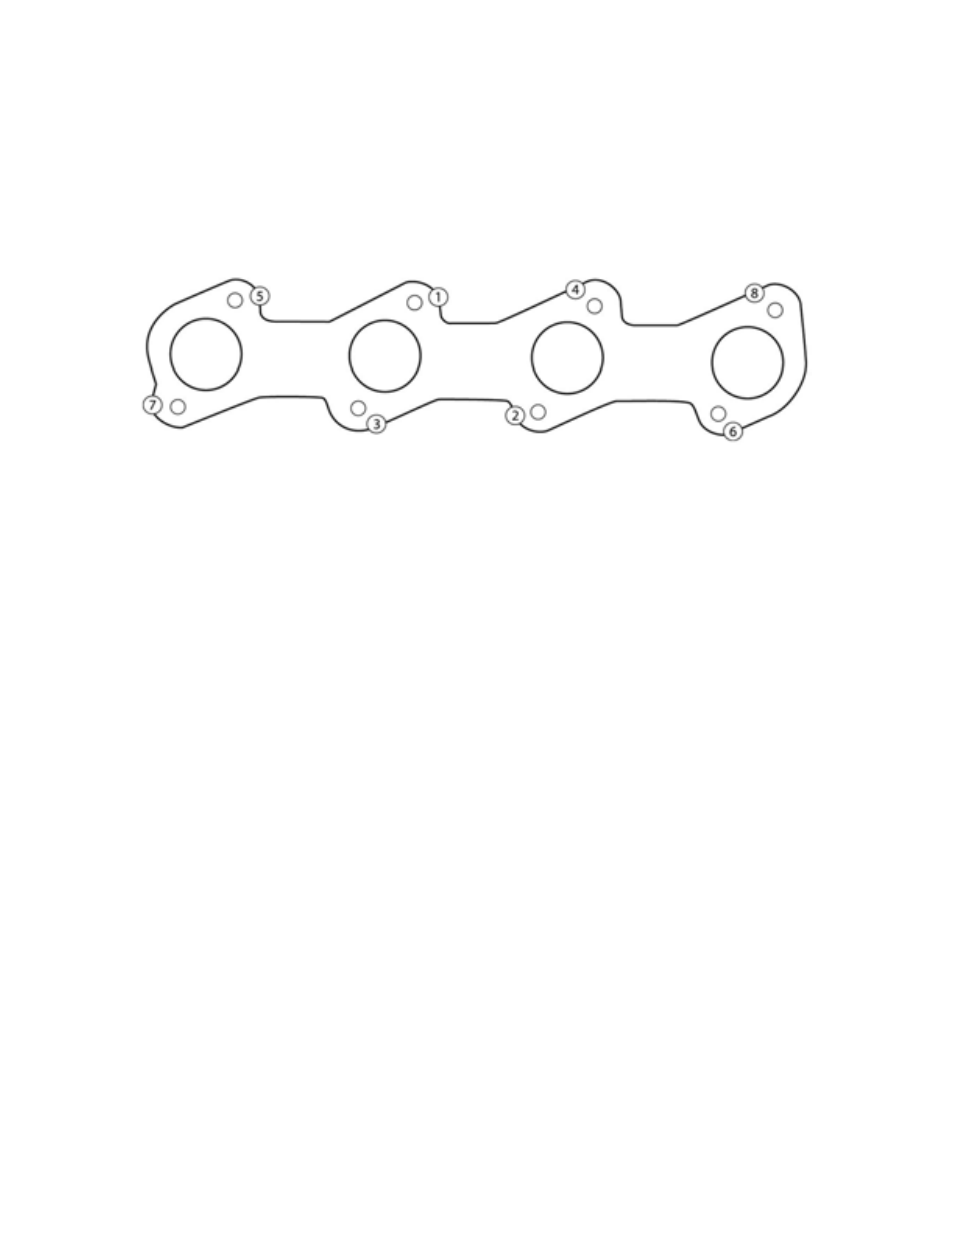
manifold to the point where they barely touch. Second, using the same inside-out
pattern, tighten each bolt until finished. This method will help prevent leakage and will
give the user the best possible performance out of their pair of headers. Below is the
proper torque sequence for your particular set of headers:
1.
Place vehicle in a location where the floor is solid and flat, with adequate lighting.
Do not attempt to work on a hot engine. Heat causes metal to expand and makes
removal of fasteners difficult at best. Disconnect the battery cables from the
battery. Raise the front of the vehicle to obtain adequate access to the bottom
exhaust manifold flanges. Use large-base jack stands to support the vehicle.
Do
not rely on the jack!
Block the tires to prevent the vehicle from rolling off the
jack stands.
2.
Spray WD-40 or some type of penetrating oil on all accessible fasteners and
fittings before attempting to remove them.
3.
Disconnect the exhaust system from the catalytic converter assembly. Unplug O2
sensors and remove the converter assembly from the vehicle.
4.
Unbolt the starter from the bell housing and let it hang out of the way.
5
Loosen the EGR tube located at the rear of the driver side manifold.
6.
Remove the motor mount nut under the passenger side manifold.