PerTronix Ignitor II 92866 User Manual
PerTronix For the car
440 E. Arrow Highway, San Dimas, CA. 91773
909-599-5955
www.pertronix.com
LIMITED WARRANTY
Pertronix, Inc. Warrants to the original Purchaser of its solid-state ignition system (product) that the
Ignitor, magnet assembly and wiring (components) shall be free from defects in material and workmanship for a
period of (30) months from the date of purchase.
If within the period of the foregoing warranty Pertronix finds, after inspection, that the product or any
component thereof is defective, Pertronix will, at its option, repair such products or component or replace them
with identical or similar parts PROVIDED that within such period Purchaser:
1.
Promptly Notifies Pertronix, in writing, of such defects.
2.
Delivers the defective products product or component to Pertronix (ATTN: Warranty) with proof of purchase
date; and
3.
Has installed and used the product in a normal and Proper manner, consistent with Pertronix printed
instructions.
THE FORGOING LIMITED WARRANTY IS EXCLUSIVE AND IN LIEU OF ALL OTHER WARRANTIES,
WHETHER EXPRESSED OR IMPLIED, INCLUDING AND IMPLIED WARRANTY OR MERCHANTABILITY OR
FITNESS FOR A PURPOSE.
THE FURNISHING OF A REPAIR OR REPLACEMENT COMPONENTS SHALL CONSTITUTE THE SOLE
REMEDY OF PURCHASER AND THE SOLE LIABILITY OF PerTronix WHETHER ON WARRANTY, CONTRACT
OR FOR NEGLIGENCE, AND IN NO EVENT WILL PerTronix BE LIABLE FOR MONEY DAMAGES WHETHER
DIRECT OR CONSEQUENTIAL.
12-VOLT NEGATIVE GROUND INSTRUCTIONS
GENERAL INFORMATION
1. See our website (www.pertronix.com) for the latest product information.
2. IMPORTANT: Read all instructions before starting installation.
3. WARNING!!! DO NOT USE WITH SOLID CORE IGNITION WIRES.
4. The Ignitor II ignition can be used in conjunction with most ignition coils rated at 0.45 ohms or
greater.
5. All external resistors must be removed to achieve optimum performance from the Ignitor II ignition
system.
6. The Ignitor II is compatible as a trigger for most electronic boxes.
IGNITOR INSTALLATION
1. Remove distributor cap and rotor. Do not disconnect spark plug wires from cap.
Examine cap and rotor for wear or damage. Replace as needed.
2. Remove point wires from the negative (-) side of the coils.
3. Remove entire breaker plate assembly.
4. The Ignitor does not require any modification to distributor. Therefore the points,
condenser, and hardware can be used as backup.
5. Using original screws install new Ignitor breaker plate.
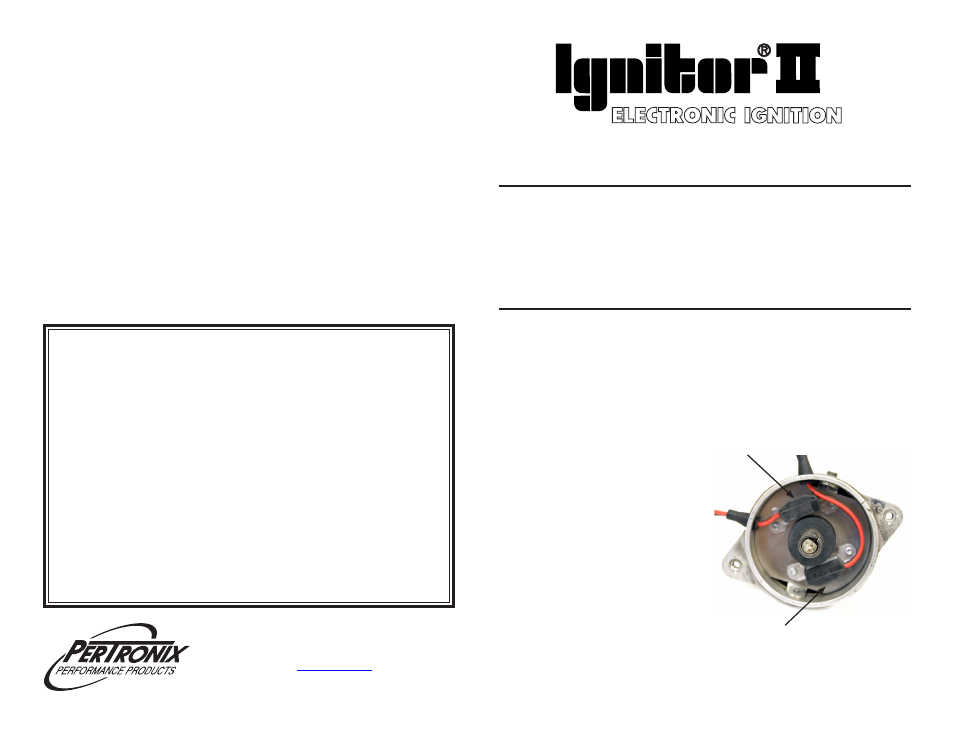
6. Primary module wires exit through
1A exit hole and it triggers cylinders
1-3-2.
7. Secondary module wires exit
through 1B exit hole and it triggers
cylinders 5-6-4. Note: Primary
module is located furthest from the
wire exit holes (See Diagram).
8. Install magnet sleeve over distributor
shaft, onto point cam. Rotate sleeve
until a slight locating position is felt
before applying pressure. With the
sleeve lined up on point cam, press
down firmly insuring sleeve is fully
seated.
9. Replace rotor and distributor cap. Make sure all spark plug wires are securely
attached
Primary Module
Secondary Module
FOR PART NUMBER: 92866