Effect red eye fix, Pictbridge – Samsung EC-L73ZZSBA-US User Manual
Page 49
《48》
Effect
Red eye fix
: Captured images will be stored in black and white.
: Captured images will be stored in a sepia tone
(a range of yellowish brown colours).
: Captured images will be stored in a blue tone.
: Captured images will be stored in a red tone.
: Captured images will be stored in a green tone.
: Save the image in negative mode.
■ By using the camera’s digital processor, it is possible to add special effects to
your images.
1. Press the Edit button.
2. Press the [EFFECT] menu button.
3. Select a desired sub menu by using the smart button.
RED
BLUE
SEPIA
B & W
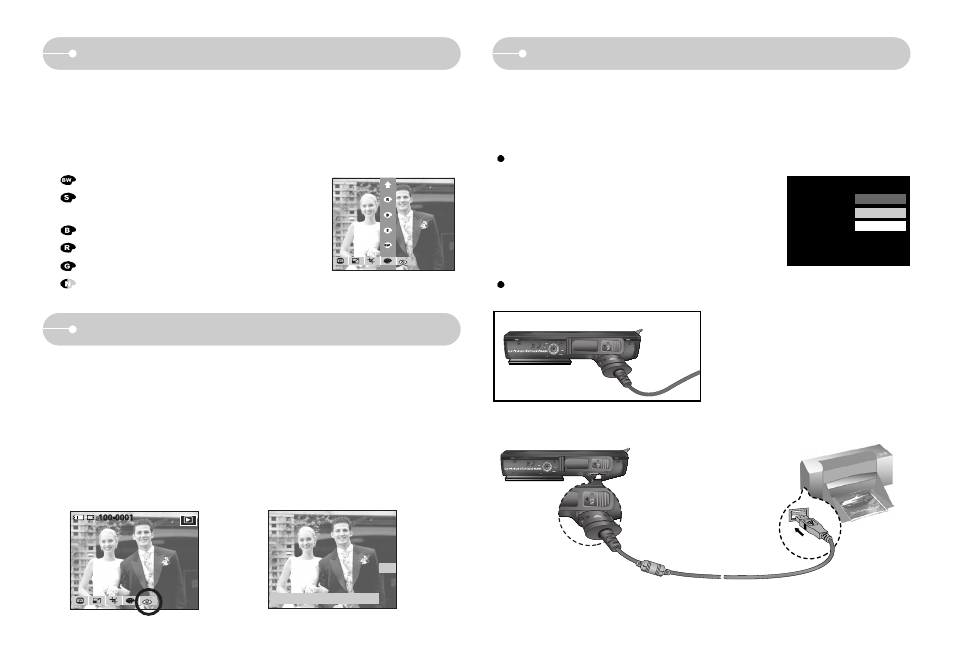
■ When a shot with "red eye" is played back, pressing this button can remove the
red eye from the subject.
1. Press the Edit button.
2. Press the [Red Eye Fix] menu button.
3. Press the OK button to remove the red-eye effect automatically.
4. When you press the OK button the red-eye fixed image will save as a new file
name.
OK
Save:OK Exit:BACK
PictBridge
■ You can use the USB cable to connect this camera to a printer that supports
PictBridge (sold separately) and print the stored images directly. Movie clips and
voice files cannot be printed.
Connecting the Camera to a Printer
Setting up the camera for connection to a printer
1. Connect the camera to a printer’ s USB port with the
supplied USB cable.
2. Select the [Printer] menu by using the smart button.
USB
Computer
Printer
- EC-L73ZZSBD-E1 EC-L73ZZBBA-E1 EC-L73ZZBBA-AR EC-L73ZZBBE-E1 EC-L73ZZSBB-E1 EC-L73ZZBBA-FR EC-L73ZZBBG-E1 EC-L73ZZSBC-E1 EC-L73ZZSBA-DE EC-L73ZZSBA-RU EC-L73ZZSBA-GB EC-L73ZZBBF-E1 EC-L73ZZSBE-E1 EC-L73ZZBBB-FR EC-L73ZZSBF-E1 EC-L73ZZBBC-E1 EC-L73ZZSBG-E1 EC-L73ZZSBA-FR EC-L73ZZBBA-DE EC-L73ZZBBA-US EC-L73ZZBBA-TW EC-L73ZZSBH-E1 EC-L73ZZBBB-E1 EC-L73ZZSDA-TW EC-L73ZZSBA-E1 EC-L73ZZBBA-RU EC-L73ZZBBD-E1 EC-L73ZZBDA-TW EC-L73ZZBBB-AR EC-L73ZZBBA-GB EC-L73ZZSBA-TW EC-L73ZZBBH-E1