Install the lamp, 2c 2d 2a – LBL Lighting Top II W User Manual
Page 3
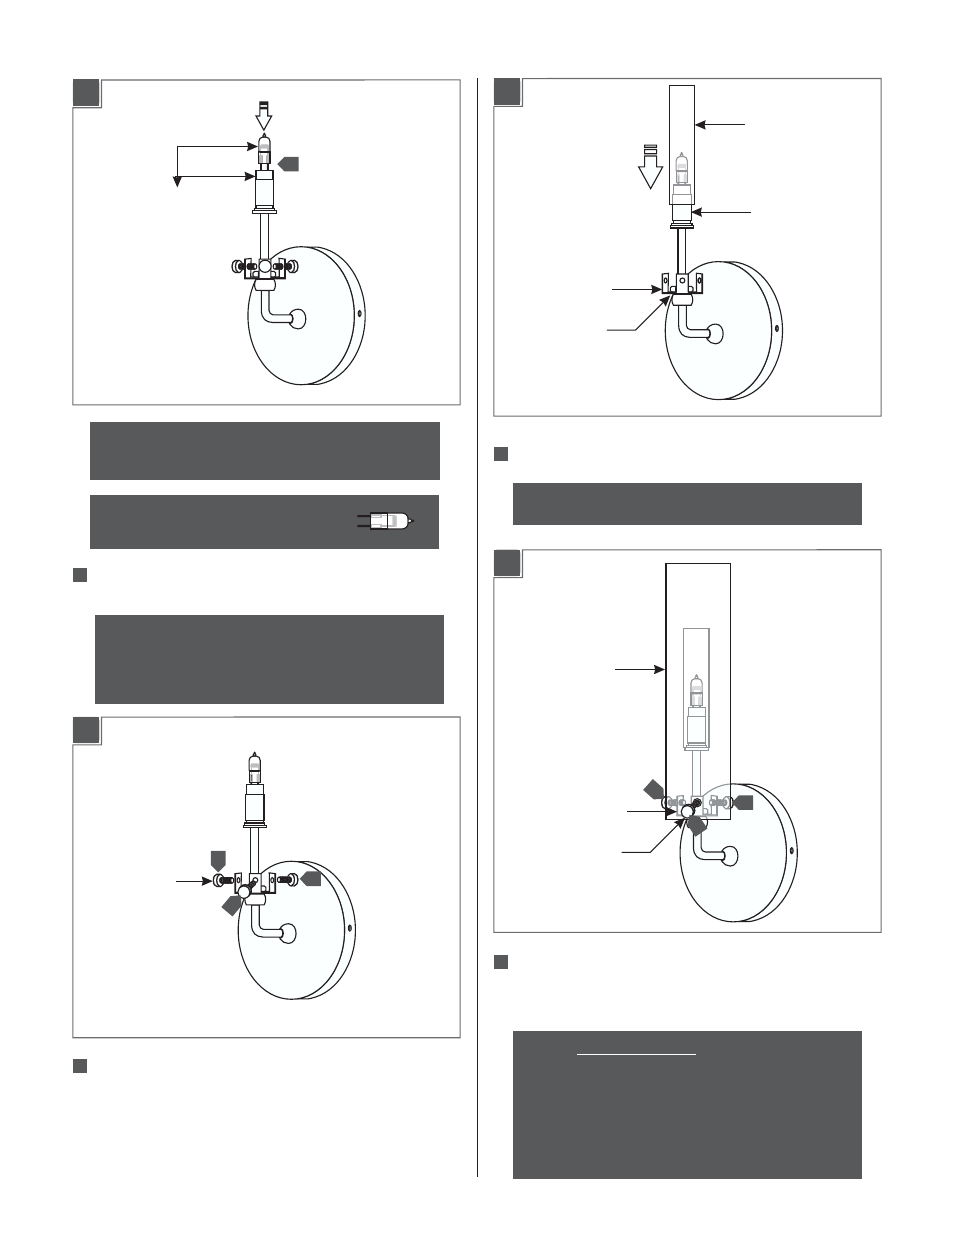
3
Use
Watt Bi-Pin Xenon (Xelogen)
MAX 35
Lamp.
NOTE:
Use only your fingers and a soft cloth to install
the lamp.
LAMP
SOCKET
Push the lamp pins completely into the socket holes.
WARNING: RISK OF FIRE
Never replace a Xenon (Xelogen) lamp with a regular
Halogen lamp.A regular Halogen lamp requires a protective
glass shield.
Remove the three thumb screws.
THUMB
SCREW
Carefully slide the glass tube ono the socket assembly.
GLASS SHADE
BRACKET
THUMB SCREW
NOTE:
To replace the lamp:
- Turn the power to the fixture off.
- While supporting the glass shade, remove the three
thumb screws.
- Remove the tube glass.
- Remove the old lamp.
- Follow 2A through 2D.
GLASS TUBE
BRACKET
THUMB SCREW
Align the glass holes with the bracket holes. Replace and
tighten the three thumb screws to secure the glass shade in
place.
SOCKET ASSEMBLY
NOTE:
Omit the step 16 for Top Wall II with opal glass.
2C
2D
2A
1
1
2B
Install the Lamp
2
3
4
2
2
2
4
4
4
- KENDALL (2 pages)
- LINNET PENDANT (1 page)
- MEZZO GP (4 pages)
- MEZZO GPCF (4 pages)
- MEZZO P (4 pages)
- MEZZO PCF (4 pages)
- MILO S (4 pages)
- MILO SCH (4 pages)
- RHUTHM S (2 pages)
- SOMEDAY GP (2 pages)
- SOMEDAY GPCF (2 pages)
- SOMEDAY P (2 pages)
- SOMEDAY CF (2 pages)
- Isla SP (1 page)
- Mason Classic (1 page)
- Mason SP (2 pages)
- Mason SPCF (2 pages)
- Aiko SP (1 page)
- Aiko SPCF (1 page)
- Olivia SP (1 page)
- Olivia SPCF (1 page)
- Zuri P (2 pages)
- Vera P (2 pages)
- Vera PCF (2 pages)
- Tindra P (4 pages)
- Akari P (1 page)
- Akari PCF (1 page)
- Isis GP (2 pages)
- Isis GPCF (2 pages)
- Rock Candy Cylinder SP (1 page)
- Rock Candy Cylinder SPCF (1 page)
- Miyu Classic SP (1 page)
- Miyu SP (2 pages)
- Miyu SPCF (2 pages)
- Sora SP (2 pages)
- Sora SPCF (2 pages)
- Julep S (2 pages)
- Julep SCF (2 pages)
- Pavia (2 pages)
- Rhythm PCF (2 pages)
- Rhythm P (2 pages)
- Juniper SF (4 pages)
- Juniper SFCF (4 pages)
- Alaya SP (4 pages)
- Icicle II SP (2 pages)