Install the cable post – LBL Lighting Scarlett SD User Manual
Page 3
3
Place all wires and wire nut connections properly inside
the electrical box.
Loosen the set screw on the primary strain relief.
Align the canopy center hole with the crossbar center
hole.
Slide the canopy up against the ceiling and secure it in
place by tightening the primary strain relief into the
crossbar. Do not turn the cord.
Push the cord into the canopy and line up the marked
point on the cord with the bottom of the primary strain
relief.
Tighten the plastic set screw to secure the cord.
STRAIN RELIEF
CORD
SET SCREW
3C
6
7
8
9
10
11
Install the Cable Post
4A
7
1
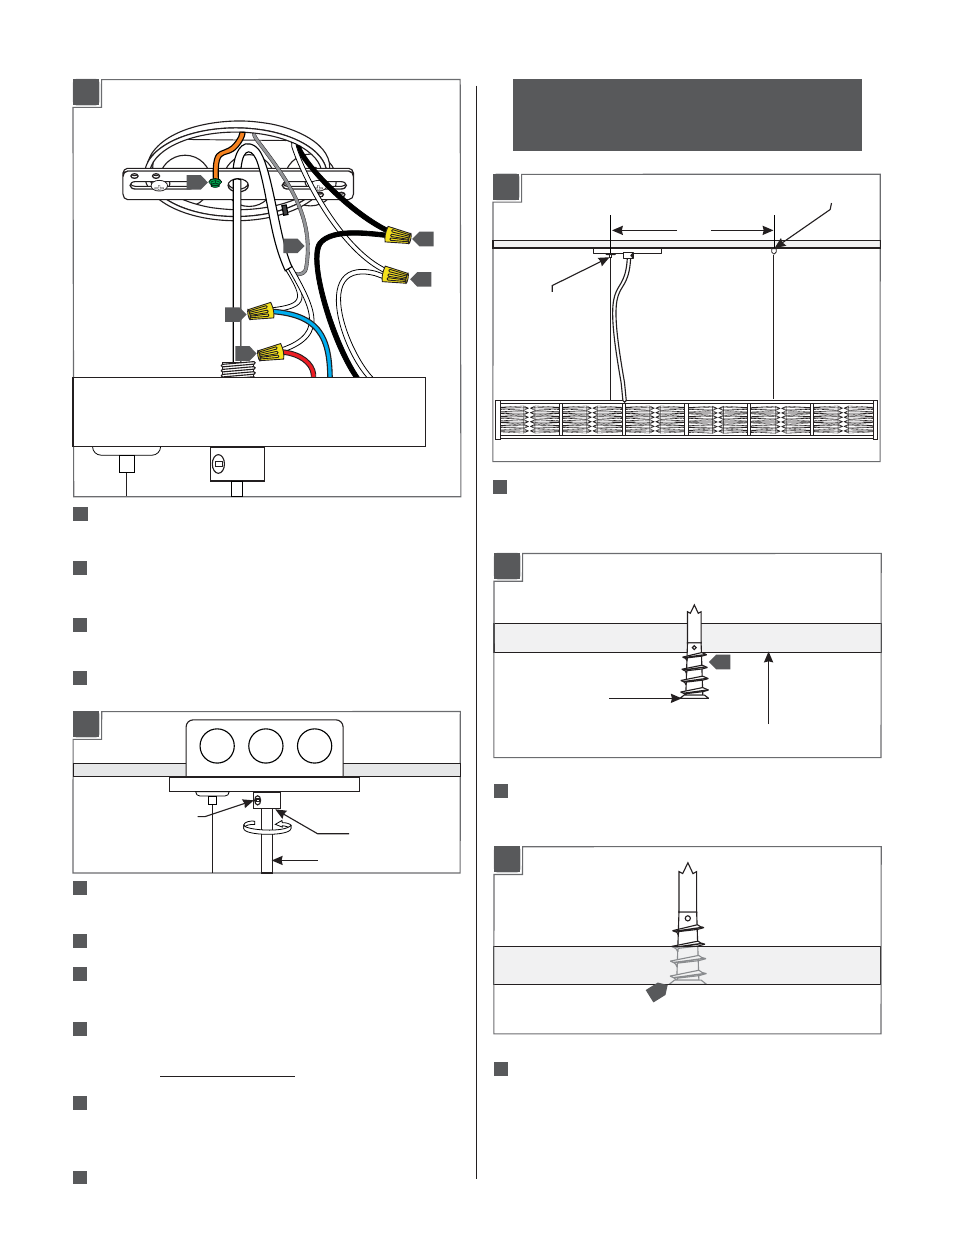
Mark the cable post location point 30.56” away from the
center cable clutch on the canopy.
CABLE CLUTCH
CAUTION:
Make sure to support the fixture while
installing, an assistant will be needed to complete
the remaining steps.
30.56”
CABLE POST LOCATION
Screw the anchor in the rest of the way with a Phillips
screwdriver.
4C
7
3
3
4B
7
2
Tap the anchor at the marked point up to the threaded portion
with a hammer.
ANCHOR
2
CEILING
3B
10
2
2
2
3
2
4
Reconnect the power cord wires to their original connections
(reversal of 2A).
Ground the fixture to a suitable ground in accordance
with local electrical codes.
Connect the white ballast wire to the neutral power line
wire.
Connect the black ballast wire to the hot power line
wire.
5
4
5
3
2
2
3