Install the lamps, 1g 1h, 2a 2b – LBL Lighting Baybridge 5 Light Chandelier CH User Manual
Page 3
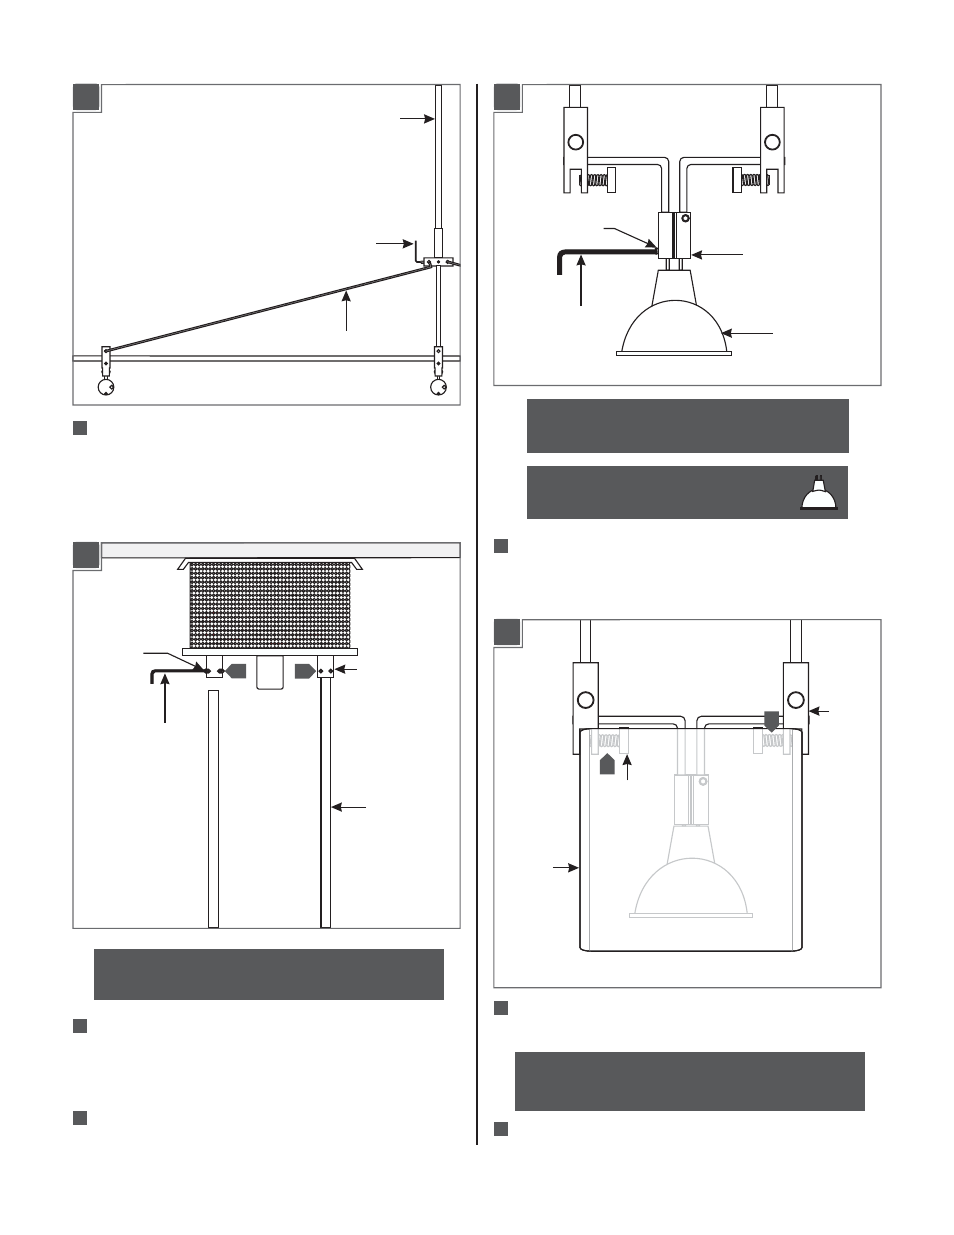
Install the lamps
M4 SET
SCREW
2 MM ALLEN
WRENCH
Measure the distance between the canopy power posts and
the desired height of the chandelier. Measure and mark this
distance on the suspension rods, and cut the suspension rods
with a hacksaw.
Insert the rods completely into the canopy power posts and
tighten the four M4 set screws with the 2mm Allen wrench.
SUSPENSION
RODS
CANOPY POWER
POST
NOTE:
To reduce the risk of a burn or electric shock
during relamping, disconnect the power to the fixture.
Use
Watt MR16 Front Cover
MAX 50
Halogen Lamp With Each Socket.
LAMP
SOCKET
Push the lamp pins completely into the socket holes and
tighten the two M3 set screws with the 1.5mm Allen wrench to
secure the lamp in place.
M3 SET SCREW
1.5 MM ALLEN
WRENCH
Slide the glass shade up into the socket post and secure it in
place by tightening the two thumb screws.
THUMB
SCREW
GLASS
SHADE
NOTE:
DO NOT OVER TIGHTEN the thumb screws
which may cause the glass shade to break.
3
Repeat steps 1 & 2 for the remaining sockets.
NOTE:
It is recommended that one person hold the
chandelier while the electrician finishes the installation.
SOCKET
POST
Hook one end of the cross metal arm to the socket post and
hook the other end to the suspension rod post.Tighten the
M4 set screw on the suspension rod post with the provided
2mm Allen wrench. Repeat this step for the other cross metal
arm.
2 MM ALLEN WRENCH
SUSPENSION ROD
CROSS METAL ARM
11
1G
1H
12
13
13
13
1
2A
2B
2
3
2
2