4 connecting to a pc – Matrix Orbital LCD2041 User Manual
Page 9
• Extended temperature available for extreme environments of -20C to 70C
• Extended voltage and efficient power supply available
• Built in font with provision for up to 8 user defined characters
• Use of up to 127 modules on the same 2 wire I
2
C interface
• Ability to add a customized splash / startup screen
• Software controlled contrast and brightness with configurable time-out setting up to 90 minutes
• Horizontal or vertical bar graphs
• Fits Matrix Orbital’s mountings without any modifications
1.4
Connecting to a PC
The LCD2041 connects seamlessly to a PC and it is an excellent means of testing the functionality. To
connect your display to a PC, you will require a standard RS-232 9-pin serial cable such as the one pictured
in
figure 6 on page 3
, as well as a modified 5V power adapter such as the one pictured in
figure 3 on page 2
.
In order to connect your display to a personal computer follow these easy instructions:
1. Plug the serial cable into the com port you wish to use.
2. Connect the modified 5V power adapter to a power lead from your PC power supply (you will have to
open your computer case).
3. Connect the serial cable to the DB-9 connector on the back of the display.
4. Connect the 5V power adapter to the 4-pin connector on the back of the display.
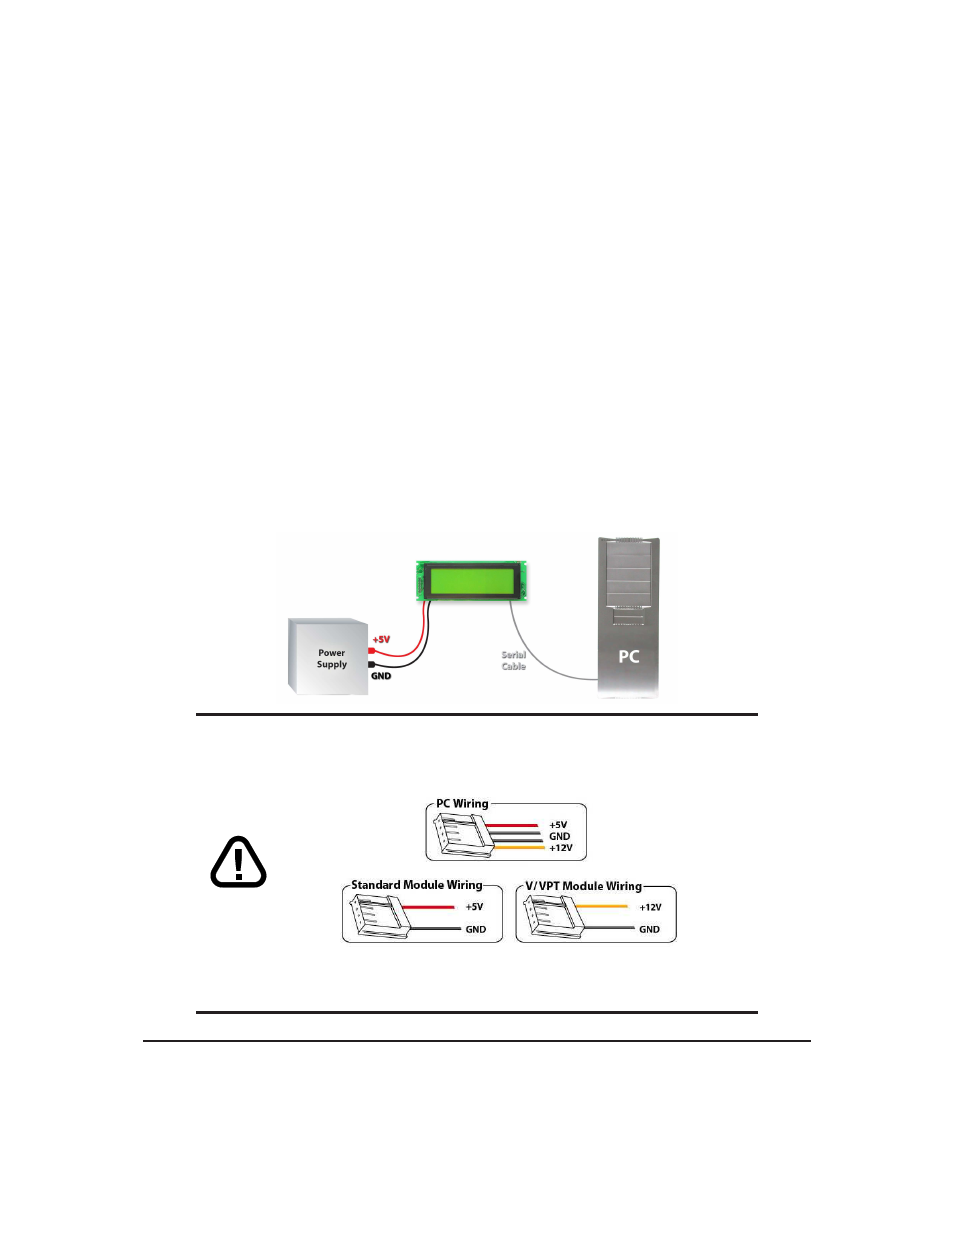
WARNING
DO NOT use the standard floppy drive power connector,
as this will not provide you with the correct voltage and will damage the
display module.
Figure 10: PC vs Matrix Orbital Display Module Wiring
Matrix Orbital
LCD2041
5