Assembly, 6 assembly, 6b 6a – Wagner ProCoat Plus User Manual
Page 6: Start, You will need
English
6
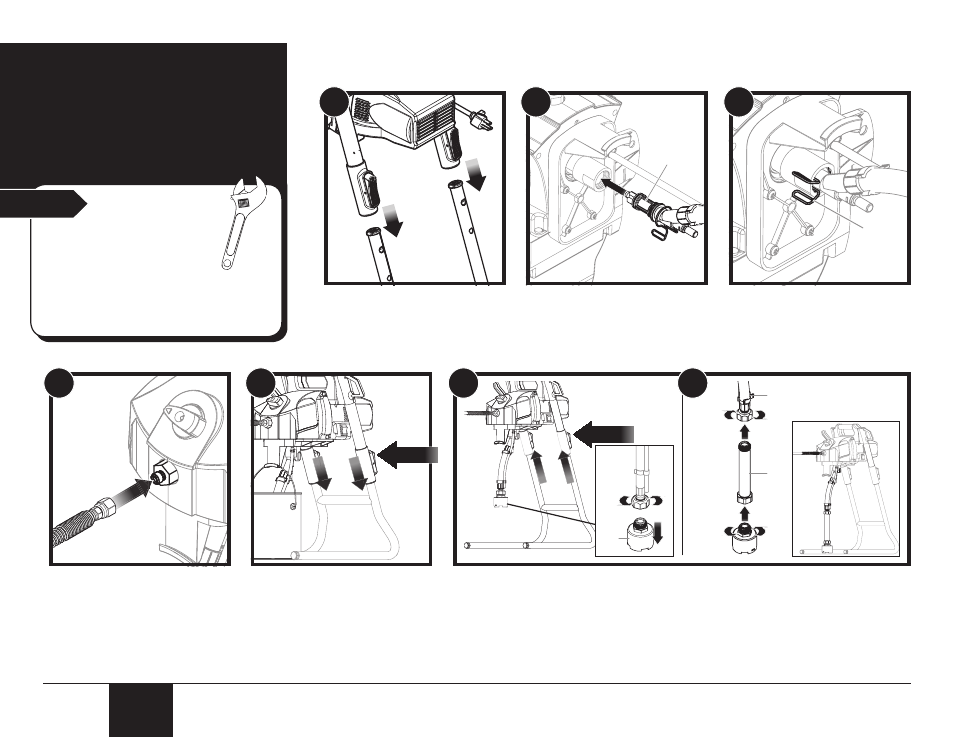
1. Assembly
Start
1. Slowly guide the button housings
over the ends of the stand until
they snap into place.
2. Carefully lay the sprayer on its
back. Insert the suction tube (a)
into the sprayer as shown.
Be sure it is fully inserted.
3. Squeeze the ears of the clip
(b) and place it inside the inlet
fitting to hold the suction tube in
place.
Place the sprayer upright again.
You will need:
• Adjustable wrench
ImPORTanT: Do not plug in the
power cord until assembly is
complete.
note: It will be much easier to
attach the hose to the sprayer if
you uncoil it first.
4. Thread one end of the spray
hose to the outlet valve on the
sprayer.
Tighten the hose with an
adjustable wrench.
5. One gallon setup -
Press the stand buttons and
slide the sprayer down the
stand as far as it will go (it will
lock into place).
Hook the material container on
the pail bracket.
6a. Five-gallon setup -
Press the stand buttons and slide the
sprayer up until it clicks into place.
Unscrew the inlet filter (c) and remove.
note: You may have to stand on the “feet”
of the stand in order to slide the sprayer up.
6b. Thread the inlet filter into the suction
extension (d).
Thread the suction extension into the
bottom of the suction tube (e).
ImPORTanT: DO nOT attach the bucket
handle to the pail bracket.
1
4
(a)
2
5
(b)
3
PRESS
(d)
(e)
PRESS
“FEET”
(c)
6b
6a