Quick start guide for your mbr – Town Mongolian Barbecue Ranges User Manual
Page 6
FOOD SERVICE EQUIPMENT CO., INC. • 72 Beadel St. • BKLYN • NY 11222
Quick Start Guide for your MBR
The MBR Grill will give you optimal service provided it is installed and maintained properly. This is
a brief overview of key points that must be observed during the installation and operation of the unit.
Please refer to the Owner’s Manual for more detailed information. If you have any general installation or
service questions please call Town at (718)388-5650 Monday to Friday, 9 AM to 5PM.
INSTALLATON: A licensed plumber familiar with commercial kitchen gas equipment should install this
appliance. The following is only an overview. Town assumes no responsibility for improper installation
or testing. If you have any problems consult your installer and/ or your local gas company.
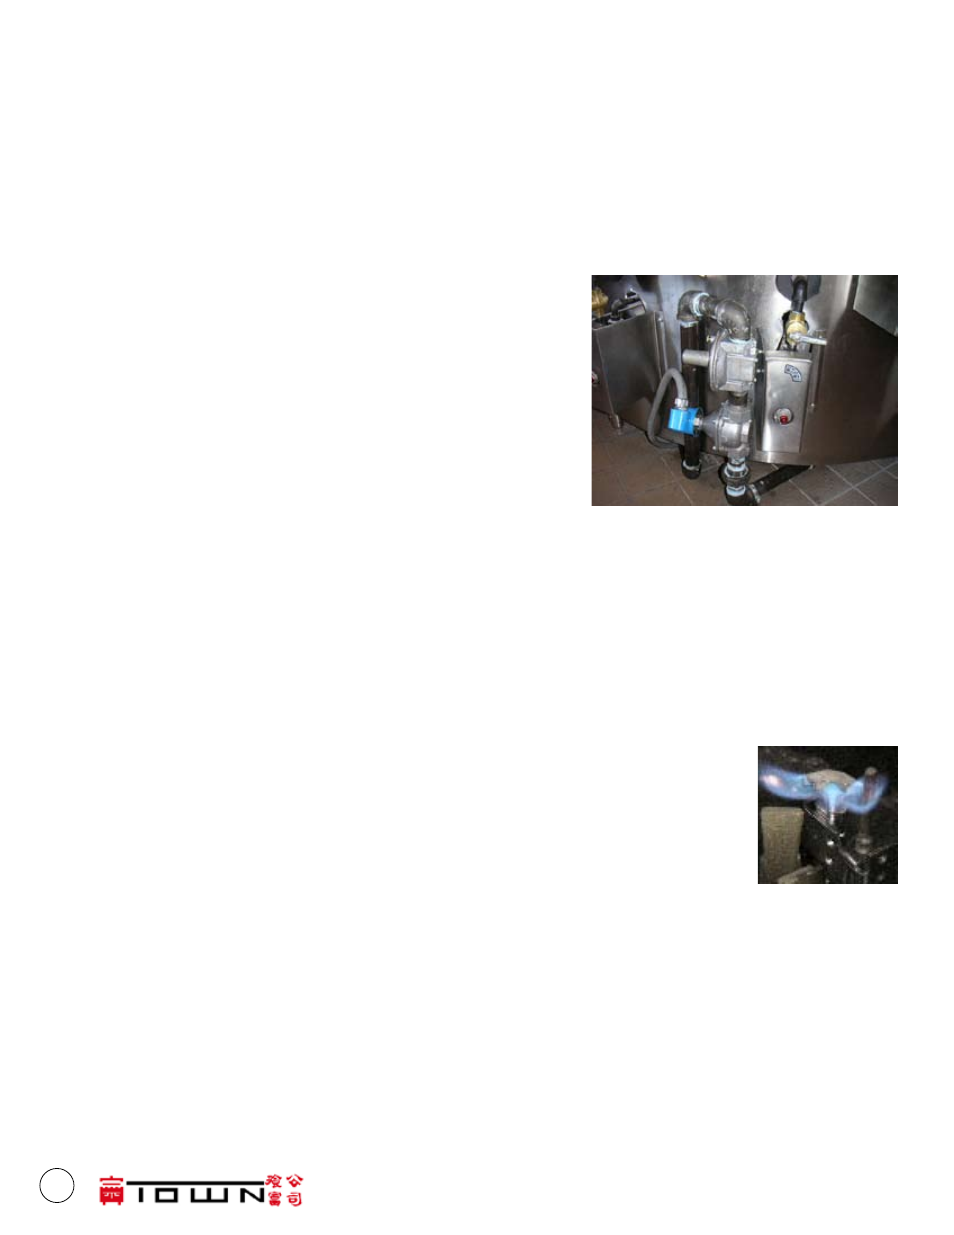
1. The supplied regulator must be installed on the outside of
the unit, NEVER install the regulator in the interior tub of the
MBR. The supplied vent limiter must be attached to the regu-
lator and not be blocked from venting. A main gas valve to
shut off the gas to the unit must be installed before the pres-
sure regulator. A drip leg must be installed at the gas feed.
The pilot safety system is sensitive to gas line debris, which is
common in new commercial installations. Failure to install
the trap will void the warranty on the safety control(s).
2. We recommend a 2” gas supply line. Minimum line size is
1½”. Large MBR units will not perform as designed if an undersized gas line is used. It will not pro-
vide adequate supply volume.
3. After installation and leak testing the unit can be lit (see directions in owners manual). With all gas
appliances ON and all burners of the MBR turned ON, measure the pressure at the test tap in the
MBR. The 1/8” test tap is located on the manifold section above the access doors. Natural gas pres-
sure should be 6” WC. If less than 6" WC is measured, check to insure the regulator is properly set. If
you cannot obtain a reading of 6” WC the unit will not deliver maximum performance. The pressure
regulator can be adjusted by removing the brightly finished cap screw located at the top of the regu-
lator revealing a white nylon adjusting screw. Turn this shaft down to increase
pressure.
4. With all burners ignited, check for proper combustion indicated by a clear blue
flame. The unit is pre-set at the factory. However, regional gas blends and move-
ment in transit may necessitate on-site adjustment. See page 4 for instructions on
how to adjust the air/gas mixture. Check that pilot and thermocouples are prop-
erly positioned and have not shifted during shipment of the unit. Tip of thermo-
couple should be 3/8" above the pilot flame. The body of the thermocouple should be engulfed by
the pilot flame.
5. Follow the instructions in the Owners’ Manual to season the cooktop before using. This begins the
procedure to create a non-stick surface.
6. The MBR requires a pre-heat period of up to 60 minutes to achieve operating temperatures. When
proper operating temperature is reached, turn OFF every other burner. Use of all burners during op-
eration will shorten the life span of the thermocouples, safety controls and cook top.
6