Hawkeye Float User Manual
Page 3
Float Guide Kit Instructions, April 2010
3
►
►
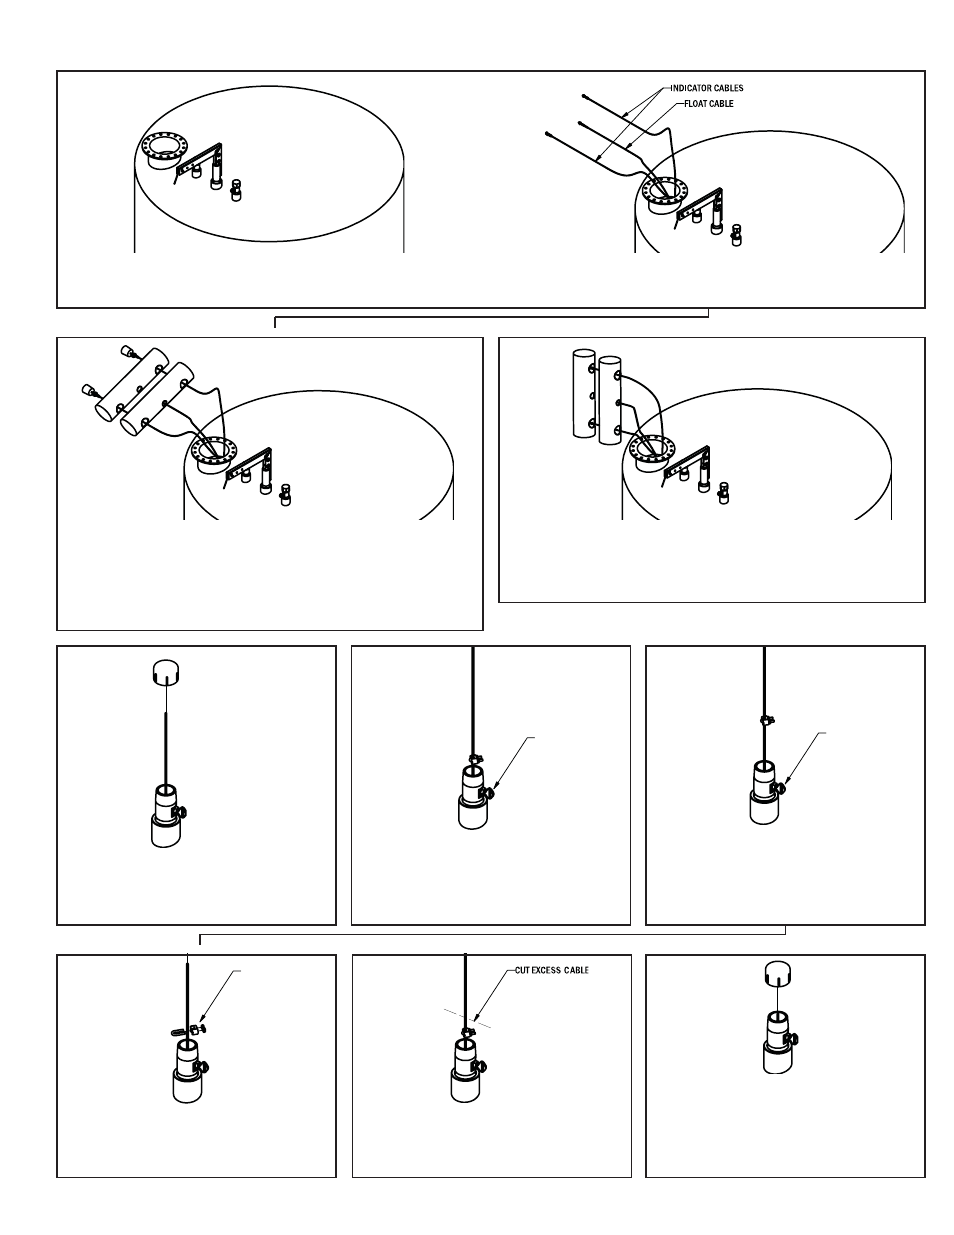
Remove the housing cap from the float guide
assembly and pull out the cable clamp and ex-
cess cable.
Turn the thumb screw counter clockwise to
loosen cable. Pull the cable and cable clamp
upwards until taut.
Turn thumb screw clockwise to secure cable.
Use the 9/16 wrench to tighten the sealing nut.
Loosen the cable clamp using the 5/16 wrench,
and reposition as near to the cable lock pocket
as possible.
Cut off the excess cable, leaving enough to
grab onto if future adjustement is required.
Position the remaining cable and cable clamp
into the pocket and replace the housing cap
with the pipe wrench. Repeat 5-9 with second
float gude cable lock assmbly.
MOVE
DOWNWARDS
LOOSEN
TIGHTEN
6.)
7.)
8.)
11.)
10.)
9.)
►
►
►
►
►
Float Guide Kit Installaton Complete
Before continuing with the remainder of the Float Guide Kit Assembly, install the gauge head as per its supplied instructions, ensuring the
float cable is hanging freely inside the tank.
Using the hook, reach into the tank through the thief hatch and grab the float guide cables, the float cable from the gauge head and pull them out of the
thief hatch.
Run the guide cables through the two guide holes of the poly float and at-
tach the float cable from the gauge head.
Attach the strap forks to the eyebolts per poly anchor leaflet using the pro-
vided 10-32 UNF machine screws and lock nuts.
Feed the cables back into the tank from the hatch, followed by the float.
Hold the guide cable between the float and the anchor, and ease the an-
chor into the tank through the thief hatch and onto the tank floor.
3.)
4.)
5.)