Haws 2500.CT User Manual
Page 4
6/13
Model 2500.CT
Page 4 of 12
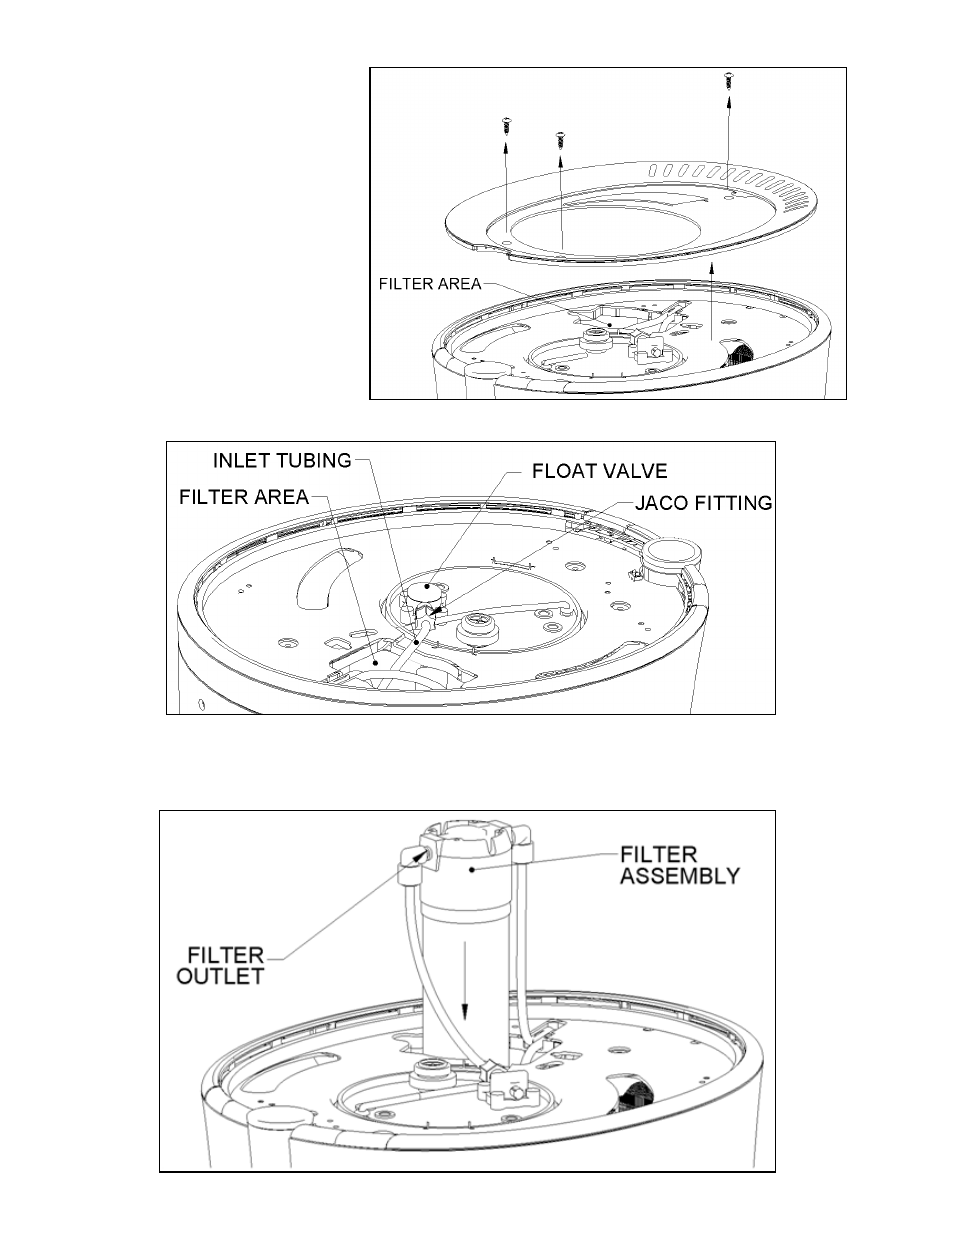
Step 2:
Remove the top lid of
the cooler. Unscrew
the 3 Phillips screws
that hold down the
internal lid and lift it
out of place. This will
expose the filter area.
Step 3:
Locate the tubing
running into the float
valve on the cooler
tank (see diagram).
There are several
inches of extra length
on this tubing down in
the filter area; without
disconnecting either
end, pull this extra
length out and cut it
squarely approximately at the midpoint.
Step 4:
Lower the filter assembly partway into the filter area. Connect the newly-cut length of tubing
running from the float valve into the filter outlet (ports are labeled). Connect the other cut
length of tubing into the filter inlet. Lower the filter assembly completely into the cooler,
taking care not to kink the tubing.