State Tilt Roof User Manual
Page 7
7
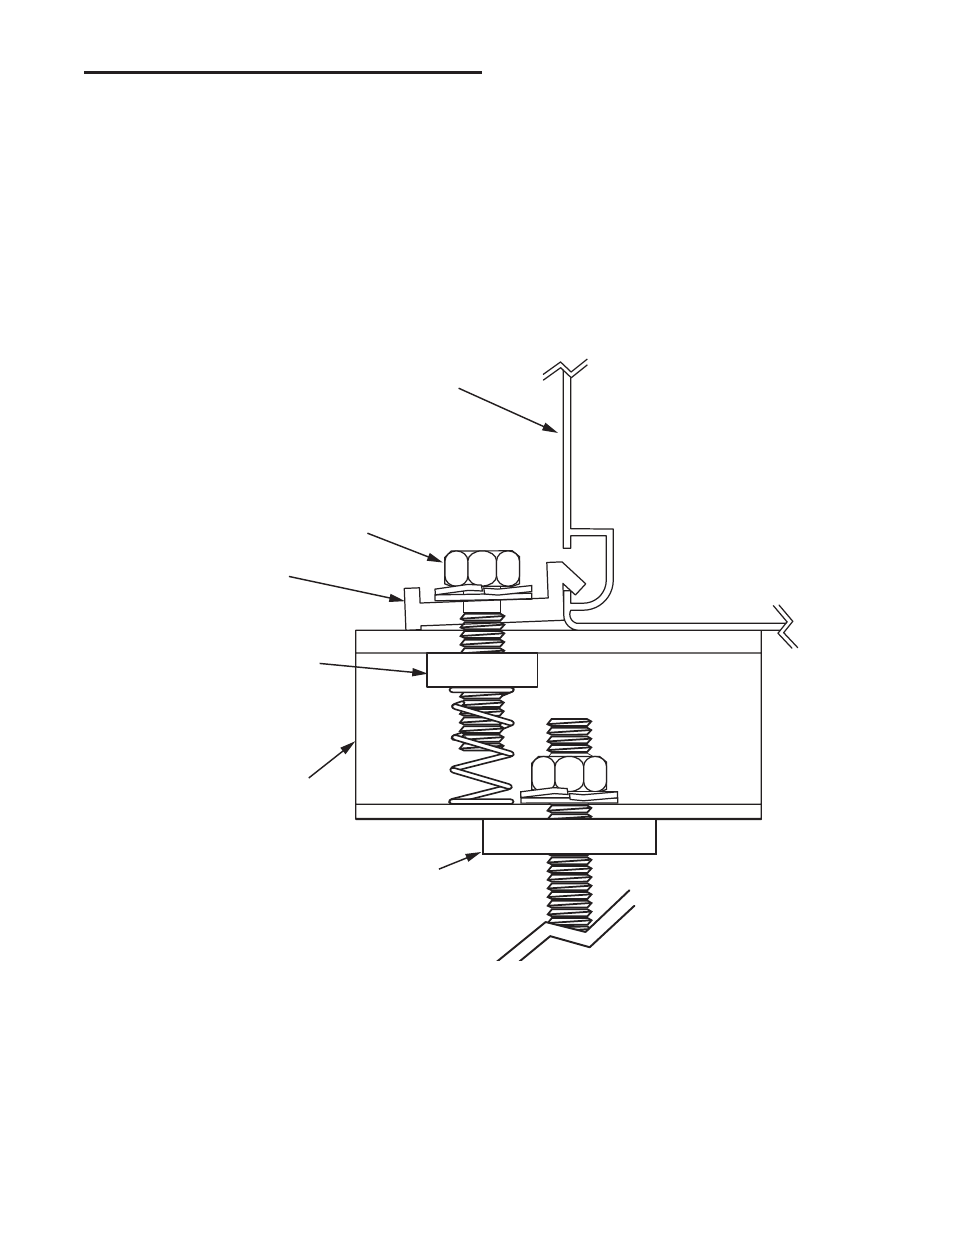
ATTAChING COLLECTOR TO MOUNTING BRACkETS
Once all of the mounting brackets have been secured to
the roof the solar collector(s) can be installed. See Figure
17 for these instructions.
1. Insert the stainless steel channel nut w/spring inside
of the mounting bracket.
2. Fasten the solar collector mounting clip to the channel
nut with the stainless steel bolt, lock-washer, and flat
washer as shown. Do not tighten. Repeat step for the
other mounting bracket locations.
3. The solar collector can now be set on the mount-
ing brackets. To aid in handling the collectors on the
roof the mounting clips may be tightened to the lower
mounting brackets prior to raising the collectors. The
collector can then be set on the lower mounting brack-
ets while the top clips are fastened over the lip on the
collector frame.
4. After the solar collector is in position, locate the upper
mounting clip so that its lip over-hangs the lip of the
solar collector frame as shown. Tighten the mounting
clip to the solar collector frame securely. Repeat for
the other upper mounting clips.
5. Once the upper mounting clips are secured, the bot-
tom mounting clips can be loosened and retightened
over the collector lip as directed in step 4.
6. Repeat steps as needed for other solar collectors.
SOLAR COLLECTOR
FRAME
MOUNTING
CLIP
STAINLESS STEEL BOLT,
LOCK WASHER,
& FLAT WASHER
CHANNEL NUT
with SPRING
(One Piece Part)
MOUNTING
BRACKET
SUPPORT
NUT
Figure 17.