Wixey WR550 REMOTE PLANER READOUT User Manual
Page 2
2
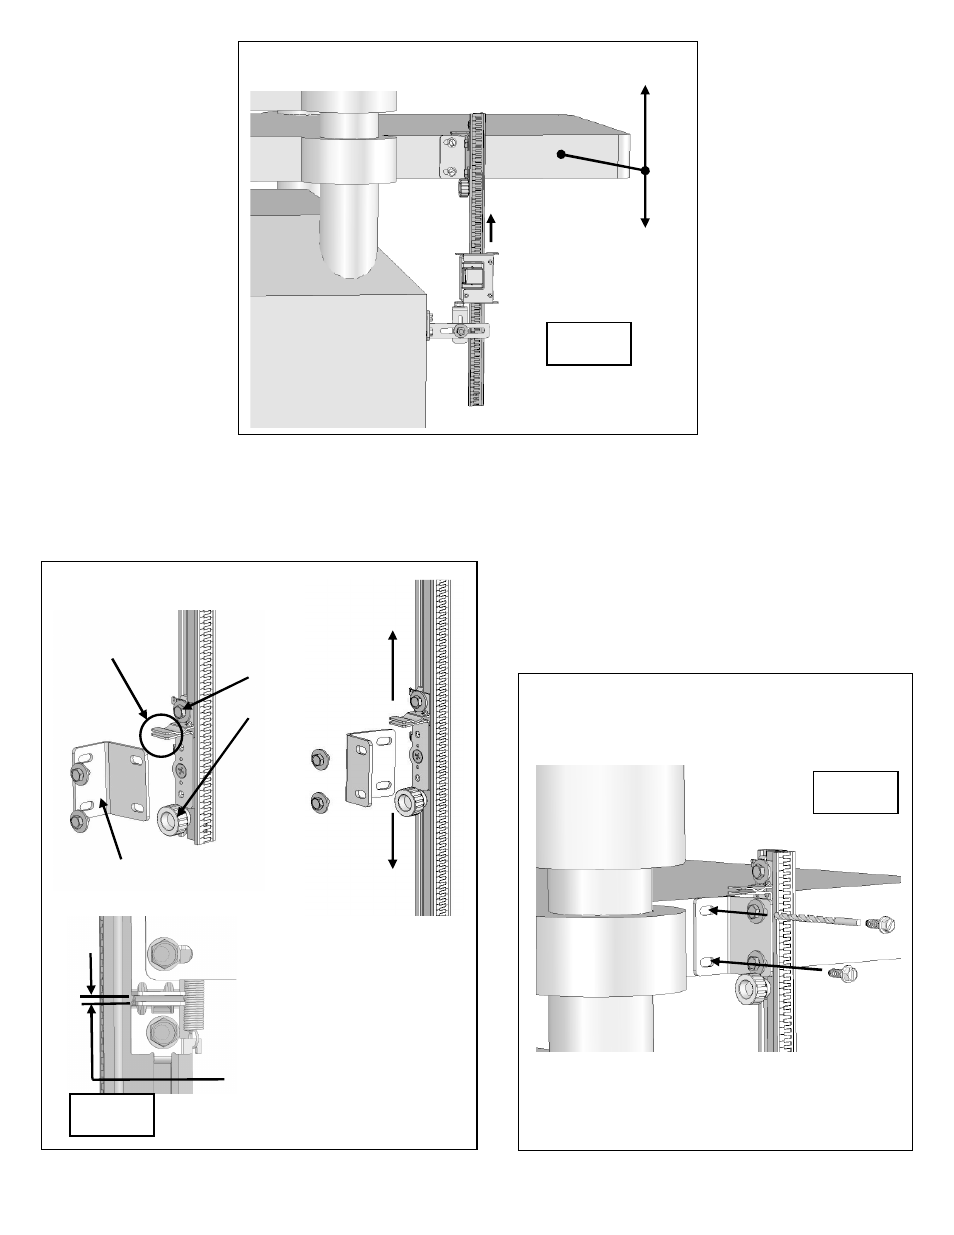
3- Mounting the Scale
The scale mounting assembly can be located at any position along the scale. The “L” bracket can be
removed and re-attached to the assembly in different positions (steps 1-3 in FIG 6). The slots in the “L”
bracket are used to adjust the scale perpendicular to the table surface (FIG 7).
+
+
TABLE MOVES UP AND DOWN
FIG 5
JAWS
L-BRACKET
1. LOOSEN
BOLT
AND
LOCK KNOB
SCALE MOUNTING ASSEMBLY
2. SLIDE THE
SCALE MOUNTING
ASSEMBLY TO
ANY POSITION ON
THE SCALE.
(REMOVING THE
SPRING MAY
MAKE THIS STEP
EASIER)
3. TIGHTEN THE BOLT AND
LOCK KNOB. BE SURE THE
JAWS ARE ALIGNED FLAT
WHEN DONE. REPLACE THE
SPRING IF IT WAS REMOVED.
FIG 6
USING THE 5.5mm DRILL AND 2-M6 x 12mm
LONG THREAD FORMING SCREWS ATTACH
THE L-BRACKET TO THE MACHINE.
PUT A DROP OF OIL ON THE END OF THE
SCREWS. USE A DRILL DRIVER OR
RACTHET WRENCH AND PUSH THEM INTO
THE HOLE WHILE TURNING SLOWLY
FIG 7