Yetter 6150 Series Markers User Manual
Page 7
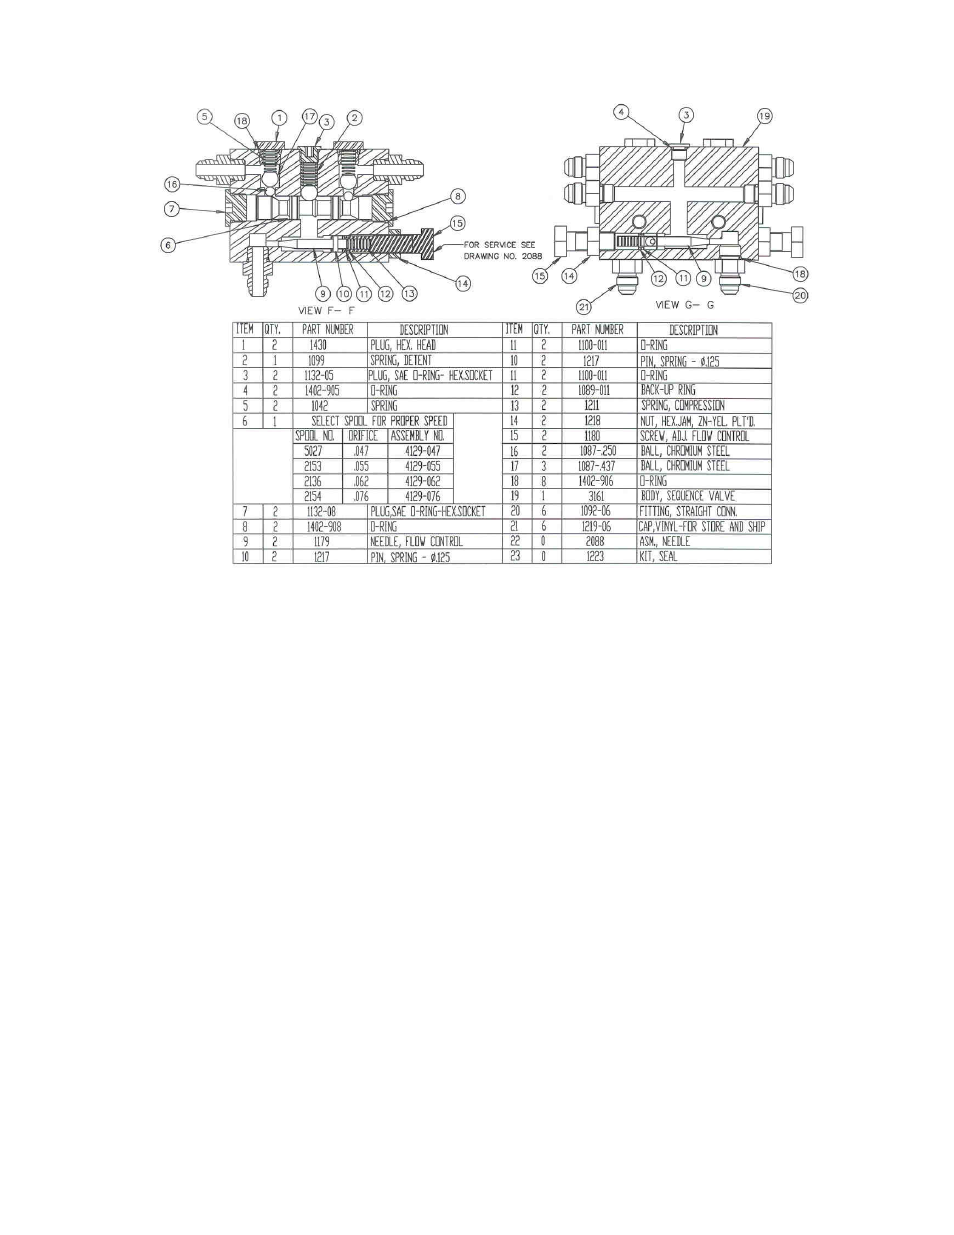
7
SERVICE
MARKER SEQUENCE VALVE
SERVICE REPAIR KIT – 2515-349
DISASSEMBLY and ASSEMBLY
If markers do not sequence, clean dirt from valve
spool bore (6). If markers tend to creep
downward, check for dirt, nicks/scratches in ball
check valve areas (16).
Note: Be sure the hoses are connected to the
correct ports before disassembling the valve for
cleaning or repair. (See schematics.)
Disassembly:
1. Remove hex head plugs (1), springs (2), and
steel balls (16 & 17).
2. Remove plug (3), spring (2), steel ball (17).
3. Remove plugs (7) from each end of body.
Important! Be sure plugs, springs and balls (Step
1 and 2) are removed before attempting to
remove spool.
4. Carefully remove spool (6) from valve body.
5. Remove flow restrictor assembly (15) from
valve body.
Inspection:
1. Clean spool and restrictors in solvent.
Note: Restrictor disassembly is not required
for cleaning.
2. Clean valve body after checking exterior for
signs of o-ring leakage.
3. If spool is nicked or scratched, remove with
crocus cloth. Spool must slide freely in bore.
1. If ball seats are nicked or scratched, install
larger ball against seat, tap ball with brass
rod to “seat” ball.
Note: Remove spool for this procedure.
2. Inspect o-rings. Replace if necessary.
Assembly:
1. Apply clean hydraulic fluid to threads, o-
rings, spool, valve bore. Reassemble in
reverse order of disassembly.
2. Open restrictors one turn minimum.
3. Install valve on planter and readjust marker
operating speed with restrictors.
Marker Operation
Markers fail to sequence
Raised marker slowly lowers
Valve spool stuck in sequence
valve
Check ball not seated in
Disassemble valve and clean
spool
Disassemble valve and re-
seat ball