Tuff Country 55900 - Toyota Tundra 99-04 4.5 kit User Manual
Page 5
17. On the front differential, remove the nut that connects the
rear part of the front differential to the rear cross member
and discard the nut.
18. Locate the center of the rack and pinion and remove the
hardware that connects the rack to the rear cross member.
The hardware may be discarded.
19. Working on the passenger side, remove the mounting
hardware that connects the rack and pinion to the rear lower
control arm mount. The upper mounting hardware may be
discarded. Save the lower mounting hardware. Remove the
bracket that connects the rack to the stock passenger side
location and save for later re-installation.
20. Make sure that the rack and pinion is secured to the
sway bar mounting points and is out of the way so that the
rear cross member can be cut.
21. Working on the driver side, remove and save the cam
bolts that secure the lower control arm to the front and rear
lower control arm mounting points. Repeat procedure on the
passenger side.
22. Working on the driver side, carefully remove the lower
control arm from the front and rear mounting points. Repeat
procedure on passenger side. Carefully support the lower
control arm on the driver and passenger side.
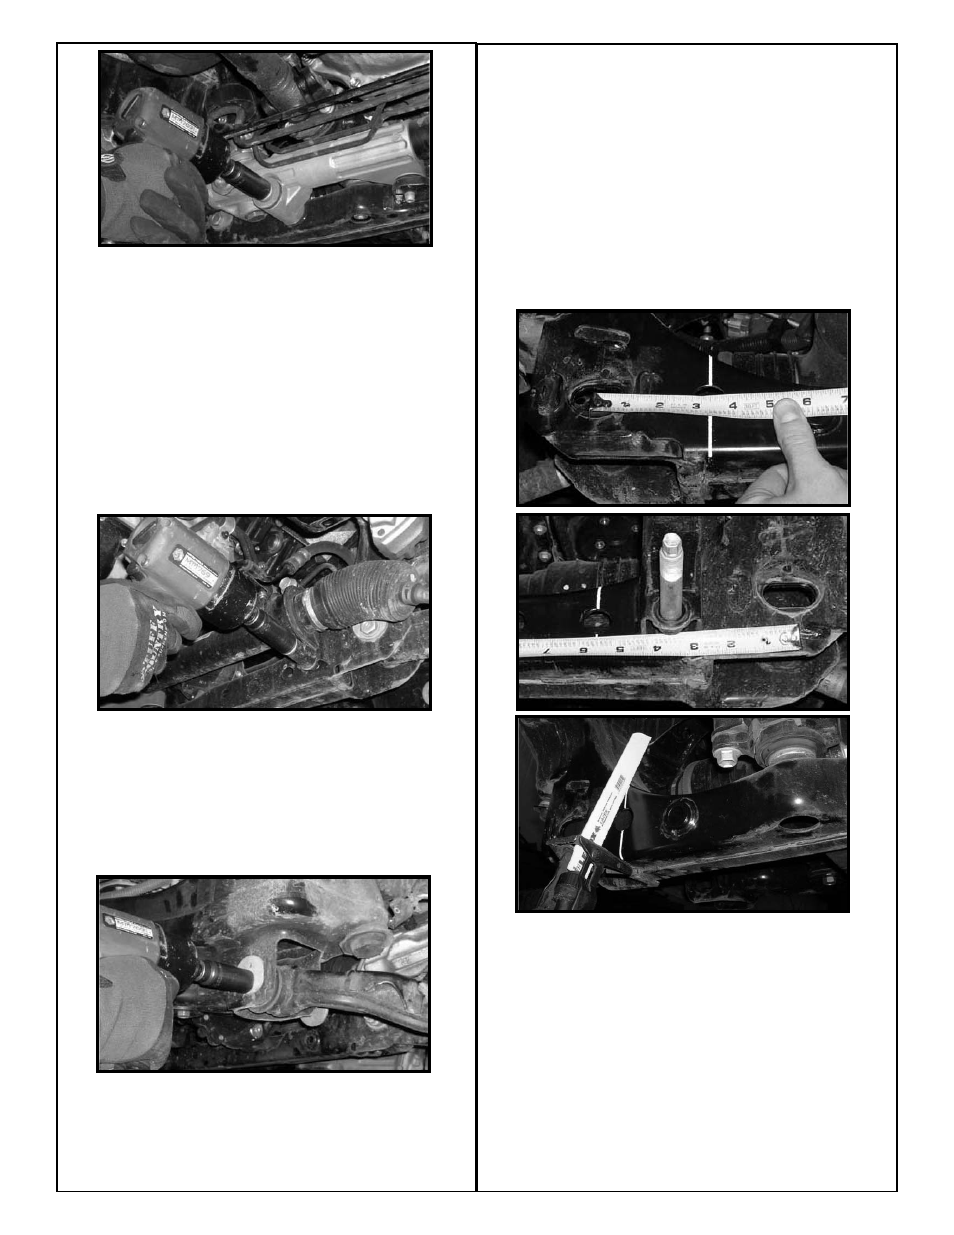
23. Working on the driver side, measure from the lower con-
trol arm mounting point towards the inside of the vehicle 3
1/4”. Scribe a mark on the rear cross member. Using a suit-
able cutting tool, carefully cut the rear cross member.
Special note: Tuff Country does not recommend using a
torch when making this cut. Tuff Country recommends
using a sawzall to make this cut. Working on the passen-
ger side, measure from the lower control arm mounting point
towards the inside of the vehicle 5 1/2”. Scribe a mark on the
rear cross member. Using a suitable cutting tool, carefully cut
the rear cross member. Special Note: Tuff Country does
not recommend using a torch when making this cut. Tuff
Country recommends using a sawzall to make this cut.
The rear cross member may be discarded.
24. Support the front differential with a pair of hydraulic floor
jacks. Place a hydraulic floor jack on the driver and passen-
ger side.
25. Working on the driver side, remove the hardware that
connects differential drop bracket to the front cross member
and save the hardware. Next, remove the (3) bolts that con-
nect the differential drop bracket to the differential. Save the
hardware for later re-installation. The differential drop brack-
et may be discarded.