Sper Scientific 840051 Datalogger User Manual
Page 6
6
AUTOMATIC DATA INPUT
Please follow these instructions in order. Power
should not be on during items 1 through 4.
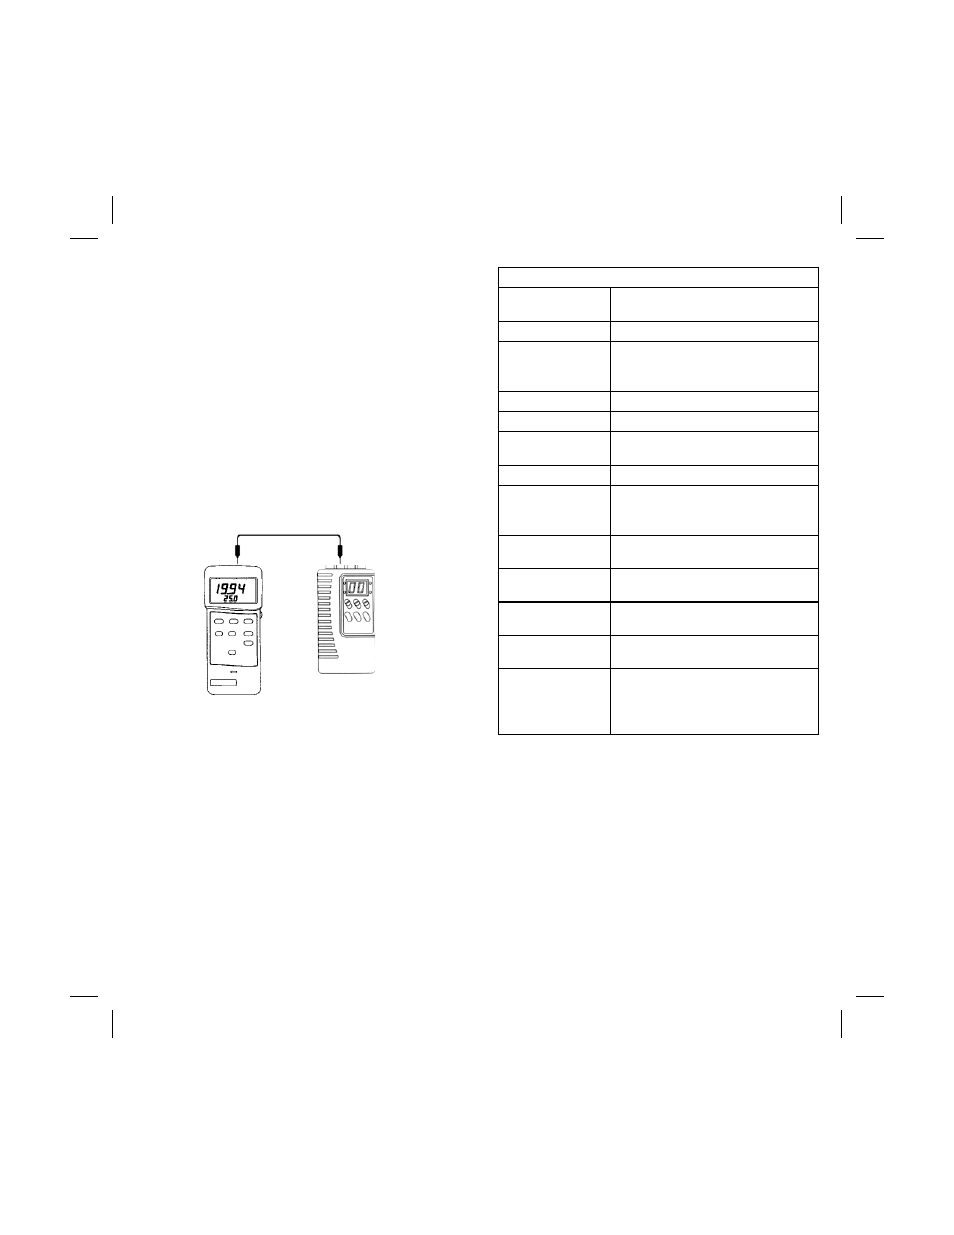
1. Connect the Datalogger to the meter using the
double earphone jack cable. Plug one end into
the “RS232 Out” socket on the meter. Plug the
other end into the “uP In” socket on the
datalogger. (DMM sockets are for use with
future products) Do not turn on the meter
until the datalogger is ready for input.
2. Slide the “AUTO/MAN/OUT” switch (Fig.1-6) to
the “AUTO” position.
3. Select from the “Time Switch” (Fig.1-7)
•
“S” (Seconds) position is used to set the interval
recording time from 1-99 seconds.
•
“M” (Minutes) position is used to set the interval
recording time from 1-99 minutes.
•
“H” (Hours) position is used to set the interval
recording time from 1-99 hours.
4. Turn the Datalogger on by sliding the “Power
Switch” (Fig1-8) to the “I” position (Power is off
in the “0” position) and turn on the meter.
The “FULL” indicator illuminates when the
datalogger is turned on after changing the
Figure 2
11
DATALOGGER SPECIFICATIONS
Data Storage
7999 Data points (16 bit
stream)
Display
12.7mm (0.5) red LED, 2 digits
Interval
recording time
adjustment
Seconds– 1-99
Minutes– 1-99
Hours-1-99
Clock
Crystal O S C
Battery
Four 1.5v AA
Power
Consumption
Approximately DC 20 to 54mA
External Power 9V DC adapter socket
Memory
Management
Memory circuit store
continuously with battery
power in normal condition
Operating
Temperature
0°C to 50°C (32°F to 122°F)
Operating
Humidity
Less than 80% Relative
Humidity
Weight
205G/ 0.45 LB (including
Battery)
Dimensions
131 x 70 x 26mm (5.2 x 2.8 x
1.0 inches)
Accessories
Meter, Graphical software,
Double earphone cable,
RS232 cable, instructions, soft
case