Procedures for using the features, Procedures for installing the telephone – Avaya Definity 6211 User Manual
Page 2
2
PROCEDURES FOR USING THE FEATURES
To answer or place a call
Note: The Message light flashes when a call is coming in
(that is, when the telephone is ringing).
1
To place or answer a call, lift the handset.
2
To place a call, next, dial the desired number.
3
To end the call, hang up the handset.
Note: To raise the volume of the handset, press the upper
half of the Handset volume control button labeled
; to
lower the volume of the handset, press the lower half of the
Handset volume control button labeled
.
To put a call on hold
1
Press
. (The red light next to
goes on.)
To return to the held call
1
Press
, or, if you have hung up the handset,
lift the handset again from the cradle.
(The red light next to
goes off.)
•
You are reconnected to the other party.
ANSWERING AND PLACING A CALL
HOLD
To retrieve a message when your Message light is
blinking
1
See your system manager for instructions about your
local message retrieval procedures.
Note: The Message light also flashes when a call is coming
in (that is, when the telephone is ringing).
To redial the last number that you dialed
1
While off-hook, press
.
(The telephone will redial up to 32 digits.)
To control the volume of the tone ringer
Note: The volume control is labeled
.
1
To raise the volume of the ringer, slide the Ringer volume
control upwards; to lower the volume of the ringer, slide
the Ringer volume control downwards.
MESSAGE
REDIAL
RINGER VOLUME
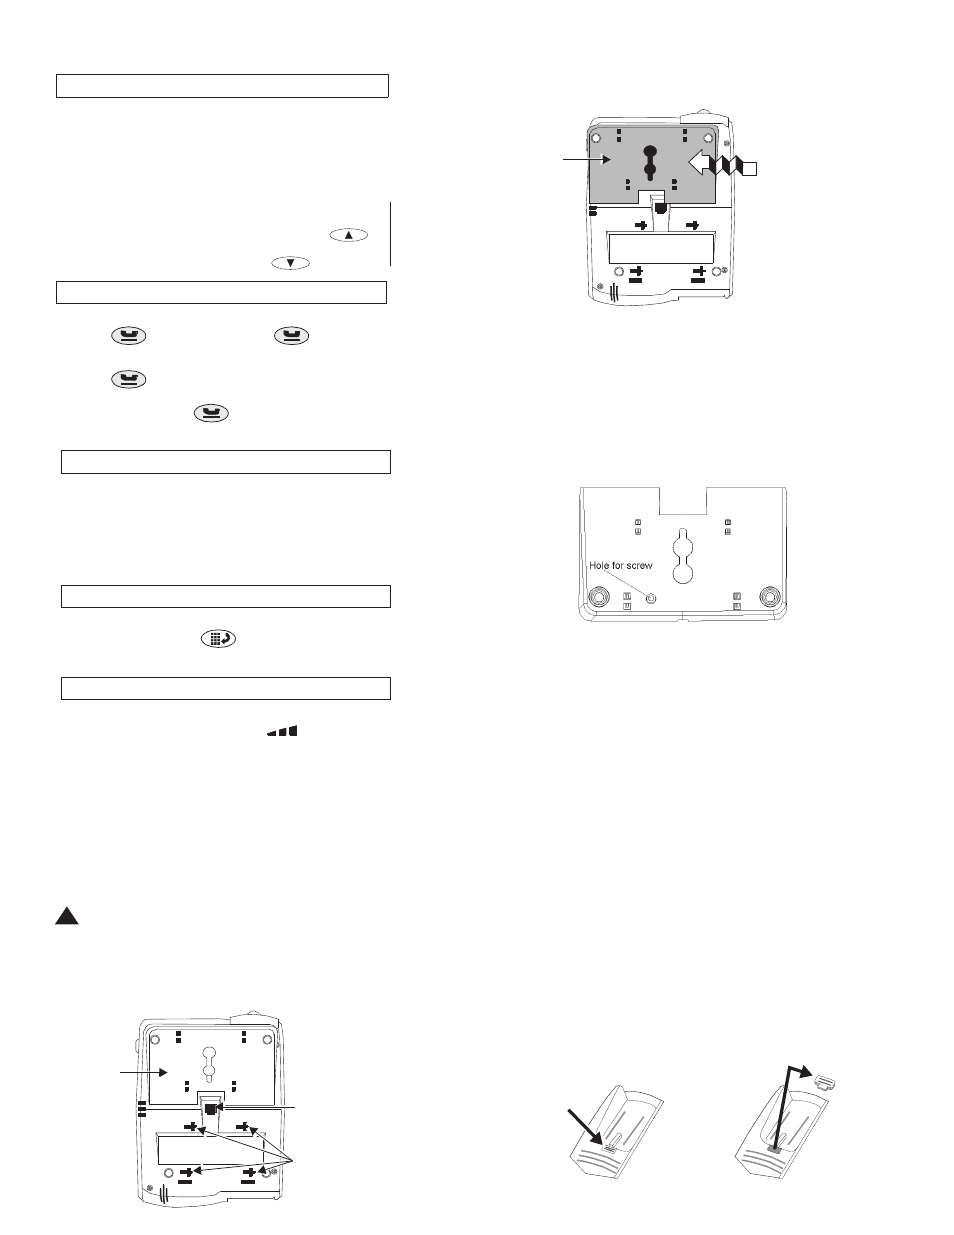
Figure 2. The Bottom of the 6200 Series Telephones
2
Remove the desk stand by sliding it to the left until it is
free of the telephone base.
PROCEDURES FOR INSTALLING THE
TELEPHONE
TABLE/DESK INSTALLATION
Use the 7-foot straight line cord that came with your
telephone to connect the telephone to a modular jack.
!
WARNING:
Do not plug the handset cord into the line jack or the
data jack on your telephone since it could damage your
handset and the telephone.
1
Turn the telephone upside down so that you can see the
bottom of the telephone. See Figure 2.
Desktop
Line jack
stand
wall mounting
4 holes for
Figure 3. Sliding the Base from the Bottom of the Set
3
Plug one end of the line cord into the line jack on the
bottom of the telephone.
4
Align the other end of the line cord so that it appears
through the slot at the top of the stand and reattach the
stand to the telephone by sliding the stand into the
appropriate tabs and then to the right.
5
After you have attached the stand to the telephone, use
the screw provided to tighten the stand onto the back of
the telephone set.
Slide stand
to left and lift
Desktop
stand
Figure 4. Tightening the Stand to Back of the Telephone
6
Turn the telephone right-side up and place it on your desk
or table.
7
Plug one end of the coiled handset cord into the handset
jack on the side of the telephone.
8
Plug the other end of the handset cord into the handset.
9
Hang up the handset.
10
Plug the free end of the line cord into a modular wall jack.
11
Lift the handset and listen for dial tone.
12
Set the Ringer Volume Control switch to the setting you
want.
WALL INSTALLATION
Use the following directions to mount the telephone on a
standard wallphone jack with mounting studs.
Note: For wall installation, do NOT unbundle the line cord
packaged with the telephone; that is, leave the line cord in its
coiled position.
1
You must reverse the handset tab (which holds the
handset when you hang up). See Figure 4.
•
Hold down the switchhook and slide the handset tab up
and out of its slot.
•
Turn the tab so that the curved end is facing up.
•
Insert the tab back into its slot.
a. Handset
b. Press to release
retainer
in place
and then remove
handset retainer