Overview of the avpp, Front panel of the avpp – Avaya IP Office 15-601082 User Manual
Page 10
Wireless Installation and Configuration Guide
Wireless Installation and Configuration Guide
Page 4
IP Office
[15-601082] Issue [1] (1 June 2006)
Overview of the AVPP
Before you can begin using the AVPP, you will need to do the following:
1. Install and configure the Avaya Voice Priority Processor (AVPP) within an IP telephony system.
2. Configure IP Office.
3. Configure the Access Points.
4. Configure the 3616/3620/3626 wireless phones.
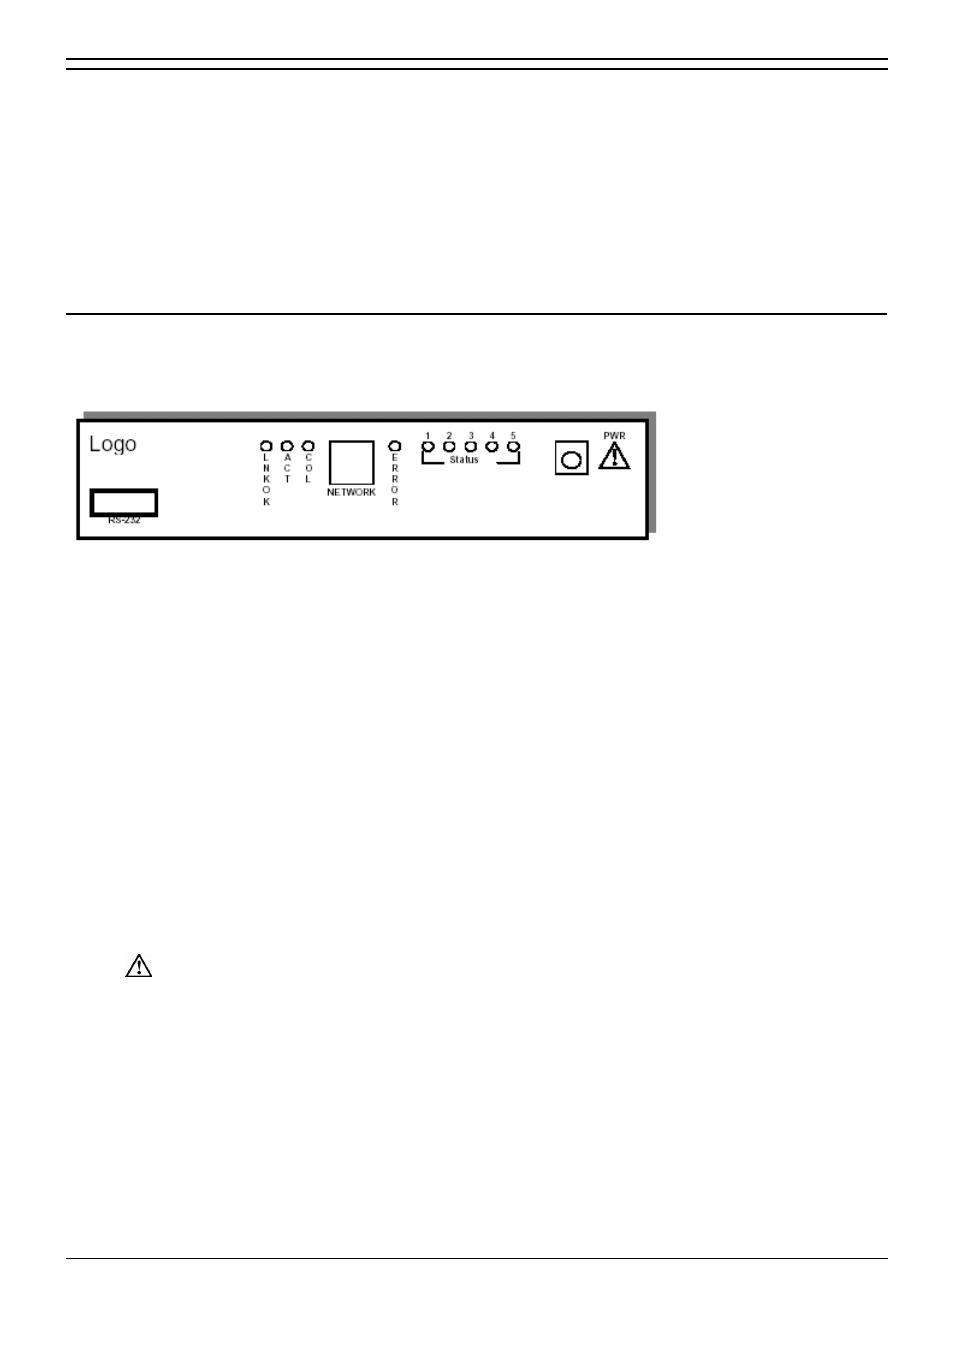
Front Panel of the AVPP
The AVPP
’
s front panel contains ports to connect to the LAN, and an administrative computer via an RS-
232 port. Status LEDs supply information about the AVPP
’
s functionality.
RS-232 Port
–
male DB-9 connector (DTE) used for RS-232 connection to a terminal, terminal
emulator, or modem for system administration.
Link LEDs:
LNKOK
–
lit when there is a network connection.
ACT
–
lit if there is system activity.
COL
–
lit if there are network collisions.
NETWORK
–
connects to wired (Ethernet) LAN.
ERROR LED
–
lit when the system has detected an error.
STATUS LEDs
–
indicate system error messages and status.
1
–
heartbeat, indicates gateway is running.
2
–
if active calls.
3, 4, 5
–
currently unused.
PWR (power jack)
–
connects to the AC adapter supplying power to the system.
Warning:
Only use the Avaya-provided Class II AC Adapter with output 24VDC, 1A.