JELD-WEN JII040 Custom Clad Lift and Slide Door Systems User Manual
Page 6
ASSEMBLY AND INSTALLATION INSTRUCTIONS
for Custom Clad Lift and Slide Door Systems (JII040)
6
6
INSTALL DOOR
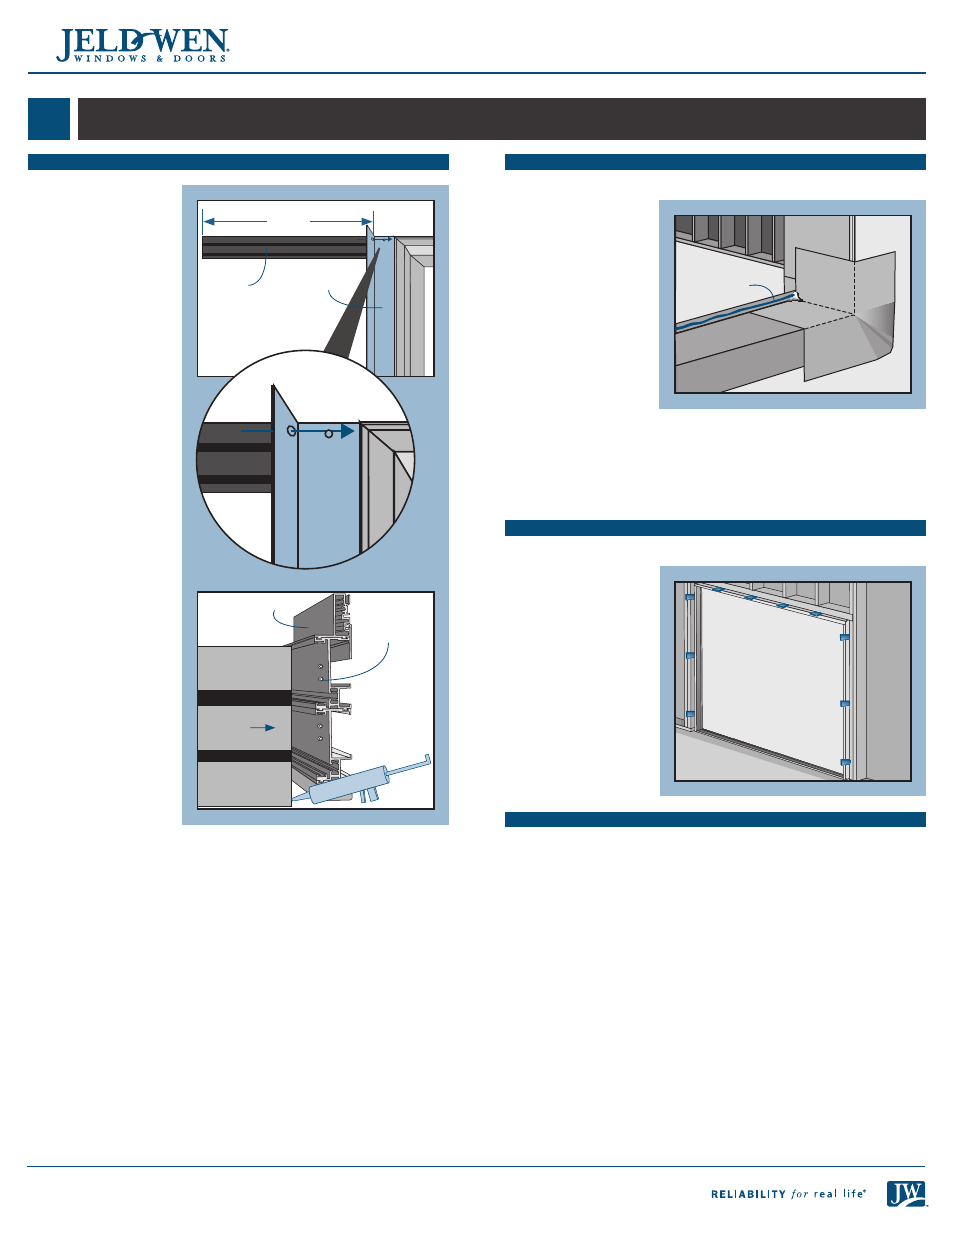
ASSEMBLE FRAME
1. On a clean and flat
surface, lay out
frame head, sill and
side jambs with
the exterior side
up. If installing a
pocketing system,
there will be post
interlock(s) for each
end that pockets
used instead of a
side jamb piece.
Post interlock(s) do
not install on the
extreme end of the
head and sill tracks,
but will install to
the side where
the pre drilled
holes are located
(approximately the
width of one panel
from the end of the
head and sill tracks).
2. If gaskets are
provided, adhere
to both ends of
the sill. Run a bead
of silicone on all
surfaces of the sill
as shown. Repeat
silicone application
for the head where
the ends will
contact the jambs.
3. Clamp the frame
corners as needed
to ensure that the
frame sections fit
together flush and
using the supplied 1
1/4" screws, fasten
the sill to the right and left jamb frame parts. The pre-drilled holes in
the jamb will line up with the screw bosses in the sill. Make sure the
attached gasket lies flat and the screws are inserted properly into the
screw bosses.
4. Using the supplied 1 1/4" screws, fasten the header to the right and
left jamb frame parts through the pre-drilled holes in the jambs.
5. Seal the screw heads and the outside of each corner joint with
sealant.
6"
6"
Interior
INSTALL FRAME
Warning!
To avoid injury, use at least two people to install.
1. If installing a pre-
formed sill pan,
follow manufacturer's
instructions and skip
this step. If installing a
job site fabricated sill
pan, run a continuous
3/8" bead of sealant
along the sill pan back
dam. When the frame
is installed, make
sure the frame makes
solid contact with the
sealant. Add more
sealant if necessary.
2. Tilt the frame into the rough opening. Adequately support the frame
until fully installed.
3. Align the exterior of the frame, or applied nailing fin, with the most
exterior surface of the structure (the exterior face of the concrete
wall, framing or sheathing).
SHIM THE JAMBS
Note!
Secure all shims with sealant.
1. From the interior,
shim the side jambs at
each pre-drilled hole.
Shim head track next
to pre-drilled holes.
Also shim at the strike
plate(s) if applicable so
that strike plate screws
(installed later) will
each penetrate a shim.
2. Inspect the frame for
square, level, and
plumb (remove and
reinstall if necessary).
FASTEN FRAME
1. To secure the head, fasten through each pre-drilled hole using #10 x 2
1/2" screws. Fastener holes should not go through, but next to shims.
Move shims accordingly to be next to fastener holes if necessary.
2. To secure the sill, put a generous amount of silicone sealant in each
pre-drilled hole and drive a #10 x 2 1/2" screw through each hole.
3. Secure the side jambs through each pre-drilled hole.
6. Verify the unit is square by re-measuring on the diagonals.
7. Verify the unit is plumb and level.
8. Use a level (4 foot recommended) to ensure there are no bows in the
framing.
9. Adjust screws and re-shim as needed to correct any bows.
Sealant
Sill
Jamb
Screw
holes
Post
interlock
Exterior side
shown
Frame
Depth of