JELD-WEN JII011 Vinyl Windows without Nailing Fin User Manual
Page 3
INSTALLATION INSTRUCTIONS
for Vinyl Windows without Nailing Fin (JII011)
3
REMOVE PACKAGING
Remove shipping materials such as corner covers, shipping blocks or
pads. If there is a protective film on the glass, do not remove it until
installation and construction are complete.
INSPECT WINDOW
• Cosmetic damage.
• Product squareness (diagonal measurements not more than
1/8" different).
• Correct product (size, color, grid pattern, glass type, energy-efficiency
requirements, etc.).
• Cracked frame welds or other frame damage.
If any of the above conditions represent a concern, or if you expect
environmental conditions to exceed the window's performance
rating, do not install the window. Contact your dealer or distributor
for recommendations.
REMOVE PACKAGING AND INSPECT WINDOW
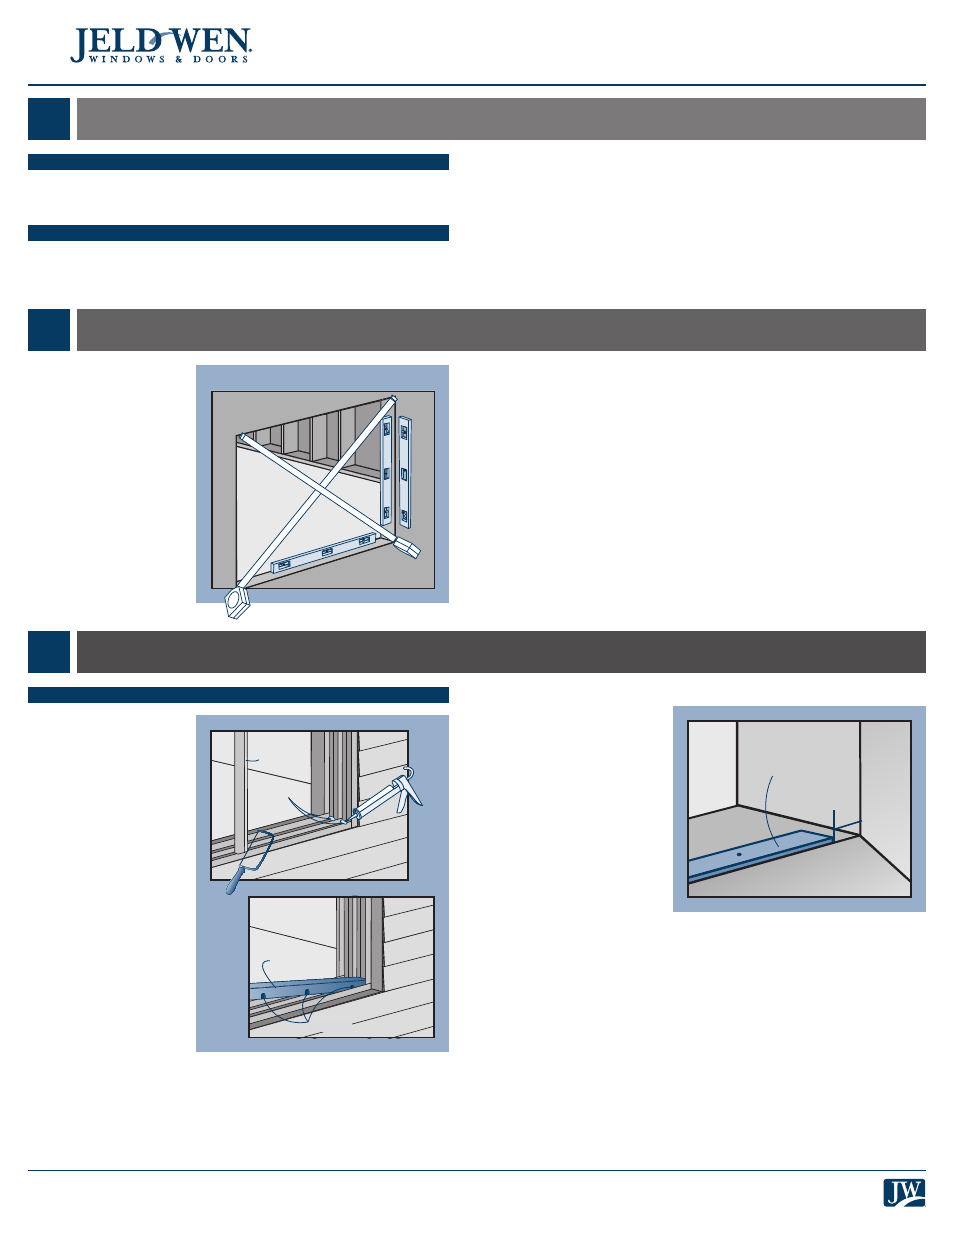
INSPECT ROUGH OPENING
PREPARE WINDOW OPENING
1
2
3
• Verify the width
and height of the
window are each
1/2" smaller than the
rough opening width
and height.
• Verify the rough
opening is square.
The (A) and (B)
measurements above
should be the same.
Maximum allowable
deviation from square
for windows over
20 sq. ft. is 1/4" and for
windows under 20 sq.
ft. is 1/8".
• Verify the rough opening is level and plumb (C) and (D). The
maximum allowable deviation is 1/8".
• The rough opening sill must not be crowned or sagged (D), but rather
level or sloped (positive slope) to the exterior.
• Verify the exterior face of the rough opening is a single plane (E) with
less than 1/8" twist from corner to corner.
• Verify the rough opening is structurally sound.
• Correct any deviations before installing the window.
IF INSTALLING INTO A WOOD WINDOW FRAME:
1a. If installing from
the interior, remove
any trim on the
inside face of the
wood frame. Do
not remove the
exterior stops.
1b. If installing from
the exterior, remove
any trim on the
outside face of the
wood frame. Do
not remove the
interior stops.
Note!
Steps 2 and 3 are not applicable if installing into an existing
double-hung with sloped sill.
2. Apply enough sealant to the bottom of the continuous support to
cover the entire surface.
3. Center the continuous support (see materials list) on the sill of the
existing frame, flush to the exterior edge and leaving a 1/2" gap at
the ends. Secure with nails.
END of Existing Window Frame Instructions, SKIP to section 4,
“INSTALL WINDOW.”
PREPARE EXISTING WINDOW FRAME
1. Remove the sashes
and/or glass in the
existing window.
2. Remove all hardware
and window
components not a part
of the frame (meeting
stile, jamb liners,
locking mechanisms or
other hardware etc.).
IF INSTALLING INTO AN
ALUMINUM WINDOW
FRAME:
1. Seal all four corners
of the window frame
as shown.
2. Notch grooves across
the bottom of the
continuous support (see
materials list) to allow
for water drainage
through the weep
holes. Set the continuous support into the exterior sill track, creating
a level surface at the sill.
END of Aluminum Frame Instructions, SKIP to section 4,
“INSTALL WINDOW.”
Verify Square, Level, and Plumb
A
B
D
C
E
Meeting
stile
Sealant
Continuous
support
Notches
Continuous
support
1/2"