Fantasea Line FG16 Housing User Manual
Page 13
FG16 Housing Instruction Manual 20131101
13
a. Peel the screen protector off the back side of the housing.
b. Install the hand lanyard on the housing by inserting it through the lanyard loop on the
bottom right of the housing (facing from back), then pulling it through itself and testing it
in order to make sure it is secure (image #1).
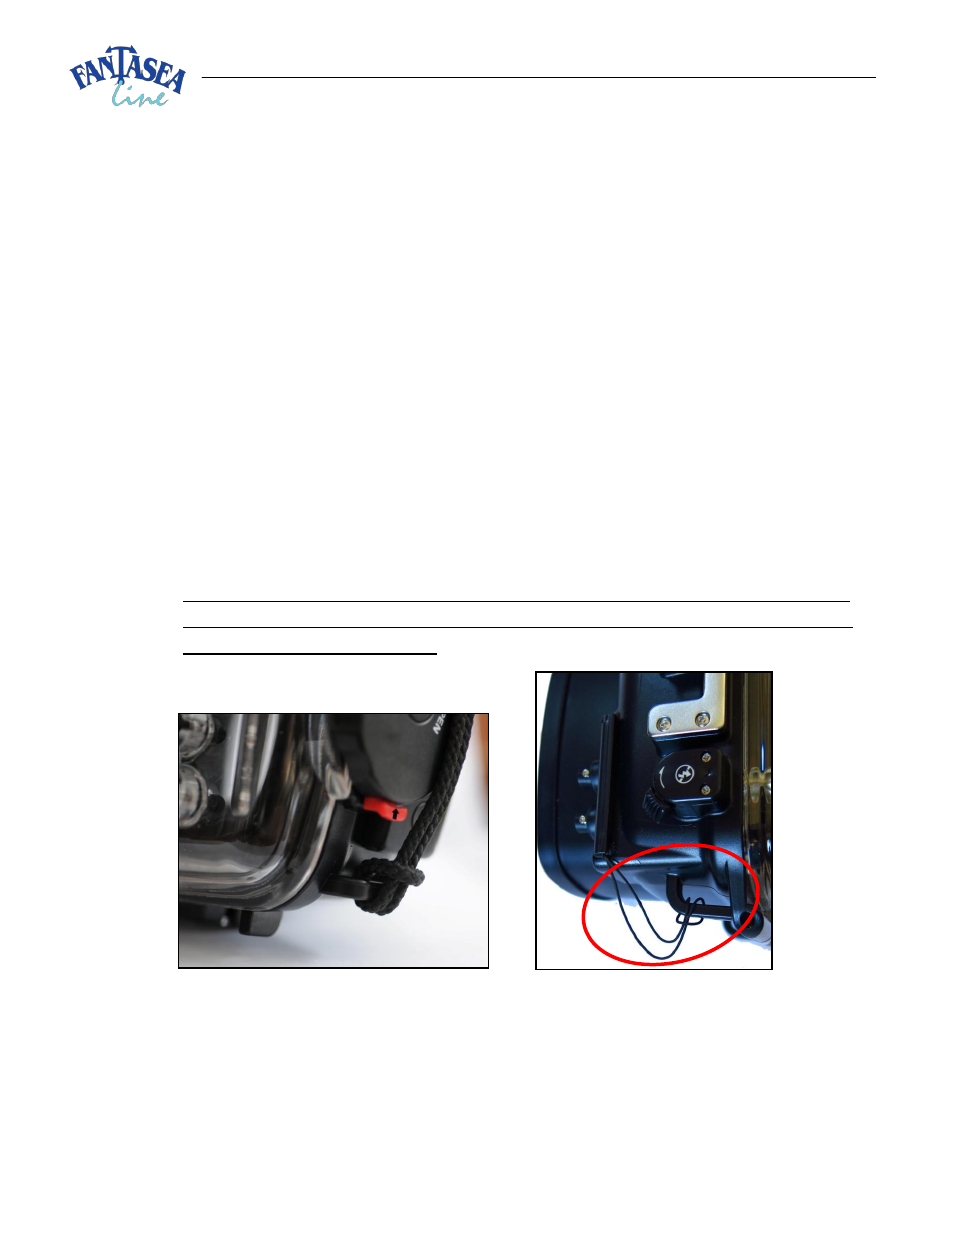
c. Install the housing side of the diffuser quick release secure line by tying it around the
upper rectangular loop at the top left side of the housing, where the Fiber Optic Cable
Plate secure string is attached to as well (image #2). Please note that this line may come
assembled and then there is no need for installation.
d. Open the housing (see section “Opening the Housing” on the following page) and remove
the anti-glare hood out of the housing. Secure the anti-glare hood to the housing by tying
its secure string around the lower rectangular loop at the bottom left side of the housing.
Install the anti-glare hood over the anti-glare hood rails at the back of the housing. First
install the anti-glare hood over the top rail (image #3 on the following page) and then
gently and carefully stretch it downwards to install it on the bottom rail, making sure it’s
sitting securely on both upper and lower rails (image #4 on the following page).
e. If making use of a hand strap (optional), install it on the two loops found at the right side
of the housing.
f. It is important that a first dive with the housing is always made without the camera in
order to verify that the housing watertight seal has not been affected during transport
and after long periods of storage.
Image #1
Image #2