Hardware setup – Asus CUC2000-M User Manual
Page 22
22
ASUS CUC2000-M User’s Manual
3. HARDWARE SETUP
Motherboard Settings
3. H/W SETUP
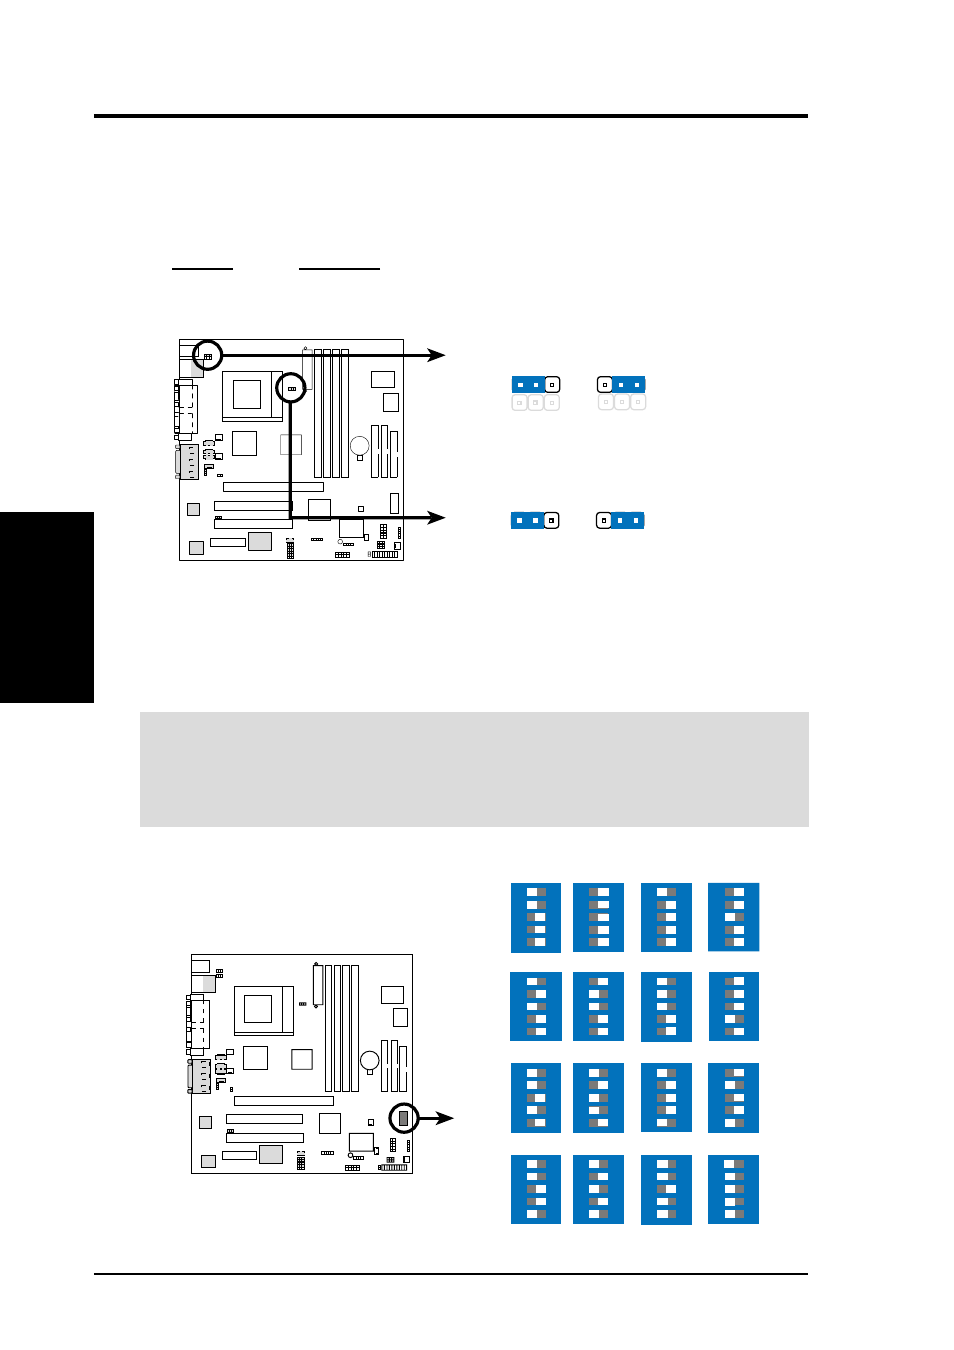
8) MCH/MTH Voltage Selection (JP1 / JP3)
These jumpers allow you to select the voltage supplied to the MCH/MTH. The
default setting of Normal should be used unless processor overclocking requires
a higher voltage (Test).
Setting
JP1 / JP3
Normal
[1-2] (default)
Test
[2-3]
CUC2000-M
CUC2000-M MCH/MTH Voltage Selection
Test
Normal
(Default)
JP1
(for MCH)
1 2
2 3
Test
Normal
(Default)
JP3
(for MTH)
1 2
2 3
9) CPU External Frequency Setting (SW1)
This option tells the clock generator what frequency to send to the CPU and the
PCI bus. This allows the selection of the CPU’s External frequency.
IMPORTANT:
1. In JumperFree mode, all dip switches must be set to OFF.
2. When JumperFree mode is enabled, use BIOS setup in place of these switches
(see CPU Speed in 4.4 Advanced Menu).
NOTE: Only selected switches are illustrated. For a complete frequency listing,
see next page.
CUC2000-M
CUC2000-M CPU External
Clock (BUS) Frequency
Selection
SW1
CPU
→
CPU
→
CPU
→
CPU
→
(JumperFree Mode)
120MHz
ON
12345
125MHz
ON
12345
133MHz
ON
12345
138MHz
ON
12345
142MHz
ON
12345
150MHz
ON
12345
168MHz
ON
12345
180MHz
ON
12345
107MHz
ON
12345
105MHz
ON
12345
103MHz
ON
12345
100MHz
ON
12345
116MHz
ON
12345
114MHz
ON
12345
112MHz
ON
12345
109MHz
ON
12345