Control panel layout – HP LaserJet Pro 100 color MFP M175nw User Manual
Page 20
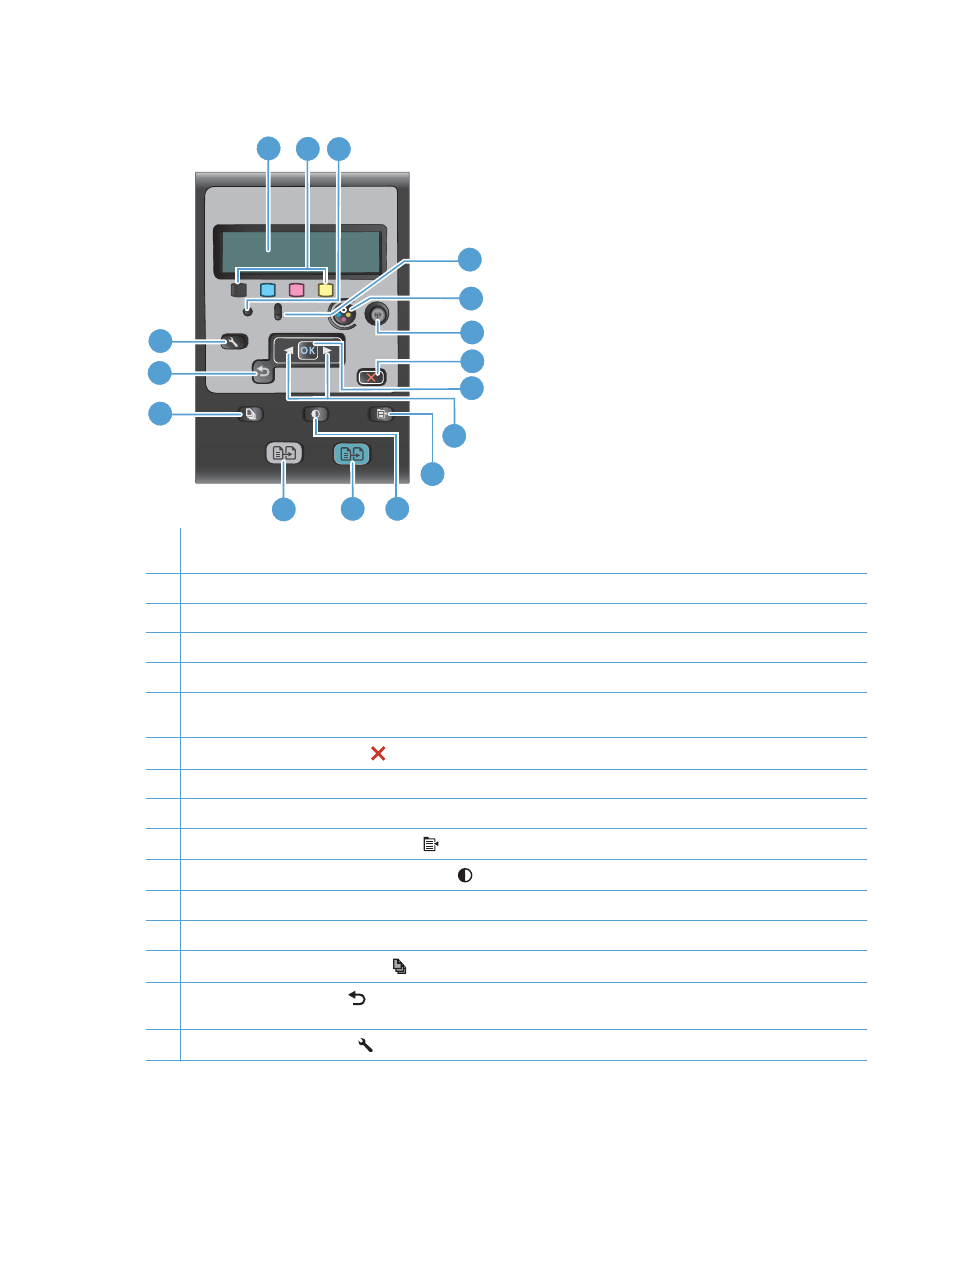
Control panel layout
1
3
11
10
8
9
7
6
5
4
16
15
14
13
12
2
1
Control panel display: The display provides information about the product. Use the menus on the display to establish
product settings.
2
Toner level gauges. These gauges indicate the estimated amount of toner left in each cartridge.
3
Ready light. This light indicates that the product is ready or is processing a job.
4
Attention light. This light indicates a problem with the product. View the display for a message.
5
Cartridge button. When the print cartridge door is closed, press this button to rotate the print cartridge carousel.
6
Wireless button (network models only). Press the button to open the Wireless Menu. Press and hold the button to
enable Wi-Fi Protected Setup (WPS) . The light indicates the state of the wireless connection.
7
Cancel button. Use the Cancel
button to cancel the current job.
8
OK button. Use the
OK
button to acknowledge a setting or to confirm an action to proceed.
9
Arrow buttons. Use the arrow buttons to navigate the menus and adjust certain settings.
10
Copy Menu button. Use the
Copy Menu
button to open a copy settings menu.
11
Lighter/Darker button. Use the
Lighter/Darker
button to control the brightness or darkness of a copy.
12
Color copy button. Use the Color button to start a color copy job.
13
Black and white copy button. Use the Black button to start a monochrome copy job.
14
# Copies button. Use the
# Copies
button to set the number of copies that you want for the current copy job.
15
Back button. Use the Back
button to return to a previous menu, or to exit the menus and return to the Ready
state.
16
Setup button. Use the Setup
button to open the main menu options.
6
Chapter 1 Product basics
ENWW