Replacing the service door – HP 350 G1 Notebook PC User Manual
Page 55
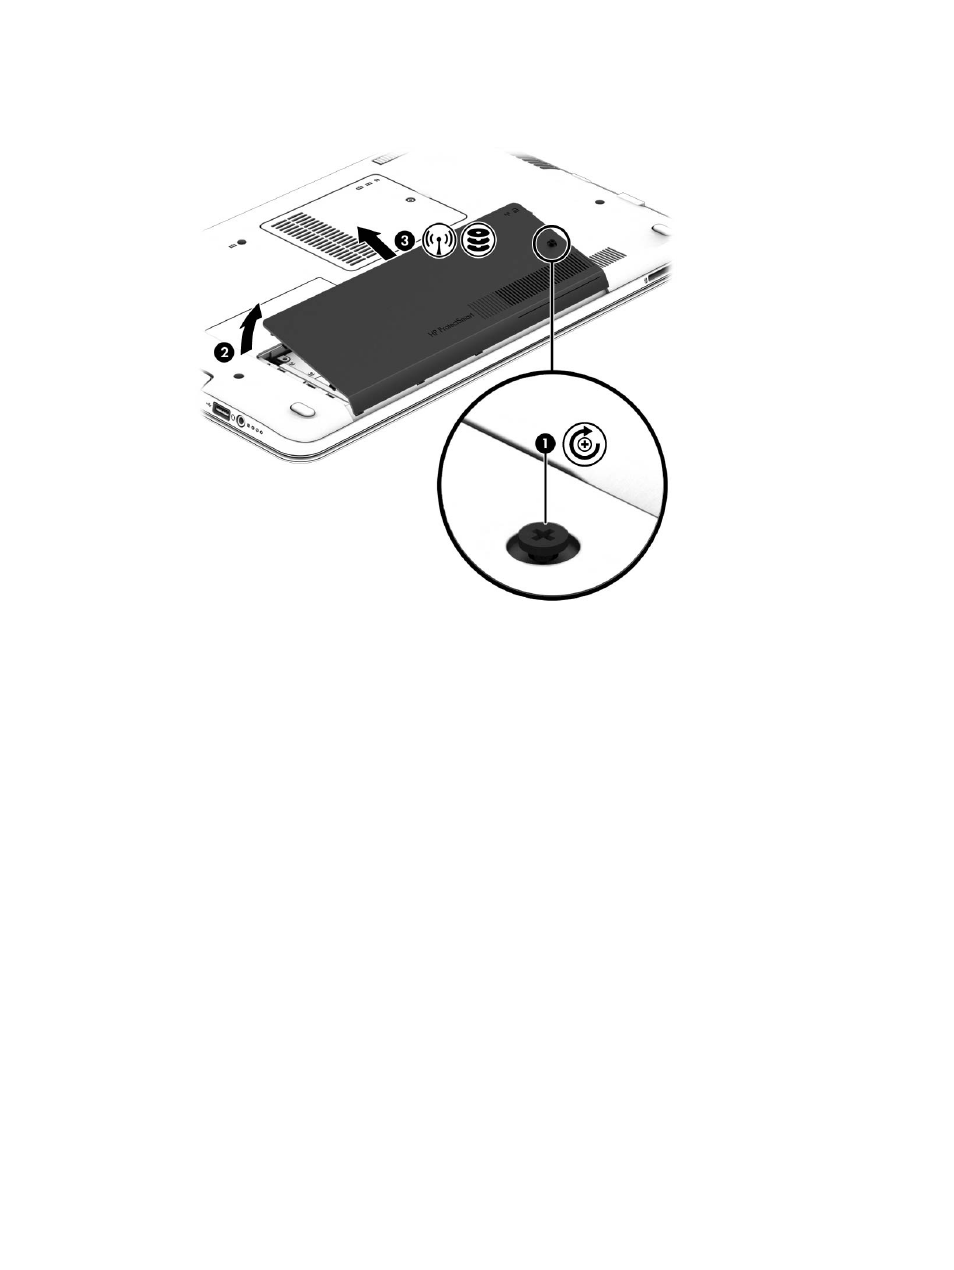
2.
With the battery bay toward you, remove the screw (1), tilt the service door up (2), and then lift
the service door away (3).
Replacing the service door
Replace the service door after accessing the memory module slot, hard drive, regulatory label, and
other components.
1.
Tilt down the service door to align the front edge of the service door near the front edge of the
computer (1).
2.
Insert the alignment tabs (2) on the rear edge of the service door with the notches on the
computer, and tilt down and into place.
Using hard drives 45
See also other documents in the category HP Notebooks:
- EliteBook 8440p (169 pages)
- XZ100 (104 pages)
- ZT1100 (58 pages)
- 110 (104 pages)
- ze2000 (213 pages)
- OmniBook 2000 Notebook PC (70 pages)
- XE3 (116 pages)
- 1103 (101 pages)
- ze4200 (126 pages)
- TC1 100 (17 pages)
- 15 (101 pages)
- XB4000 (43 pages)
- ze2300 (239 pages)
- Laptop Docking Station (70 pages)
- VXI E1432A (222 pages)
- V6115TU (22 pages)
- 210 (67 pages)
- zt3000 (186 pages)
- XB3000 (79 pages)
- xe310 (12 pages)
- COMPAQ TC4400 (219 pages)
- 367055-002 (26 pages)
- Compaq Tablet PC TC1 100 (23 pages)
- 463777-001 (42 pages)
- zx5000 (272 pages)
- VC133 (38 pages)
- USB Media Docking Station VY847AA#ABA (1 page)
- ze4100 (5 pages)
- 2000 (118 pages)
- ZE4900 (182 pages)
- V4200 (273 pages)
- Compaq Tablet PC TC1100HP (22 pages)
- EliteBook 6930p Notebook PC (35 pages)
- Chromebook 11 G2 (23 pages)
- EliteBook Folio 9470M-Notebook-PC (33 pages)
- EliteBook 2570p Notebook PC (107 pages)
- EliteBook 2570p Notebook PC (106 pages)
- ProBook 6470b Notebook-PC (113 pages)
- ProBook 6470b Notebook-PC (126 pages)
- EliteBook 2540p Notebook PC (175 pages)
- EliteBook 2540p Notebook PC (173 pages)
- EliteBook 2540p Notebook PC (177 pages)
- EliteBook 2540p Notebook PC (23 pages)
- ProBook 6460B Notebook-PC (45 pages)
- mt41 Mobile Thin Client (90 pages)