The photosmart at a glance – HP Photosmart A646 Compact Photo Printer User Manual
Page 10
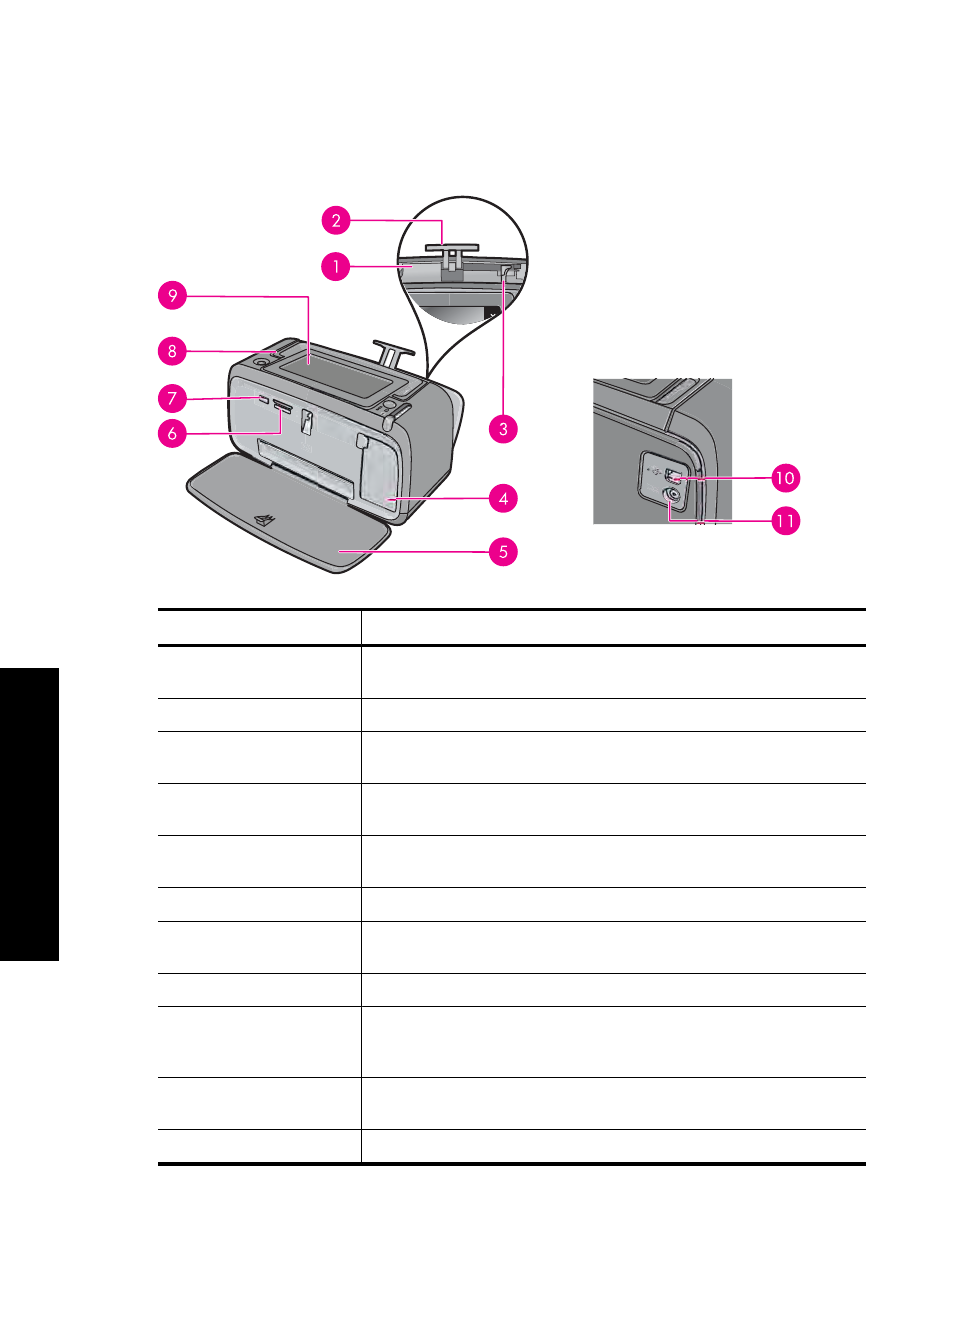
The Photosmart at a glance
Figure 2-1 Front and rear views
Label
Description
1
Input tray: Load paper here. Open the output tray first. The input tray
opens automatically when you open the output tray.
2
Input tray extension: Pull out to support paper.
3
Paper-width guide: Move to the width of the current paper to position
the paper properly.
4
Print cartridge door: Open to insert or remove the HP 110 Tri-color
Inkjet print cartridge.
5
Output tray (open): The printer deposits prints here. The input tray
opens automatically when you open the output tray.
6
Memory card slots: Insert memory cards here.
7
Camera port: Connect a PictBridge digital camera or a USB flash/
thumb drive here.
8
Handle: Extend to carry the printer.
9
Printer screen: Lift up to adjust the viewing angle. You can preview
photos, make selections from the printer menu, and more from this
screen.
10
USB port: Connect the printer to a computer using a USB cable
(purchased separately) here.
11
Power cord connection: Connect the power cord here.
Chapter 2
8
Get started
Ge
t st
a
rte
d