Interpret the print quality page – HP LaserJet Pro CP1025nw Color Printer User Manual
Page 137
Interpret the Print Quality Page
1.
Make sure that the product is idle and the Ready light is on.
2.
Load paper in the input tray.
3.
In the Windows system tray, right-click the Device Settings icon and then click the product
name.
4.
Click the Device Settings button.
5.
Click the Print PQ Troubleshooting Page button.
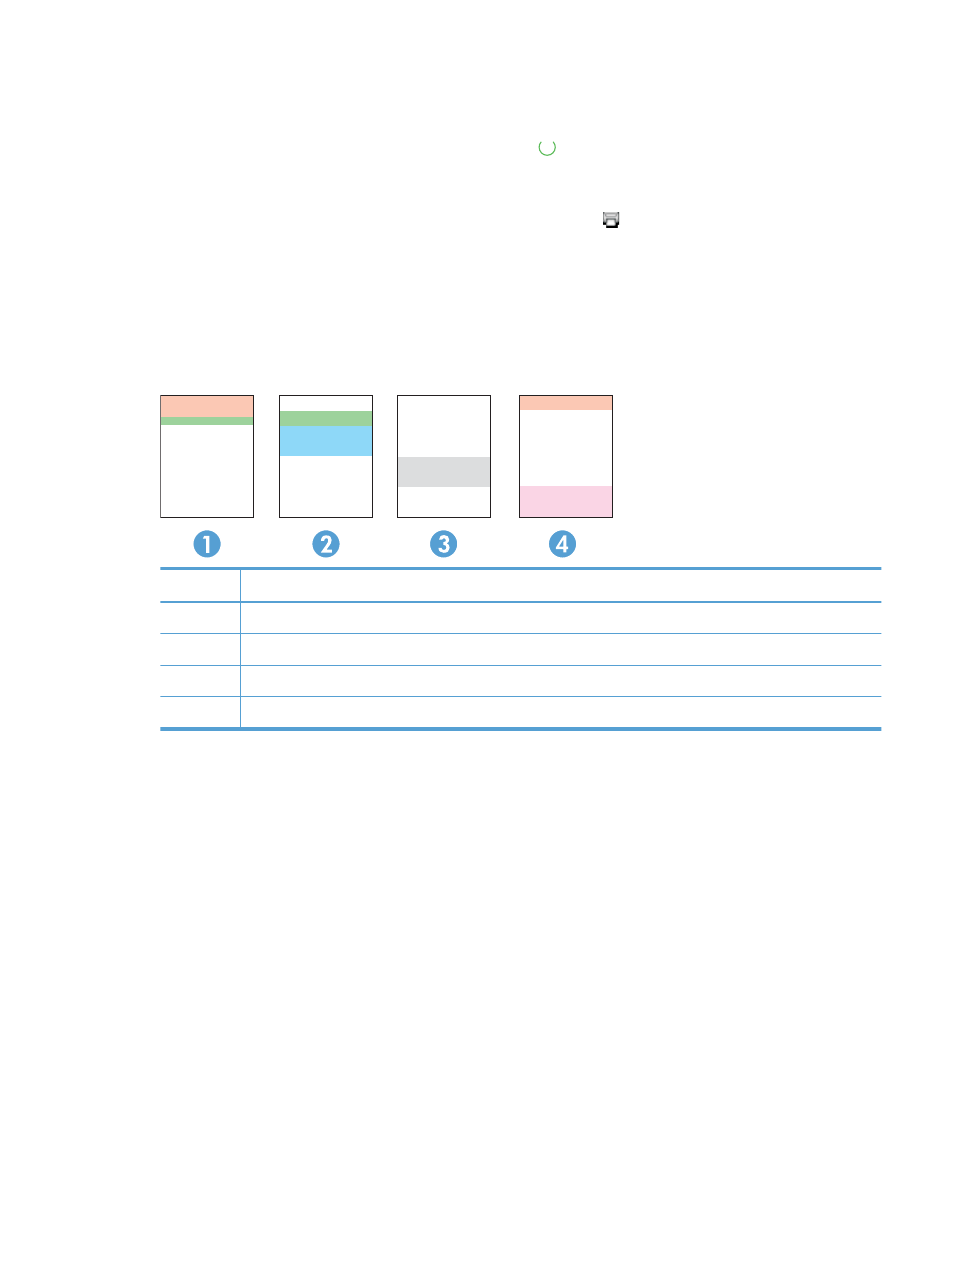
This page contains five bands of color, which are divided into four groups as indicated in the following
illustration. By examining each group, you can isolate the problem to a particular print cartridge.
Section
Print-cartridge
1
Yellow
2
Cyan
3
Black
4
Magenta
●
If dots or streaks appear in only one of the groups, replace the print cartridge that correlates with
that group.
●
If dots appear in more than one group, print a cleaning page. If this does not solve the problem,
determine if the dots are always the same color; for example, if magenta dots appear in all five
color bands. If the dots are all the same color, replace that print cartridge.
●
If streaks appear in multiple color bands, print a supplies status page to determine if the imaging
drum has reached its estimated end of life. If imaging drum has not reached its estimated end of
life, inspect the imaging drum for damage. If the imaging drum is not damaged, contact HP.
ENWW
Improve print quality
125