Clear jams, Jam locations, Auto-navigation for clearing jams – HP Color LaserJet Enterprise M651 Printer series User Manual
Page 83: Experiencing frequent or recurring paper jams
Clear jams
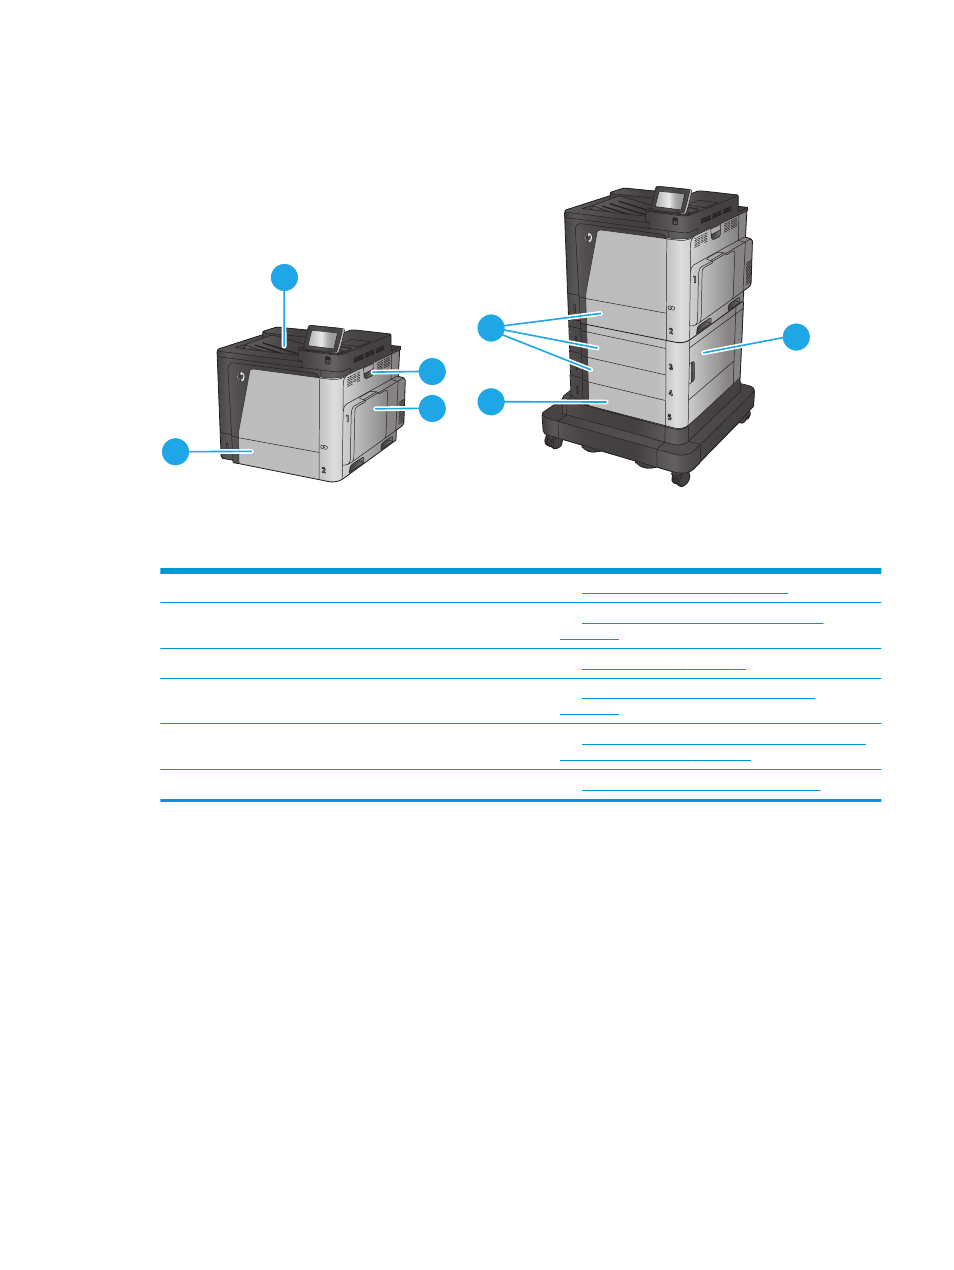
Jam locations
M651xh
M651n
M651dn
1
2
6
3
4
4
5
1
Output bin
See
Clear jams in the output bin on page 92
.
2
Right door and fuser area
See
Clear jams in the right door and the fuser area
3
Tray 1
See
Clear jams in Tray 1 on page 77
.
4
Tray 2 and the 500-sheet trays
See
Clear jams in Tray 2 and the 500-sheet trays
5
1,500-sheet high-capacity input tray
See
Clear jams in the 1,500-sheet high-capacity input tray
and the lower-right door on page 84
.
6
Lower-right door
Clear jams in the lower-right door on page 88
Auto-navigation for clearing jams
The auto-navigation feature assists you in clearing jams by providing step-by-step instructions on the
control panel. When you complete a step, the product displays instructions for the next step until you have
completed all steps in the procedure.
Experiencing frequent or recurring paper jams?
To reduce the number of paper jams, try these solutions.
1.
Use only paper that meets HP specifications for this product.
2.
Use paper that is not wrinkled, folded, or damaged. If necessary, use paper from a different package.
3.
Use paper that has not previously been printed or copied on.
ENWW
Clear jams
75