Customizing dpi profiles, Selecting a dpi profile – HP Laser Gaming Mouse User Manual
Page 5
HP Laser Gaming Mouse
3
Customizing DPI Profiles
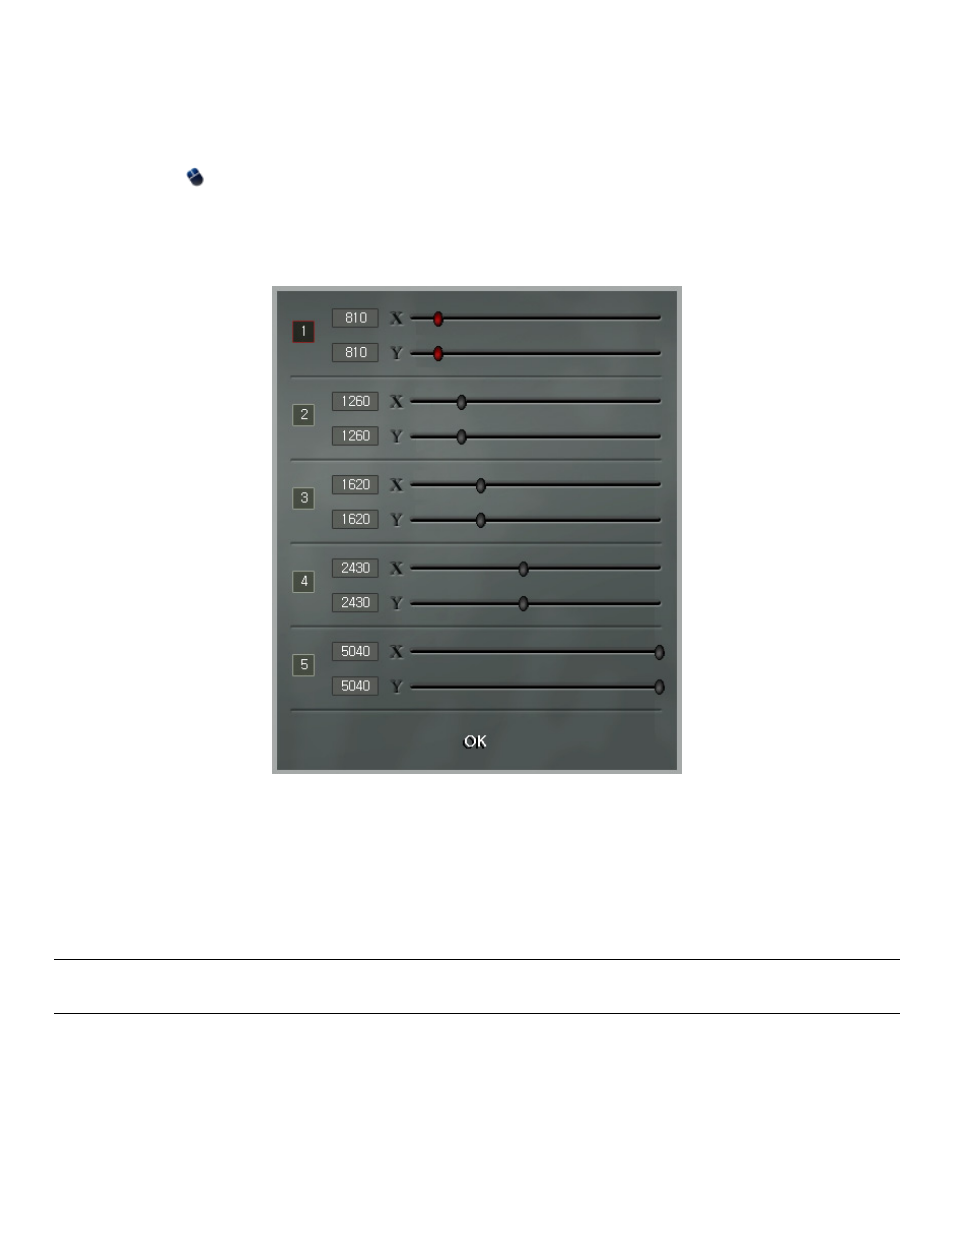
You can customize and save the settings for each of the five DPI profiles. When you select a user profile, the corresponding
DPI profile also becomes active. For example, when you select user profile 3, DPI profile 3 becomes active.
1 Double-click the
icon in the Windows System Tray to open the gaming mouse control panel.
2 Click the DPI button.
3 Drag the sliders to set the value of the X-axis and the Y-axis for the profiles you want to change.
4 Click OK.
Selecting a DPI Profile
You can choose a DPI profile without affecting the other user profile settings. The default values for these profiles are: 810,
1260, 1620, 2430, and 5040 DPI.
1 Press button 8 (DPI switch, located behind the scroll wheel) to switch to the next DPI profile.
2 Keep pressing the DPI button until you find the desired DPI profile.
NOTE: The LED behind button 8 indicates which DPI profile is currently selected. When you reach the last DPI profile, the
next click circles back around to the first DPI profile.