Using the base, Base leds, Charging the batteries – HP RP7 Retail System Model 7100 User Manual
Page 19
Using the Base
Base LEDs
LEDs on the Base provide information about the Base as well as battery charging status, as shown
below.
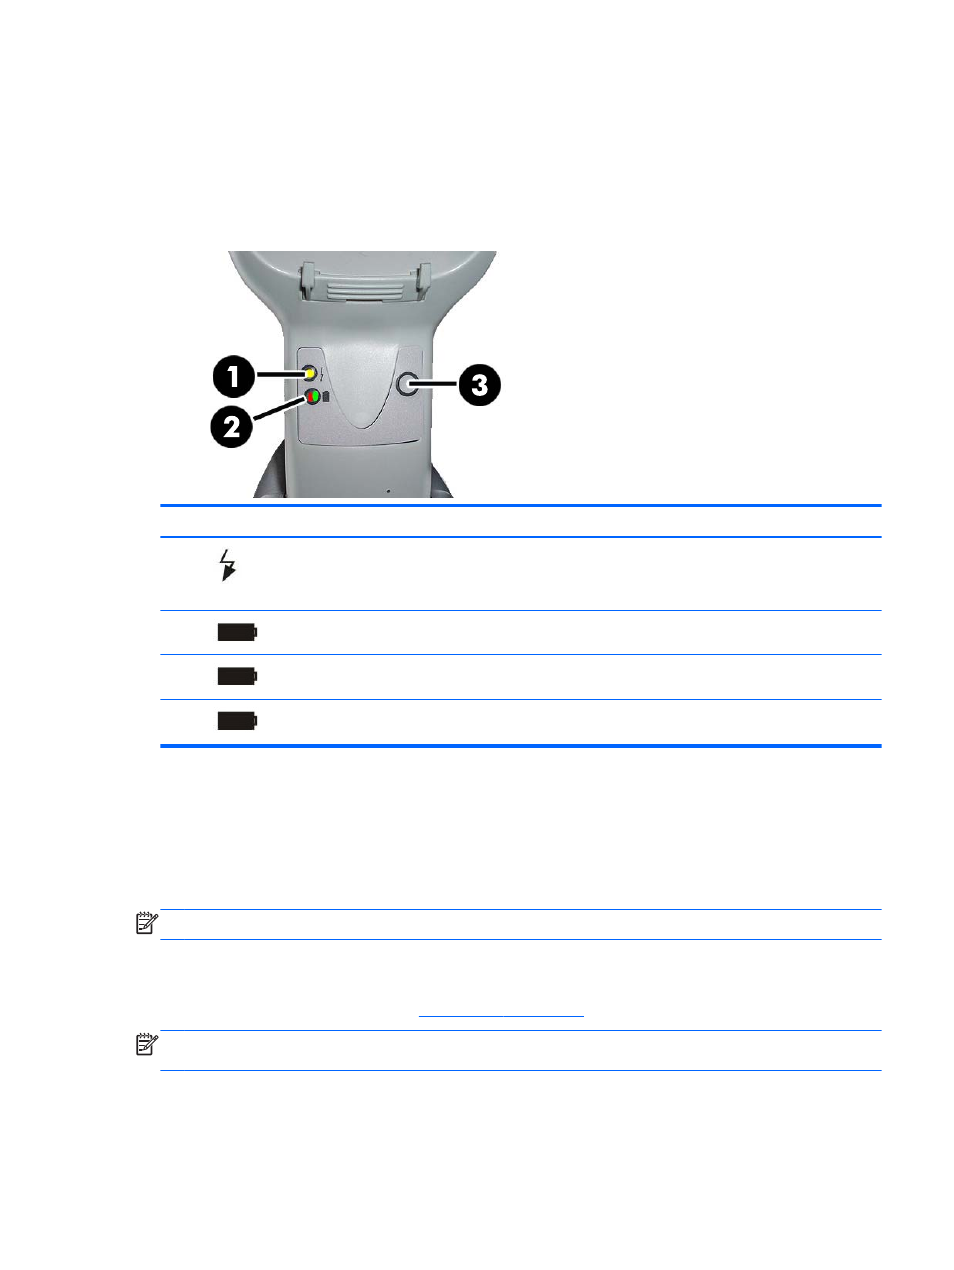
Figure 4-7
Base LEDs
No.
Icon
LED
STATUS
1
Power on / Data
Yellow On = Base is powered.
Yellow Blinking = Base receives data and commands from the Host or
the Reader.
2
Charging
Red On = the Battery is charging.
2
Charge completed
Green On = the Battery is completely charged.
2
Charging + Charge
completed
Red and Green Blinking together = the Reader is not correctly placed
onto the Base.
The button (3) can be used to force device connection via the HP Scanner Configuration Software
tool, to force a Bluetooth disconnect, and for paging the scanner when it is activated. Refer to the HP
Wireless Barcode Scanner Programming Reference Guide (PRG) for a more detailed explanation.
Charging the Batteries
NOTE:
Battery replacement should be done only by a trained technician.
To charge the battery, simply insert the scanner into the base. When the scanner is fully seated in the
cradle, it will sound a “chirp” to indicate that the cradle has detected the scanner connection.
The LEDs on the base (as shown in
) will indicate the status of the battery.
NOTE:
Before using the Battery, read “Battery Safety” in the following section. HP recommends
annual replacement of rechargeable battery packs to ensure maximum performance.
Charging the Batteries
13